Have you ever heard of deactivating your email address as a login method? In nearly every WordPress security tutorial, a WordPress expert will emphasize the danger of signing in using an email address. You can only use your username if you've applied. Your WordPress website's email address may need to be changed at some time.
When you're locked out of the site or it's down, you'll need to get into the database because that's where your login credentials and profile data are stored. Because you can't access a database through FTP, the only option is to utilize cPanel. In this article, you'll learn how to change the WordPress admin email address quickly and easily.
A Step-by-Step Guide to Changing Your WordPress Profile's Email Address
WordPress, as you may know, uses a MySQL database. There's no reason to be concerned. You might be wondering if you need any coding knowledge. WordPress, on the other hand, is a user-friendly platform. Follow the procedures, and your email address will be updated in a matter of minutes.
Step 1: Log in to the cPanel account that your web hosting company has set up for you. cPanel is available from almost every web hosting business.
Step 2: Look for the database area, and then click on the phpMyAdmin icon from there. Depending on your site hosting, the design may differ.

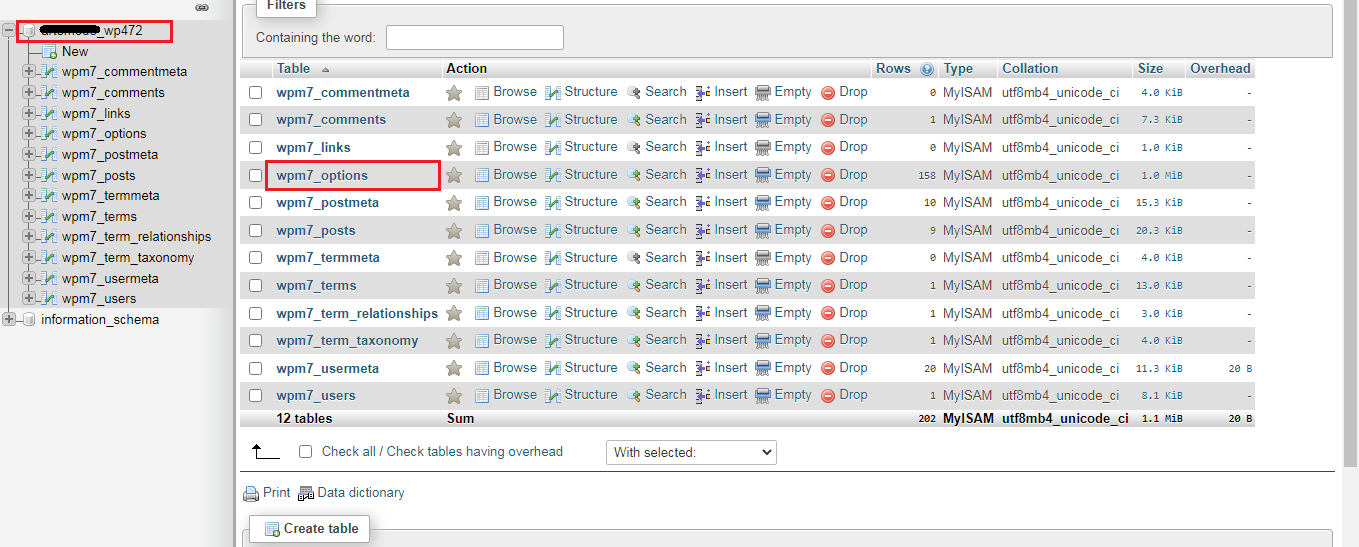
Step 3: In your browser, a new tab comes up with the phpMyAdmin interface. You must choose the database name from the left-hand sidebar. You may also see all databases by going to the Databases tab in the main menu. To open, simply click the button.
Step 4: A selection of database tables appears, from which you must select wp_options table.
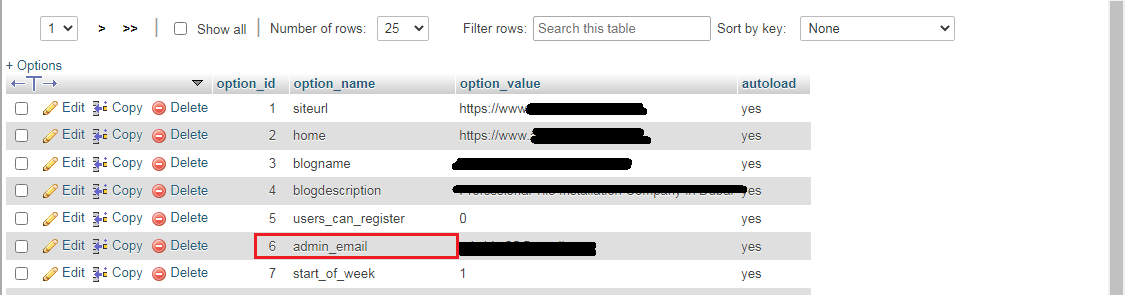
Step 5: Look for "admin email" under "option name" on this new page. In the "option value" column of that specific row, you may see your current admin email address. On the left-hand side, click the Edit button.
Step 6: As you might have guessed, you'll need to alter the option value. On this screen, there is a large white box that displays your current email address.
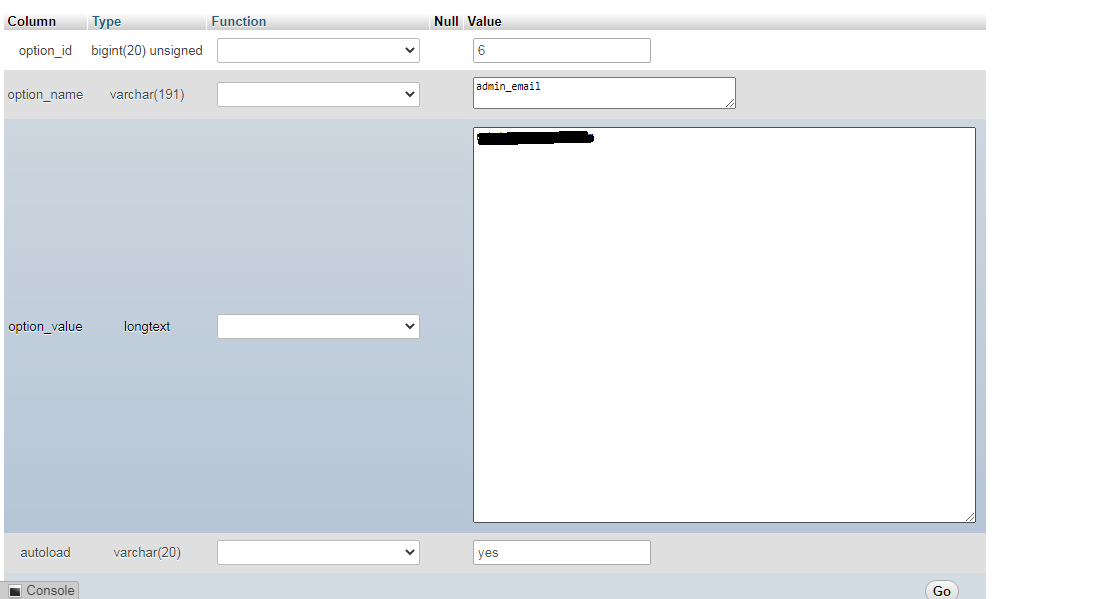
Step 7: To store your new email address, type it in and click the Go button. Congratulate yourself for successfully changing the WordPress admin email address.
Step 8: You can try logging in if you haven't deactivated your login through your email address. You may also look at your profile in your WordPress admin section.
Note: You may need to utilize cPanel sometimes since you may be unable to access your wp-admin panel due to a minor issue.
Hoping that changing the email address isn't too difficult. People think of avoiding cPanel due to its complexity now and then, but they don't know how important it is until something bad happens. You may be aware that the majority of WordPress users are non-technical and rely on others. Learning the fundamentals of cPanel and WordPress directories is usually a good idea.
Conclusion
The most crucial aspect of the entire procedure is knowing the database name. You may become perplexed if you manage several websites. Before you begin, you must first determine the database name; altering it is not difficult.
When you're locked out of the site or it's down, you'll need to get into the database because that's where your login credentials and profile data are stored. Because you can't access a database through FTP, the only option is to utilize cPanel. In this article, you'll learn how to change the WordPress admin email address quickly and easily.
A Step-by-Step Guide to Changing Your WordPress Profile's Email Address
WordPress, as you may know, uses a MySQL database. There's no reason to be concerned. You might be wondering if you need any coding knowledge. WordPress, on the other hand, is a user-friendly platform. Follow the procedures, and your email address will be updated in a matter of minutes.
Step 1: Log in to the cPanel account that your web hosting company has set up for you. cPanel is available from almost every web hosting business.
Step 2: Look for the database area, and then click on the phpMyAdmin icon from there. Depending on your site hosting, the design may differ.
Step 3: In your browser, a new tab comes up with the phpMyAdmin interface. You must choose the database name from the left-hand sidebar. You may also see all databases by going to the Databases tab in the main menu. To open, simply click the button.
Step 4: A selection of database tables appears, from which you must select wp_options table.
Step 5: Look for "admin email" under "option name" on this new page. In the "option value" column of that specific row, you may see your current admin email address. On the left-hand side, click the Edit button.
Step 6: As you might have guessed, you'll need to alter the option value. On this screen, there is a large white box that displays your current email address.
Step 7: To store your new email address, type it in and click the Go button. Congratulate yourself for successfully changing the WordPress admin email address.
Step 8: You can try logging in if you haven't deactivated your login through your email address. You may also look at your profile in your WordPress admin section.
Note: You may need to utilize cPanel sometimes since you may be unable to access your wp-admin panel due to a minor issue.
Hoping that changing the email address isn't too difficult. People think of avoiding cPanel due to its complexity now and then, but they don't know how important it is until something bad happens. You may be aware that the majority of WordPress users are non-technical and rely on others. Learning the fundamentals of cPanel and WordPress directories is usually a good idea.
Conclusion
The most crucial aspect of the entire procedure is knowing the database name. You may become perplexed if you manage several websites. Before you begin, you must first determine the database name; altering it is not difficult.