Steps to enable Greylisting in WHM
Administrator of the dedicated server use tools for streaming a large amount of spam. Greylisting is a tool available in WHM and it stops getting spam and incoming emails that are not needed. This tool rejects the mails temporarily from a particular user in the first attempt. Spam emails that are failed in the first attempt are not delivered again. Legitimate emails attempt the re-delivery after some time. This attempt helps to filter the legitimate email that is from spam. Greylisting is not enabled by default. Legitimate emails are sent after analyzing triplets. Triplets contain the sender’s address, IP address, and recipient’s address. After checking all these triplets, Greylisting filters the spam emails and lets only the legitimate emails to pass through. After sufficient time, the server will accept the legitimate email.
Following steps are used to Enable Greylisting in WHM.
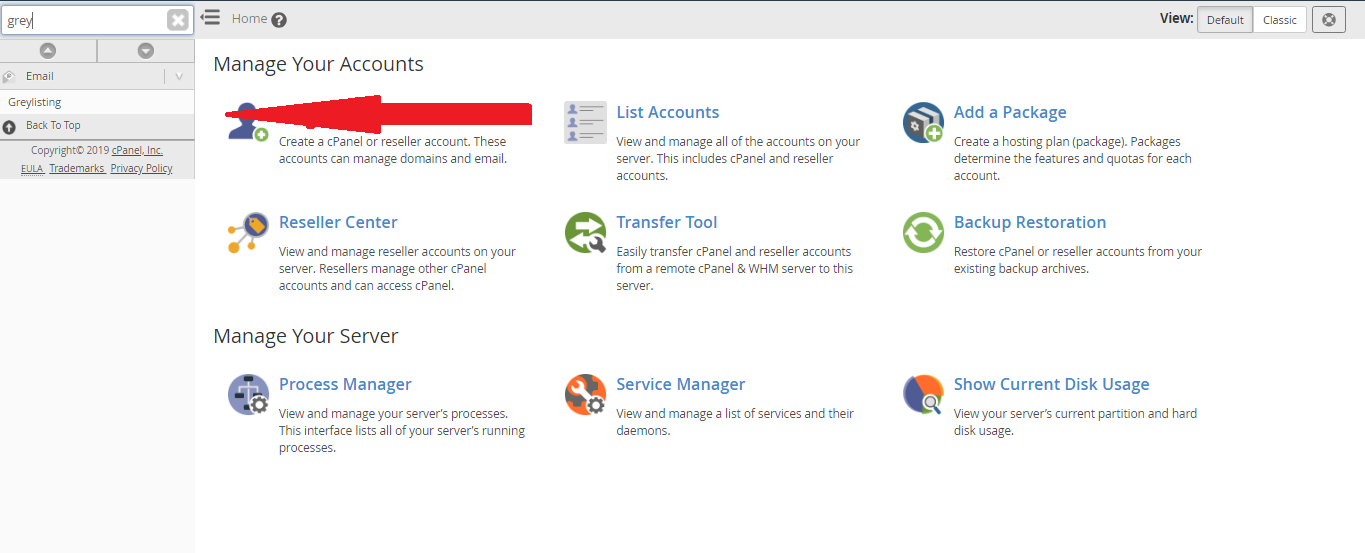
Step 1 – Login WHM with the username and password.
Step 2 – In the Email tab of WHM select Greylisting option.
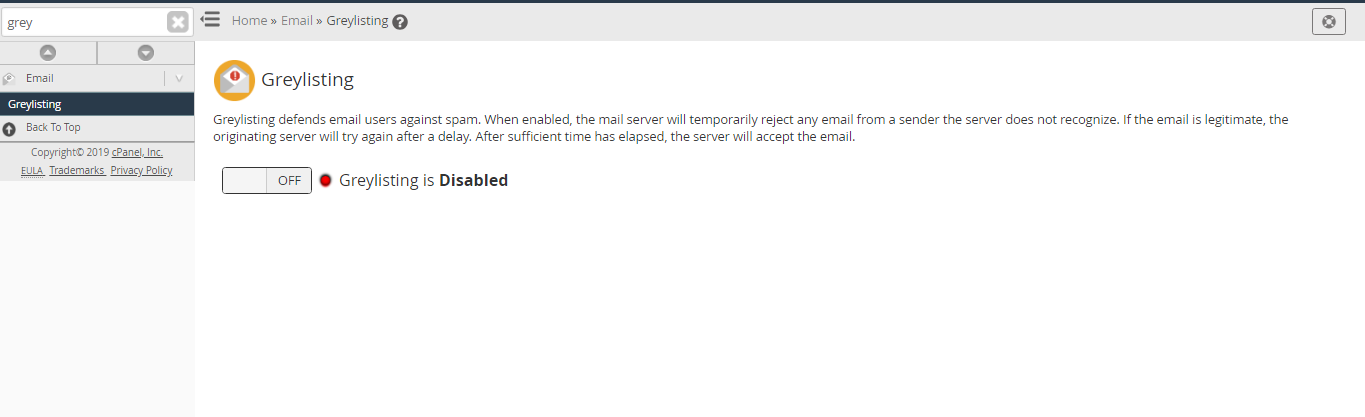
Step 3 – Click OFF button to activate Greylisting.
Step 4 – You can see Configuration Settings, Common Mail, Trusted Hosts and Reports.
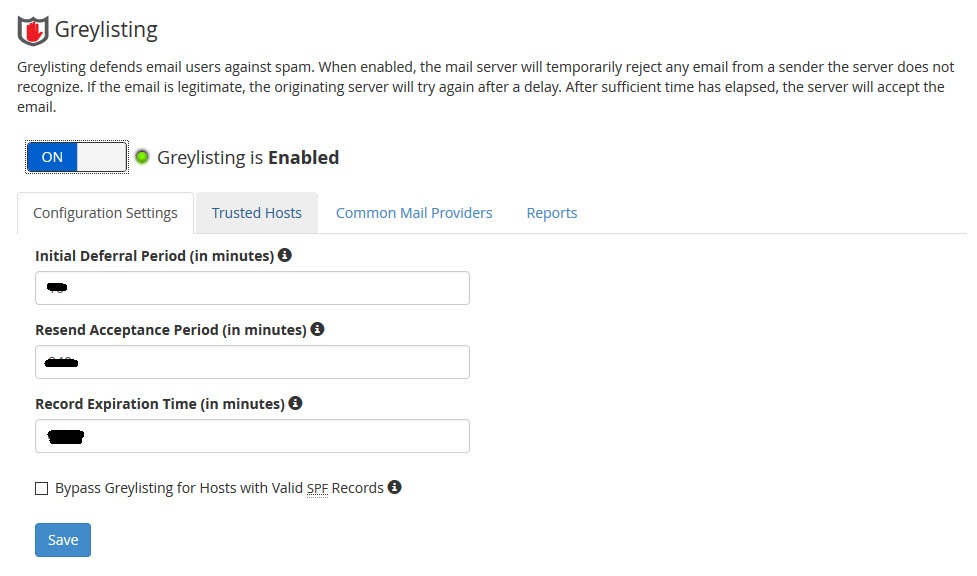
Step 5 – Click Configuration Setting option. You can set your own values or use default settings. Times are specified in minutes. “i” in each setting is for more information.
Initial Deferral Period (in minutes) – The total number of minutes in which the Greylisting defers the email received from an unknown triplet since the server receives the first email from the IP address from the unknown user.
Resend Acceptance Period (in minutes) – The total number of minutes in which the Greylisting gets an email sent again by the sender since the IP address of the unknown user receives the first email.
Record Expiration Time (in minutes) – The total number of minutes before the Greylisting removes the triplet record of the mail sent. The mail resent is treated as it is from a new user, unknown triplet since the server receives the first email from the IP address from the unknown user.
Bypass Greylisting For Hosts With Valid SPF Records – If you click this checkbox, you are allowed to Bypass Greylisting for SPF records that are valid.
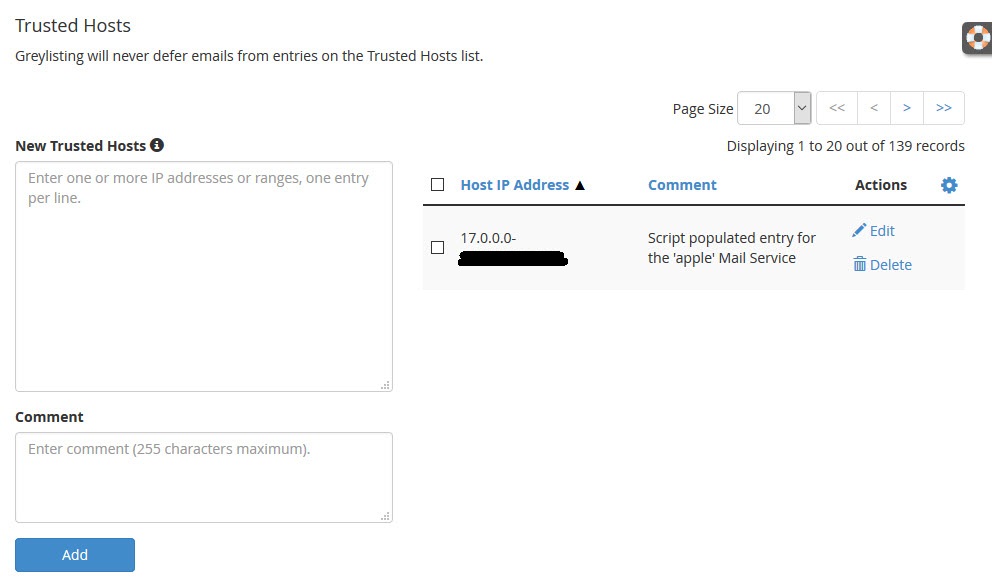
Step 6 – Click Trusted Host setting. Here you are allowed to define host from which you receive email and do not want to affect the Greylisting. Click New Trusted Host and enter the IP range or address. You can also give comments for each entry. After giving the entries click Add button.
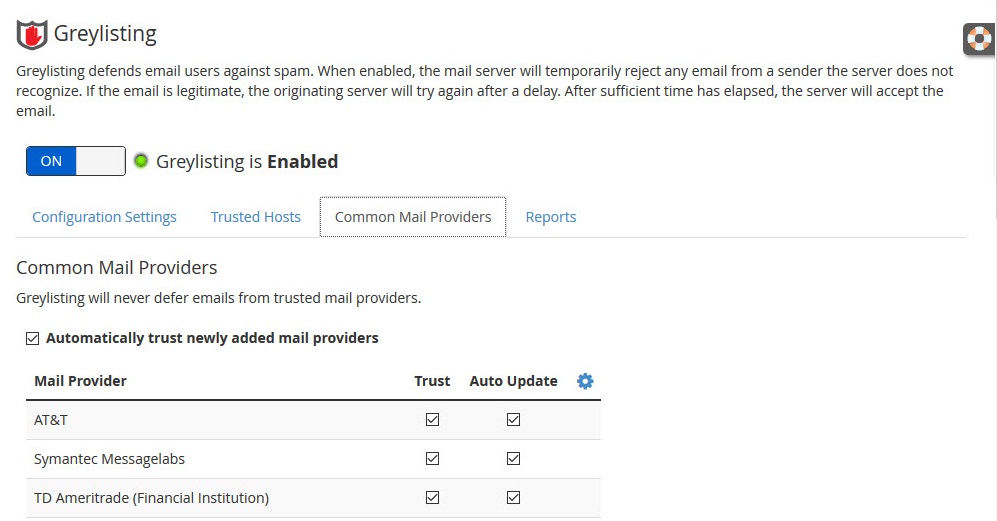
Step 7 – Click Common Mail Provider. This has a list of email providers such as Google, AOI, Yahoo, Hotmail, and Outlook. When this list is updated, WHM gives an option to add trusted common mail provider automatically. All mail providers are trusted and automatically updated. If you have any issue with the mail provider, you allowed unchecking the box. After finishing, you can save your changes by clicking the save button.
Step 8 – Click Reports. This shows all the reports that are regarded as Greylisting. This has the emails delayed as defined by the IP address of the sender. If you are searching for a particular email, you can use Filter option.
Administrator of the dedicated server use tools for streaming a large amount of spam. Greylisting is a tool available in WHM and it stops getting spam and incoming emails that are not needed. This tool rejects the mails temporarily from a particular user in the first attempt. Spam emails that are failed in the first attempt are not delivered again. Legitimate emails attempt the re-delivery after some time. This attempt helps to filter the legitimate email that is from spam. Greylisting is not enabled by default. Legitimate emails are sent after analyzing triplets. Triplets contain the sender’s address, IP address, and recipient’s address. After checking all these triplets, Greylisting filters the spam emails and lets only the legitimate emails to pass through. After sufficient time, the server will accept the legitimate email.
Following steps are used to Enable Greylisting in WHM.
Step 1 – Login WHM with the username and password.
Step 2 – In the Email tab of WHM select Greylisting option.
Step 3 – Click OFF button to activate Greylisting.
Step 4 – You can see Configuration Settings, Common Mail, Trusted Hosts and Reports.
Step 5 – Click Configuration Setting option. You can set your own values or use default settings. Times are specified in minutes. “i” in each setting is for more information.
Initial Deferral Period (in minutes) – The total number of minutes in which the Greylisting defers the email received from an unknown triplet since the server receives the first email from the IP address from the unknown user.
Resend Acceptance Period (in minutes) – The total number of minutes in which the Greylisting gets an email sent again by the sender since the IP address of the unknown user receives the first email.
Record Expiration Time (in minutes) – The total number of minutes before the Greylisting removes the triplet record of the mail sent. The mail resent is treated as it is from a new user, unknown triplet since the server receives the first email from the IP address from the unknown user.
Bypass Greylisting For Hosts With Valid SPF Records – If you click this checkbox, you are allowed to Bypass Greylisting for SPF records that are valid.
Step 6 – Click Trusted Host setting. Here you are allowed to define host from which you receive email and do not want to affect the Greylisting. Click New Trusted Host and enter the IP range or address. You can also give comments for each entry. After giving the entries click Add button.
Step 7 – Click Common Mail Provider. This has a list of email providers such as Google, AOI, Yahoo, Hotmail, and Outlook. When this list is updated, WHM gives an option to add trusted common mail provider automatically. All mail providers are trusted and automatically updated. If you have any issue with the mail provider, you allowed unchecking the box. After finishing, you can save your changes by clicking the save button.
Step 8 – Click Reports. This shows all the reports that are regarded as Greylisting. This has the emails delayed as defined by the IP address of the sender. If you are searching for a particular email, you can use Filter option.