Steps to enable File and Directory restoration in cPanel server/WHM
In cPanel version 68, there is an option called file restoration. Moreover, if you delete the file consciously or unconsciously there is a secondary option to retrieve your deleted files in version 68 of cPanel or WHM. Only, a technical person knows the importance of directory when compiling a website. In that case, if the directory was deleted then you must have a secondary option to retrieve a directory, isn’t it? Yes, you have an option in a recent version of cPanel or WHM where it comes with both file and directory restoration option.
Before a startup, it’s just to configure the WHM backup without fail. Let us see, how to take configure WHM backup:
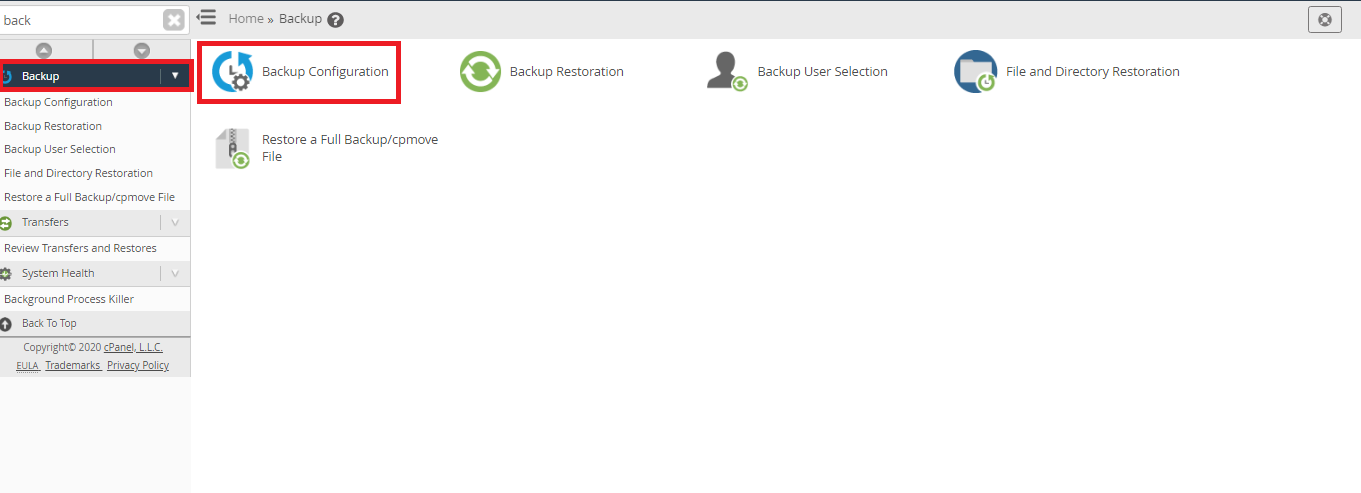
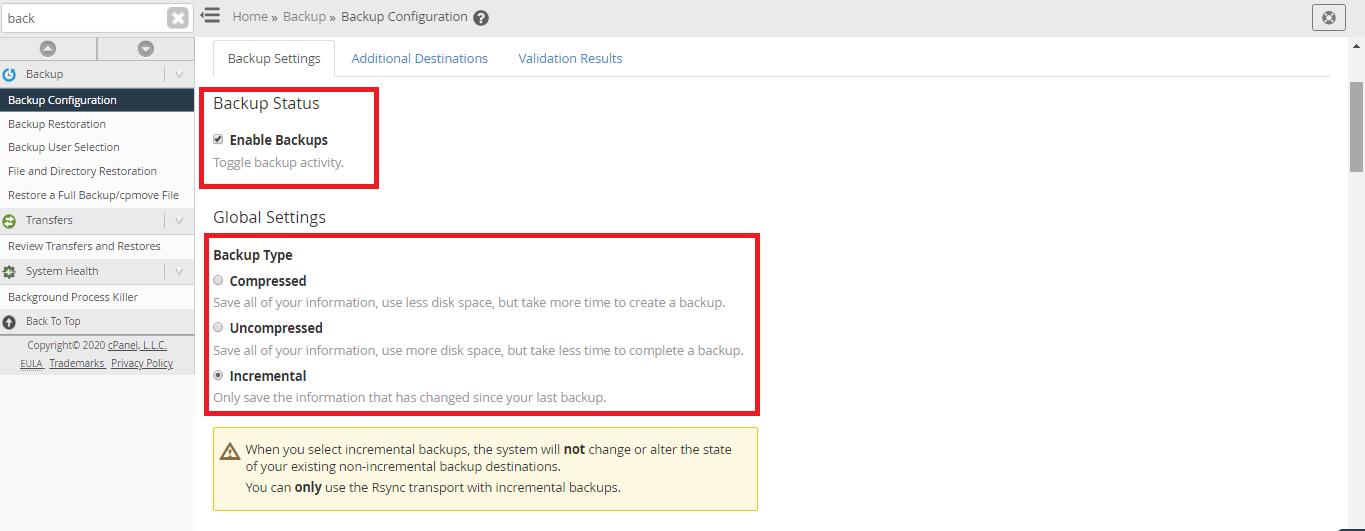
Step 1: In WHM, go to the Backup part and then choose the Backup Configuration. There, you can see the name global settings where you can enable or disable the backup.
Step 2: Below to global settings, 3 choices of backup type can be viewed such as compressed, uncompressed, and incremental.
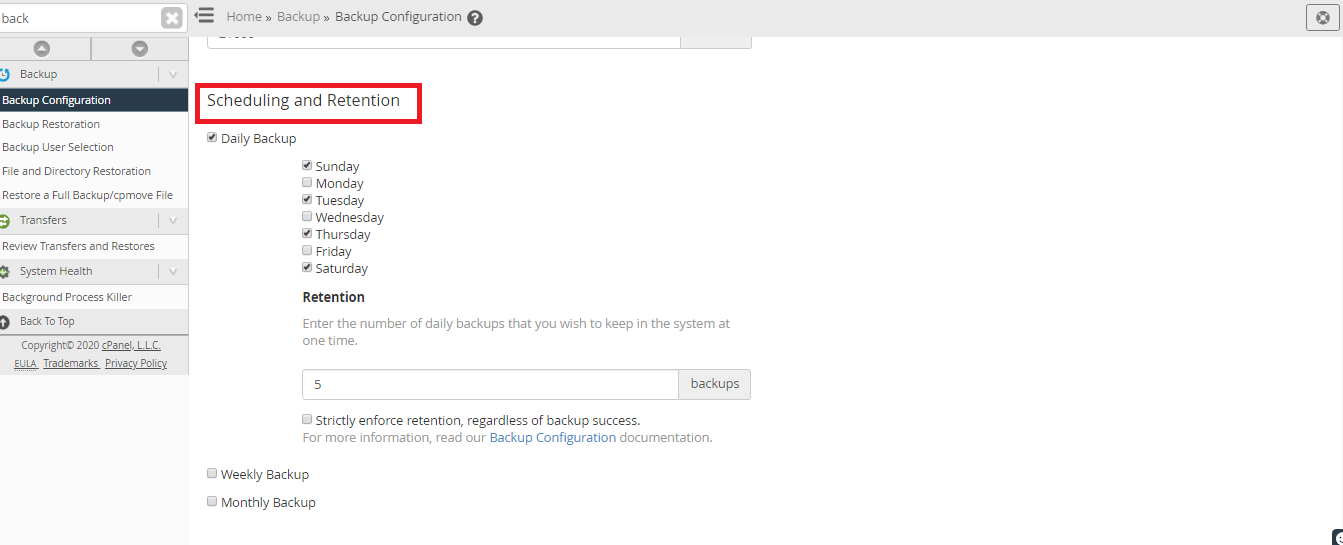
Step 3: In step 3, set up the backups in monthly, weekly, or daily sections. To enable or disable the backups, tap on scheduling, and retention choice. Here, you can also set up how many times a day, week or monthly backup should take.
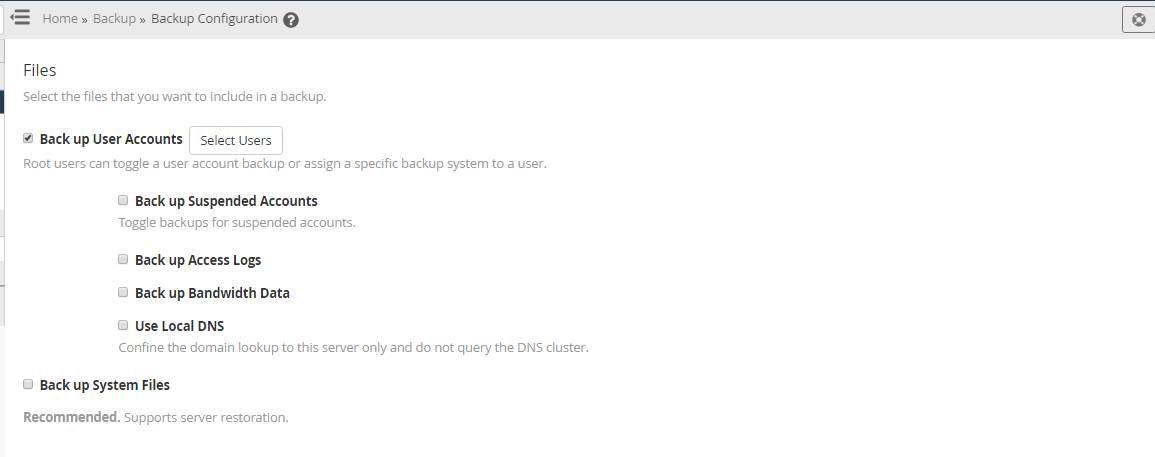
Step 4: Now, you need to select the account for taking backups. Tap on the select user button, it goes to select the backup account. The backup user selection option helps you to restore a file or full account based on the requirement.
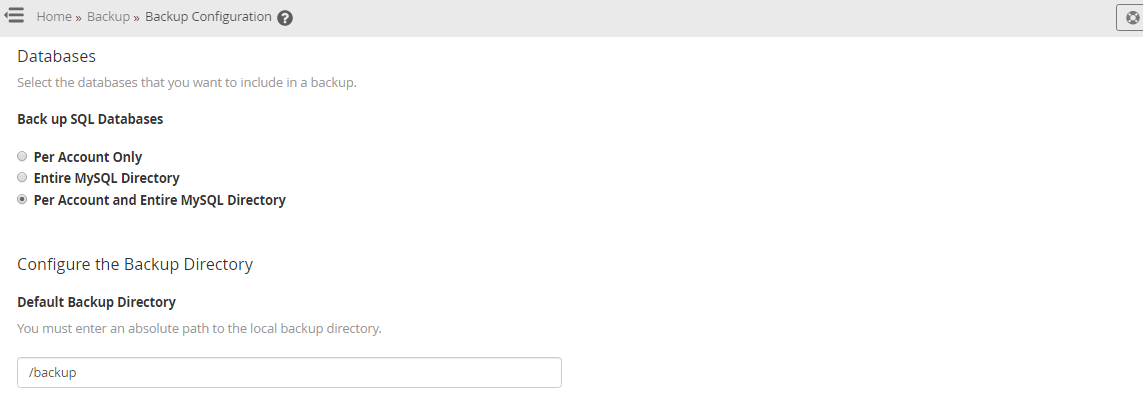
Step 5: Step 5 carries out the selection part of the database where the backup takes place only for one account per user or Entire MySQL Directory. The third choice, you will get both options in one process.
Step 6: Again, it's your wish to choose the backup configuration either external or locally. Select, retain backups in the default backup directory option to get retained backup for local setup.
Step 7: Choose a remote transport method! It would help you in many cases. Finally, just go through all your set up and save the configuration of backup.
Once if you are done with the backup configuration, you are ready to do file and directory restoration analysis since it’s the main topic right?
Step 1: Use credentials to login interface of WHM. Check on the left side, there you have many menus but all you need to choose is “Backup”.
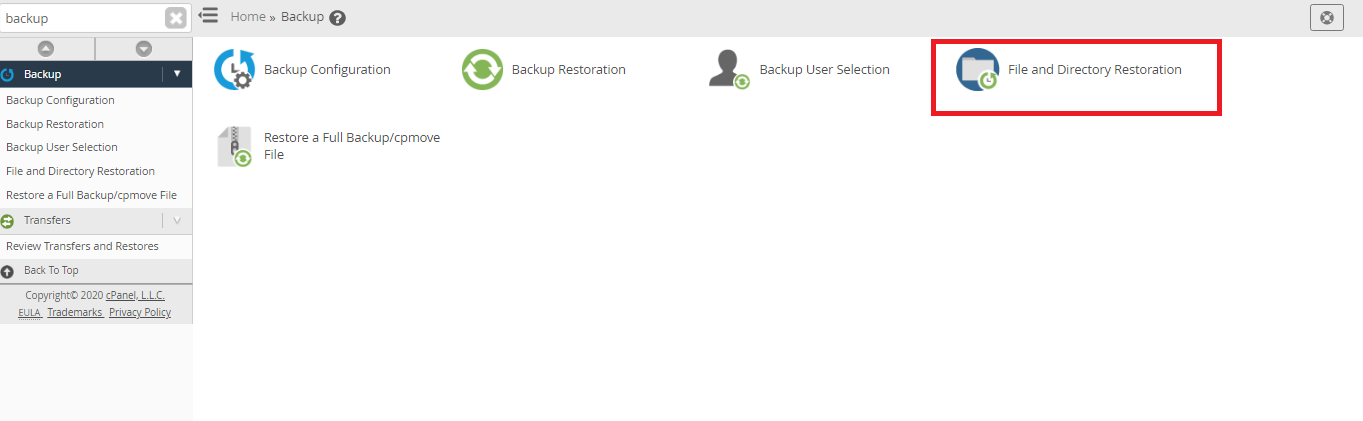
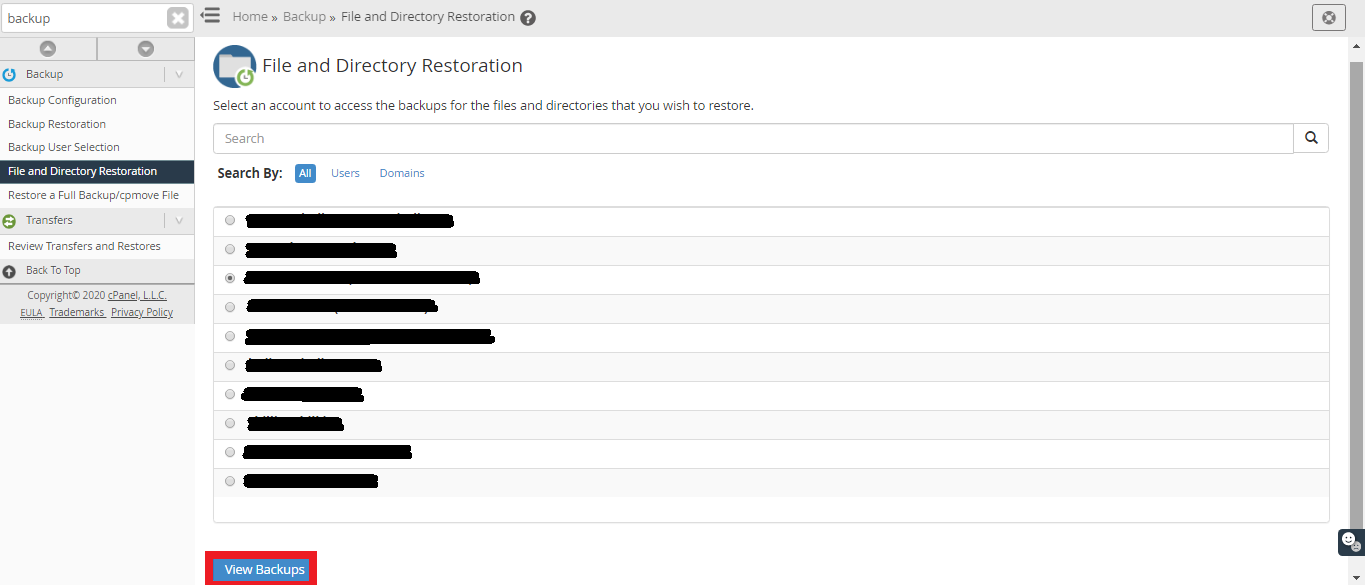
Step 2: In the backup, you have five choices choose file and directory restoration option from the five. It redirects to another page, where you need to select the account on your choice to take file & directory restoration.
Step 3: In step 3, files and folders should be chosen. So, click on the menu “Browse files and directories”. Next tap on the option “show backups” only so, you can choose the backup whatever you want to restore.
Step 4: Select the backup and click on the restore button. You will get a confirmation message by saying “System restored backup file along with the date”.
Please don’t give the assumption such as the steps are so lengthy. If you have already done with backup configuration then skip this process and start working on file and directory restoration.
In cPanel version 68, there is an option called file restoration. Moreover, if you delete the file consciously or unconsciously there is a secondary option to retrieve your deleted files in version 68 of cPanel or WHM. Only, a technical person knows the importance of directory when compiling a website. In that case, if the directory was deleted then you must have a secondary option to retrieve a directory, isn’t it? Yes, you have an option in a recent version of cPanel or WHM where it comes with both file and directory restoration option.
Before a startup, it’s just to configure the WHM backup without fail. Let us see, how to take configure WHM backup:
Step 1: In WHM, go to the Backup part and then choose the Backup Configuration. There, you can see the name global settings where you can enable or disable the backup.
Step 2: Below to global settings, 3 choices of backup type can be viewed such as compressed, uncompressed, and incremental.
Step 3: In step 3, set up the backups in monthly, weekly, or daily sections. To enable or disable the backups, tap on scheduling, and retention choice. Here, you can also set up how many times a day, week or monthly backup should take.
Step 4: Now, you need to select the account for taking backups. Tap on the select user button, it goes to select the backup account. The backup user selection option helps you to restore a file or full account based on the requirement.
Step 5: Step 5 carries out the selection part of the database where the backup takes place only for one account per user or Entire MySQL Directory. The third choice, you will get both options in one process.
Step 6: Again, it's your wish to choose the backup configuration either external or locally. Select, retain backups in the default backup directory option to get retained backup for local setup.
Step 7: Choose a remote transport method! It would help you in many cases. Finally, just go through all your set up and save the configuration of backup.
Once if you are done with the backup configuration, you are ready to do file and directory restoration analysis since it’s the main topic right?
Step 1: Use credentials to login interface of WHM. Check on the left side, there you have many menus but all you need to choose is “Backup”.
Step 2: In the backup, you have five choices choose file and directory restoration option from the five. It redirects to another page, where you need to select the account on your choice to take file & directory restoration.
Step 3: In step 3, files and folders should be chosen. So, click on the menu “Browse files and directories”. Next tap on the option “show backups” only so, you can choose the backup whatever you want to restore.
Step 4: Select the backup and click on the restore button. You will get a confirmation message by saying “System restored backup file along with the date”.
Please don’t give the assumption such as the steps are so lengthy. If you have already done with backup configuration then skip this process and start working on file and directory restoration.