Steps to convert addon domain to account in WHM
There’s a quite common process to run numerous domain from one hosting account. In that case, you might have come across a situation to get splitted by domain addon even if its your own account for cPanel.
Why to use multiple domain in one hosting account?
Before that, let me tell you the reason why they prefer to use multiple domains in one account. For all instances, we need a benefit isnt it? Yes! Of-course. To get updated traffic experience and also, to get proper resource usage identification you can split up the domains in one hosting account.
Coming to the topic, splitting up domain addon in own account is very easy with Convert addon domain to account tool. You can see it in WHM and exactly in transfer part. This splitting is not only for addon domain you can use up for email, FTP, SSL certificate, directory files and database.
Let us see the steps to split the addon domain:
Before starting the work, kindly take backup for cPanel. Its important to take backup in full form. Check properly, whether you were taking the backup for the splitting account or not.
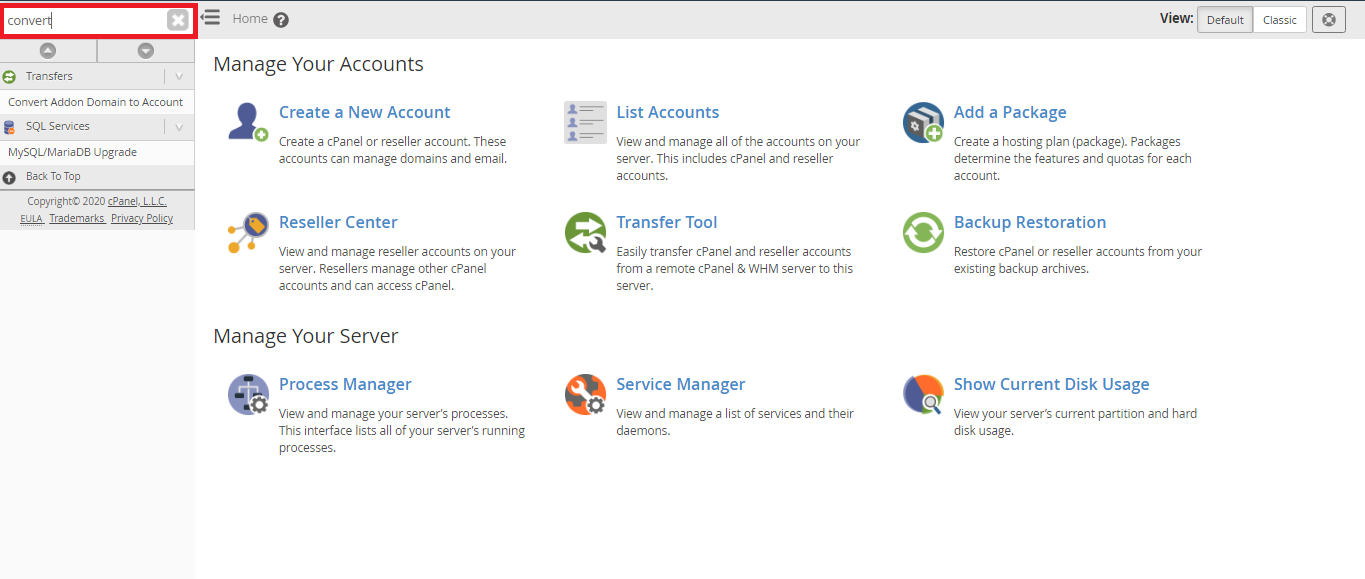
Step 1: As admin, login to the WHM account. On the left side, you can see the search option. Type the word convert.
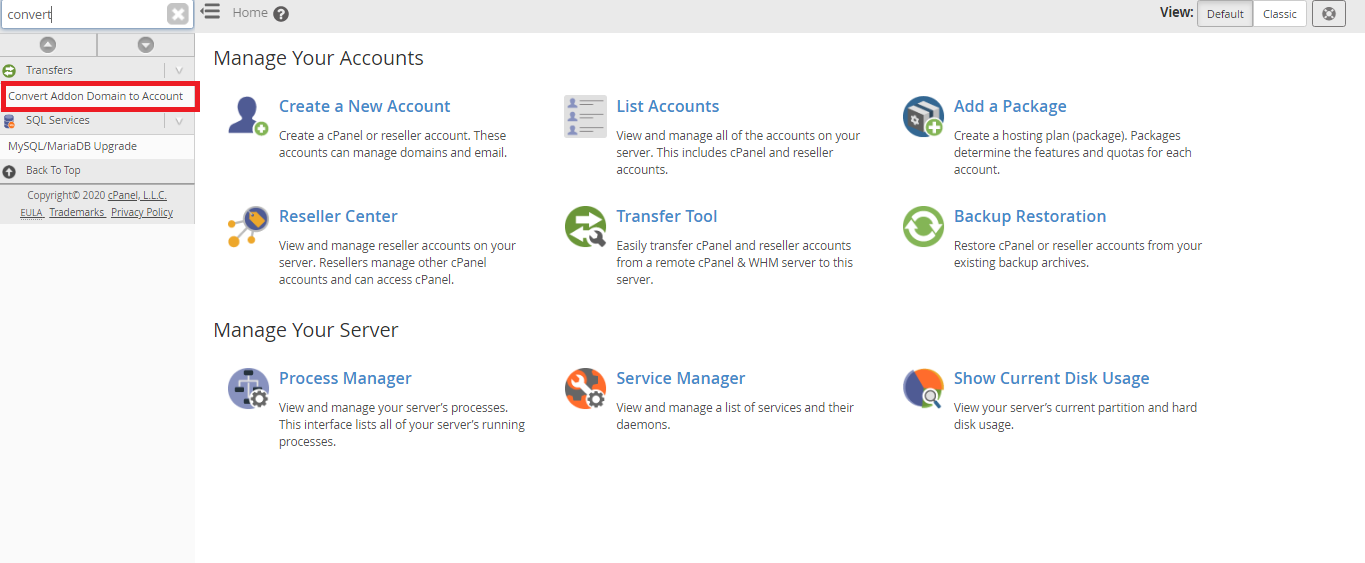
Step 2: Check where the transfer part is. You can see the option “convert addon domain to account”.
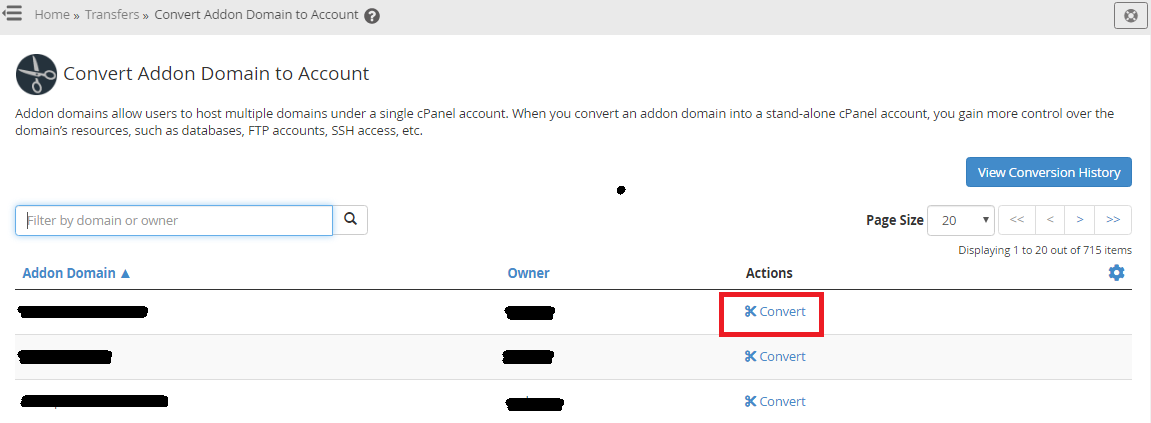
Step 3: Adjacent to the addon domain, there is a option called convert. Tap on it. Now, you will get an form type page to fill the details such as username, email, package and preserver account ownership.
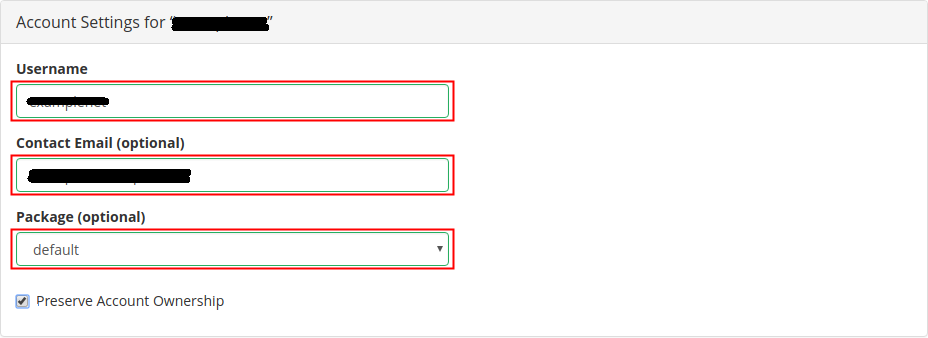
The username you going to enter would be the new name for the addon domain account. To get notification regularly, add the email address it might be optional too. Choose the package as per your need. There is a checkbox at last to give tick because only so, you will get the ownership for the old as well as new account.
Step 4: Crosscheck the addon domain information is correctly displayed in selection details. Tap on the configure button for selecting the database.
Step 5: Now, you will get a window naming “ How do you want to transfer your MySQL Database?”. That window message is type of warning so click on the button “move” .
Step 6: Select the database for what and where you need to move. Finally, click on save selection button and start conversion by tapping on the button.
There’s a quite common process to run numerous domain from one hosting account. In that case, you might have come across a situation to get splitted by domain addon even if its your own account for cPanel.
Why to use multiple domain in one hosting account?
Before that, let me tell you the reason why they prefer to use multiple domains in one account. For all instances, we need a benefit isnt it? Yes! Of-course. To get updated traffic experience and also, to get proper resource usage identification you can split up the domains in one hosting account.
Coming to the topic, splitting up domain addon in own account is very easy with Convert addon domain to account tool. You can see it in WHM and exactly in transfer part. This splitting is not only for addon domain you can use up for email, FTP, SSL certificate, directory files and database.
Let us see the steps to split the addon domain:
Before starting the work, kindly take backup for cPanel. Its important to take backup in full form. Check properly, whether you were taking the backup for the splitting account or not.
Step 1: As admin, login to the WHM account. On the left side, you can see the search option. Type the word convert.
Step 2: Check where the transfer part is. You can see the option “convert addon domain to account”.
Step 3: Adjacent to the addon domain, there is a option called convert. Tap on it. Now, you will get an form type page to fill the details such as username, email, package and preserver account ownership.
The username you going to enter would be the new name for the addon domain account. To get notification regularly, add the email address it might be optional too. Choose the package as per your need. There is a checkbox at last to give tick because only so, you will get the ownership for the old as well as new account.
Step 4: Crosscheck the addon domain information is correctly displayed in selection details. Tap on the configure button for selecting the database.
Step 5: Now, you will get a window naming “ How do you want to transfer your MySQL Database?”. That window message is type of warning so click on the button “move” .
Step 6: Select the database for what and where you need to move. Finally, click on save selection button and start conversion by tapping on the button.