You should create backups for every file you host online. So that in case anything goes wrong, you can restore them. Do you have a backup and need to restore your WordPress website but don’t know how? This article is for you. There are different ways to restoring the backup. It explains thoroughly how to restore WordPress from a backup file.
How Backups and Restores Work in WordPress?
Your WordPress website is made up of individual files that are distributed across various folders and sub-folders.
When you create a backup, a clone of your existing site is created and stored in another place. If anything goes wrong with your existing website when you make changes, you can restore the backup file and have the website running.
It’s recommended that you backup the entire website rather than individual items like themes and multimedia. Otherwise, you’d have to do a lot more work to restore the website completely.
In the subsequent sections, we explain how to restore your website using various available ways.
Restoring WordPress Using Backup Plugin
If you’re using a Plugin to backup your WordPress website, then you can use it to restore the website. For demonstration purpose, we’d use the BackupBuddy plugin. It offers a simple way to restore your website.
Restoring using phpMyAdmin
You can restore your WP website using phpMyAdmin. This if you’ve manually created a backup without the use of any plugin.
There are two possibilities. You can either use a new database to store the backup or use the existing one after emptying it.
Create a new database if your old website was hacked. Login to your cPanel and click on “MySQL Databases” under Databases.

Provide a new name to your database and click on “Create Database”.
You need to add users to this database. So create some users by going into MySQL Users and creating users.
Add the newly-created users to the MySQL database. Scroll down till you find the “Add user to Database” section. Here, you need to select the user and the database and then click the “Add” button.

Your database is now ready. You can start the backup process.
Restoring WordPress Database Backup
If you have created a database backup of your WordPress website, then you can restore it using cPanel.
Manual Restore WP Files Using FTP
In case your website was hacked, you can manually restore the individual files and directories. For this, you’d have to delete all the existing files from the database.
Before doing that, ensure your backup is up to date and you have the necessary customization done. Delete the database files only if you have all the uploads and customized files.
So that’s how you restore your WordPress website from a backup. Select the method that’s most appropriate for you. In case of any problems, get in touch with your hosting provider.
How Backups and Restores Work in WordPress?
Your WordPress website is made up of individual files that are distributed across various folders and sub-folders.
When you create a backup, a clone of your existing site is created and stored in another place. If anything goes wrong with your existing website when you make changes, you can restore the backup file and have the website running.
It’s recommended that you backup the entire website rather than individual items like themes and multimedia. Otherwise, you’d have to do a lot more work to restore the website completely.
In the subsequent sections, we explain how to restore your website using various available ways.
Restoring WordPress Using Backup Plugin
If you’re using a Plugin to backup your WordPress website, then you can use it to restore the website. For demonstration purpose, we’d use the BackupBuddy plugin. It offers a simple way to restore your website.
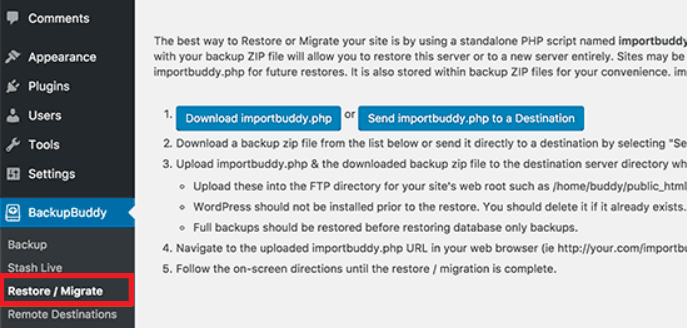
- First, log in to your WP dashboard and navigate into BackupBuddy >> Restore page.
- Next, download the importbuddy.php file. Provide the password for importbuddy to validate the download.
- If you haven’t already, download a copy of the backup. Navigate to BackupBuddy >> Backups to get your copy.
- Now that you have both importbuddy.php and zip backup file, connect to your website via FTP.
- If you were doing complete backup of your website, then delete everything that’s stored on the server. If you were backing up partially, then first you have to download the files that aren’t backed up. Otherwise, you’ll lose them permanently.
- Once you’ve downloaded everything necessary, delete all the files.
- Upload both BackupBuddy and importbuddy.php files using FTP to your root folder.
- Visit importbuddy on your website by using the URL - http://www.mywebsite.com/importbuddy.php
- Provide the password that you created when downloading ImportBuddy
- You’ll see the ImportBuddy backup file you just uploaded. If it isn’t there, you can still upload it using the Upload tab button.
- In case you have the backup stored in the iTheme Stash storage, you can use the “Restore from Stash/Stash Live” button.
- Select your database and then click on “Next Step”
- ImportBuddy will extract the files and notify you once done. Click on Next to proceed further.
- Provide the appropriate site URL and database information.
- You can either use the old database or create a new one. If your old website was hacked and compromised, it’s recommended that you not use your old database.
- To create new database tables, you can use cPanel.
- Once you’ve set the database, provide the details.
- Click on Next and ImportBuddy will test the database settings and start importing the data. Once it’s finished, hit the Next button.
- ImportBuddy will update the site URL and path as necessary.
- Finally, test your website to see if everything works correctly. If, you have successfully restored your website.
Restoring using phpMyAdmin
You can restore your WP website using phpMyAdmin. This if you’ve manually created a backup without the use of any plugin.
There are two possibilities. You can either use a new database to store the backup or use the existing one after emptying it.
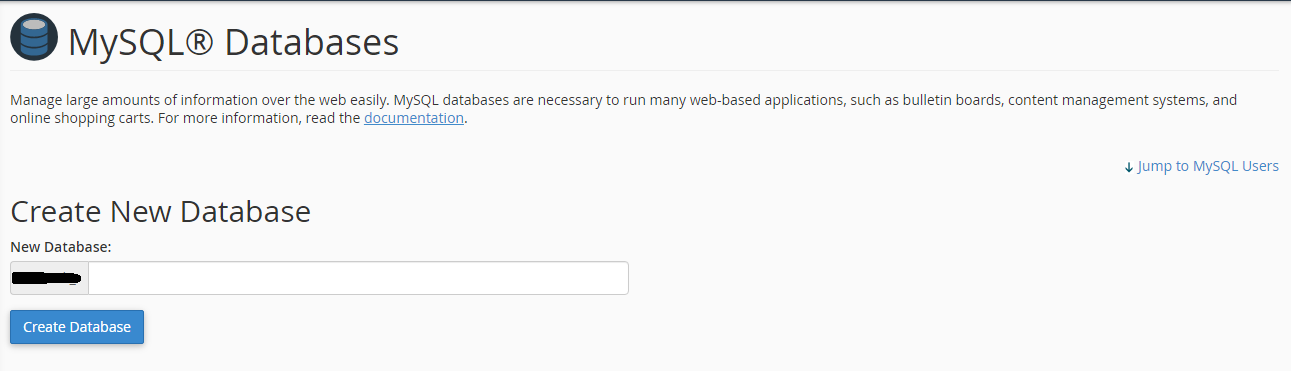
Create a new database if your old website was hacked. Login to your cPanel and click on “MySQL Databases” under Databases.
Provide a new name to your database and click on “Create Database”.
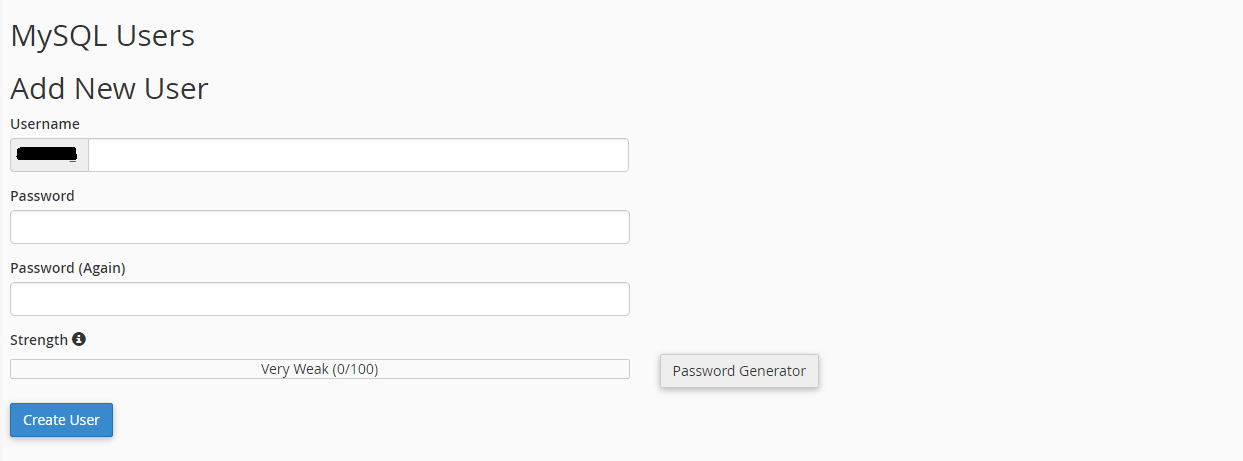
You need to add users to this database. So create some users by going into MySQL Users and creating users.
Add the newly-created users to the MySQL database. Scroll down till you find the “Add user to Database” section. Here, you need to select the user and the database and then click the “Add” button.
Your database is now ready. You can start the backup process.
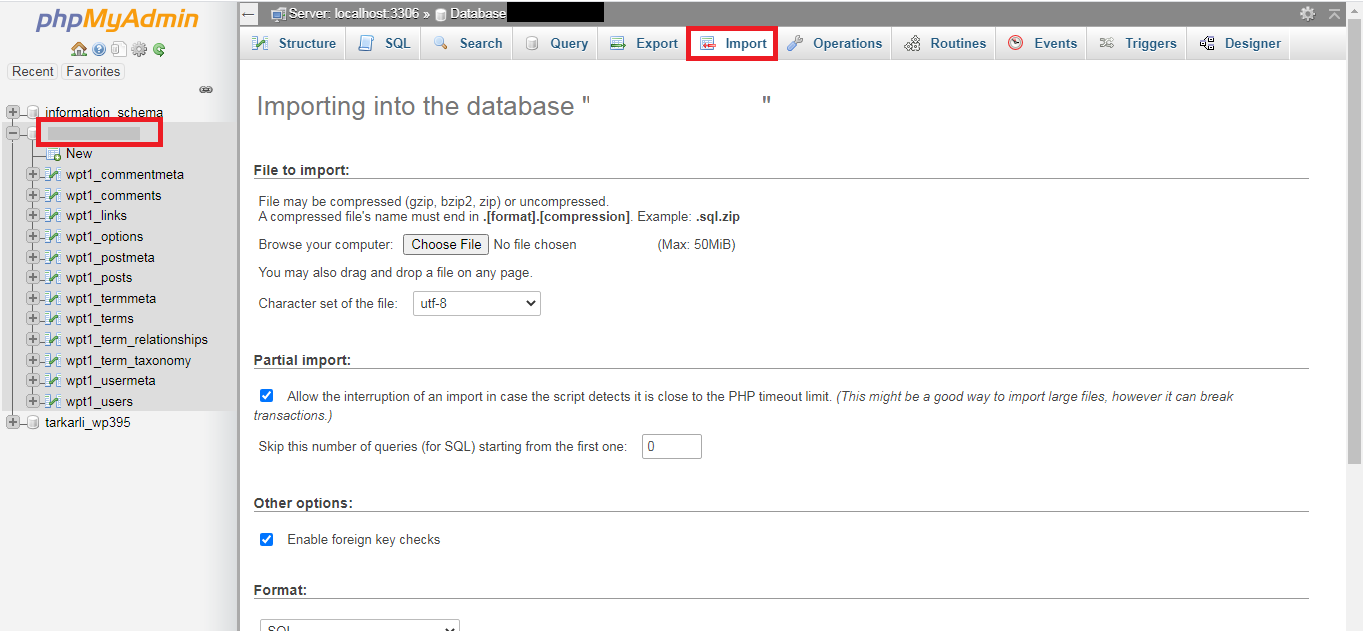
- Go back to the cPanel dashboard and into phpMyAdmin. Find and click on the new database you just created and then on the “Import” tab.
- Browse the backup file by clicking on “Choose File” button. Then click on go button at the bottom to upload it.
- phpMyAdmin will upload the files and into the database. Once done, it will notify you with a success message. That’s how you restore a website using phpMyAdmin.
Restoring WordPress Database Backup
If you have created a database backup of your WordPress website, then you can restore it using cPanel.
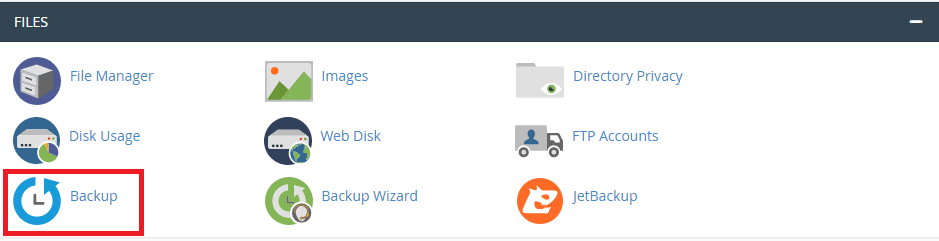
- Start the process by logging into your cPanel account and then click on Backup option under Files.
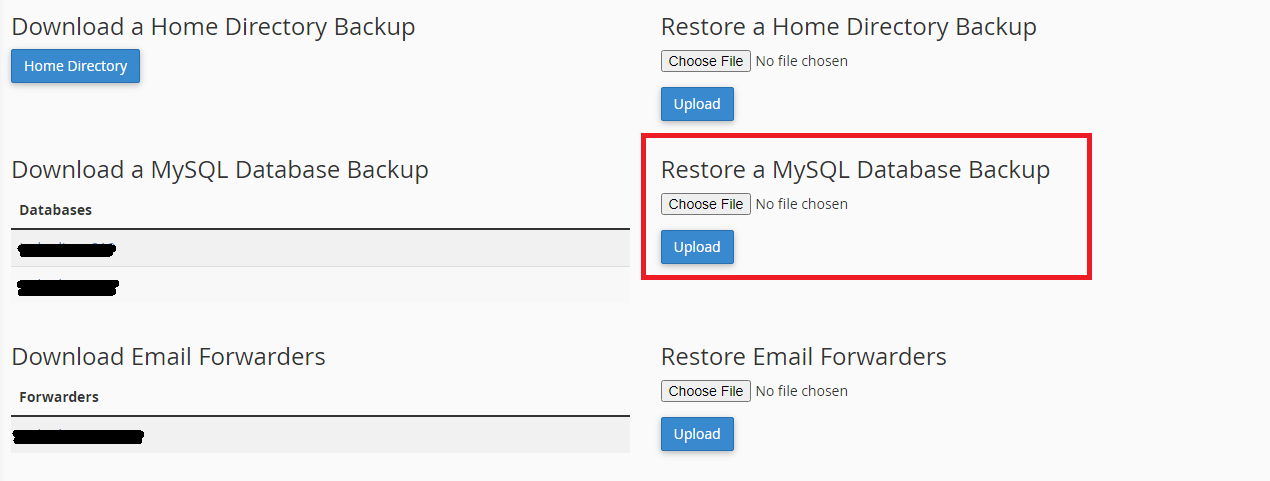
- Inside Backup, scroll down till you find the “Restore a MySQL database backup” option.
- Tap on the “Choose File” button to select the backup file from your computer. Then, click on the “Upload” button to start uploading the backup file.
Manual Restore WP Files Using FTP
In case your website was hacked, you can manually restore the individual files and directories. For this, you’d have to delete all the existing files from the database.
Before doing that, ensure your backup is up to date and you have the necessary customization done. Delete the database files only if you have all the uploads and customized files.
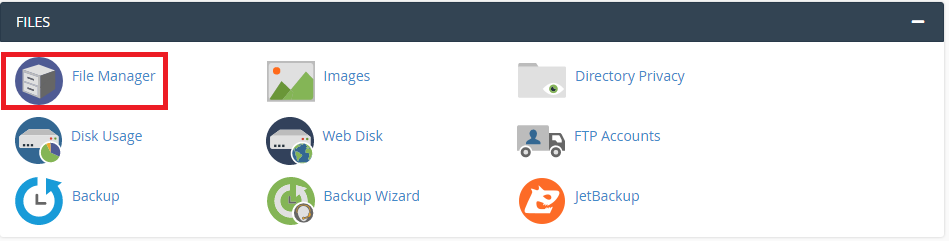
- cPanel is the best way to delete the files.
- Login to your cPanel and navigate into File Manager under Files. Select Web root as your directory.
- It will open the File manager interface in another tab. Select all the files and delete them.
- You can also delete these files using FTP. But it’s going to painfully slow process. You need to connect to the website server using FTP client, select the files and delete them.
- Once the database is empty, you can go ahead and upload the backup files.
- But since you’ve deleted everything, then core WordPress files have vanished too. So you need to download the a fresh copy of WordPress. Visit WordPress.org and download a copy. Extract the ZIP package onto your local hard disk.
- Start the FTP client, connect it to the WordPress server, and start uploading the WordPress files. Once that’s done, upload wp-config.php file.
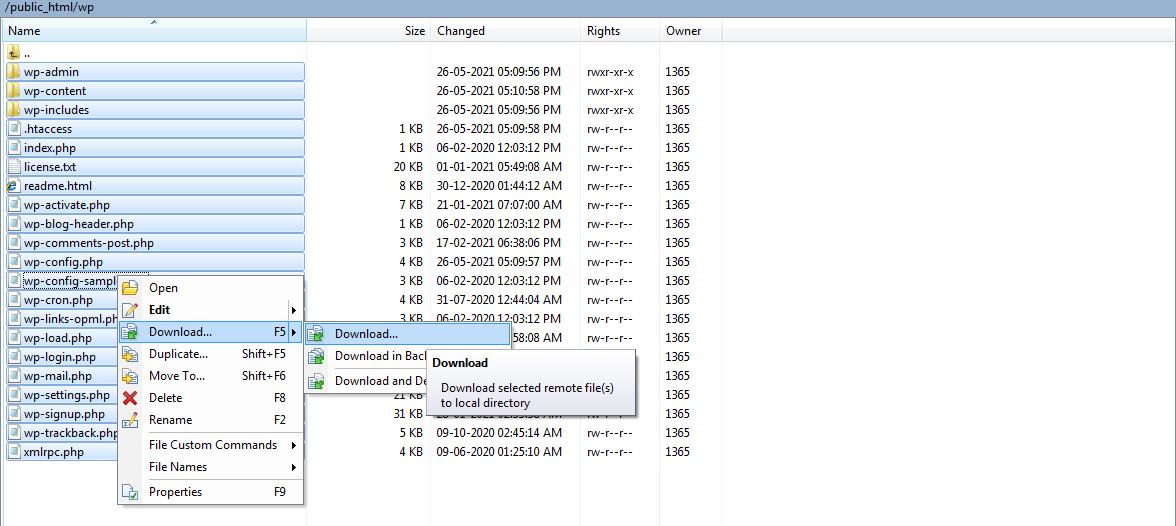
- Another way, you can rename the wp-config-sample.php file, edit the database details from the wp-config.php back up file. Save the file and upload it back to the website.
- Next, start uploading other files from your computer. As a recommendation, you should upload the images into the /wp-content/uploads/ directory.
- Login to your WP admin dashboard and install all the plugins you were using previously. You can then install the theme you had. If you were using a child theme, you must have it in your backup.
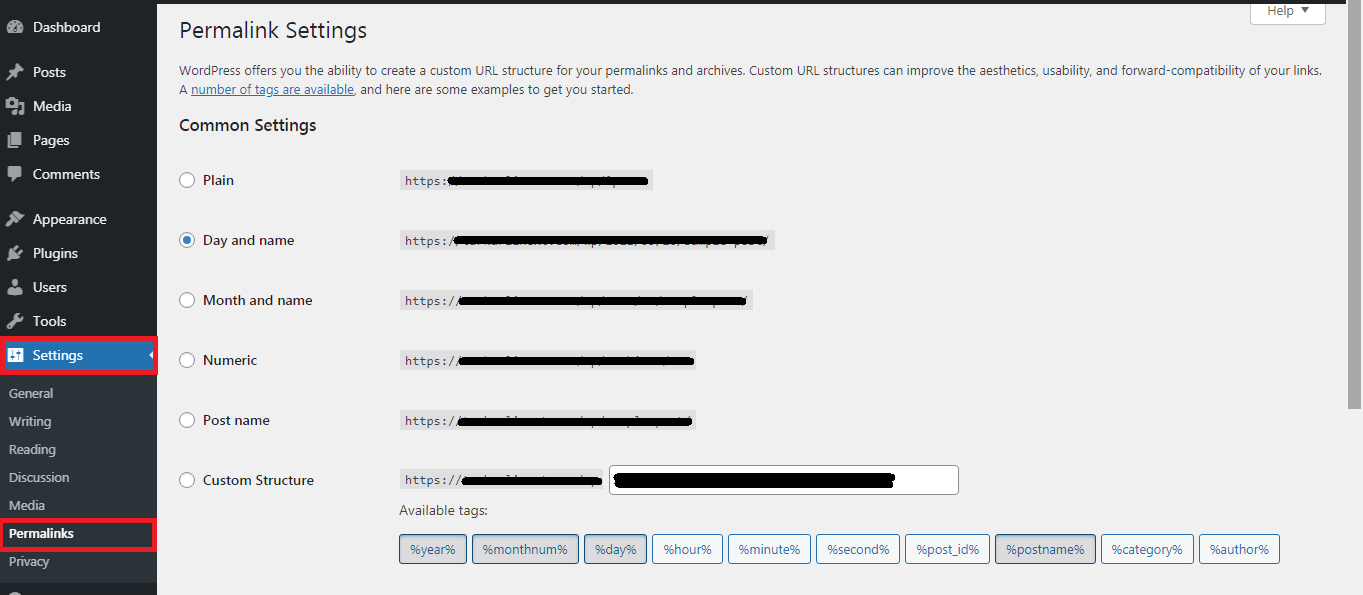
- As a final measure, go into Settings >> Permalinks and make adjustments to the permalinks settings. This will match the permalinks to your website and update if necessary.
So that’s how you restore your WordPress website from a backup. Select the method that’s most appropriate for you. In case of any problems, get in touch with your hosting provider.