How to use Maintenance mode for different CMS?
In the realm of programming advancement, maintenance mode alludes to a point that is going to fix the issue and bug of the program.
Maintenance Mode is a record alternative that allows you to suspend or delay your record while sparing your record settings.
Maintenance Mode is additionally an extraordinary path for occasional associations to abstain from taking care of the normal.
Before continuing with any changes, we prescribe producing to have a complete backup of your site. The backup will assist you in any circumstances if you face any issue while changes in your website. SO please follow all the points step by step.In this article, you will get approx all the CMS with a proper guide so get ready to get a good knowledge regarding the topic.
You are able to set the maintenance mode by using the plugin in WordPress:
If you are already logged in to your dashboard so you can see a normal website. But other users/visitors can not see the same and they will get Maintenance page or Coming Soon page. If your site is public, not private so this Coming Soon Mode will be for the search engines. It will be like the site is not available if this is in Maintenance Mode.
Logo - This will present your company so you are able to upload an image or your company logo.
Message - You are able to give any of the message to your users/visitors regarding the website.

If you have completed all the point so you need to click on the Save All Changes option to save all the above information:
If we talk about Joomla so it has a feature that is built-in for making it enable maintenance mode for the website.
Joomla 3.x
Opencart also has a feature for enabling which is built-in for maintenance mode.
Opencart 2.x, 3.x
If we talk about Magento so it doesn't have a feature that is built-in to make it enable as a maintenance mode.
Magento 2.2
In the realm of programming advancement, maintenance mode alludes to a point that is going to fix the issue and bug of the program.
Maintenance Mode is a record alternative that allows you to suspend or delay your record while sparing your record settings.
Maintenance Mode is additionally an extraordinary path for occasional associations to abstain from taking care of the normal.
Before continuing with any changes, we prescribe producing to have a complete backup of your site. The backup will assist you in any circumstances if you face any issue while changes in your website. SO please follow all the points step by step.In this article, you will get approx all the CMS with a proper guide so get ready to get a good knowledge regarding the topic.
- WordPress
- Joomla 3x
- Opencart 2x,3x
- prestashop 1.7x
- Drupal 8
- Magento 2.2
- moodle 3.3
You are able to set the maintenance mode by using the plugin in WordPress:
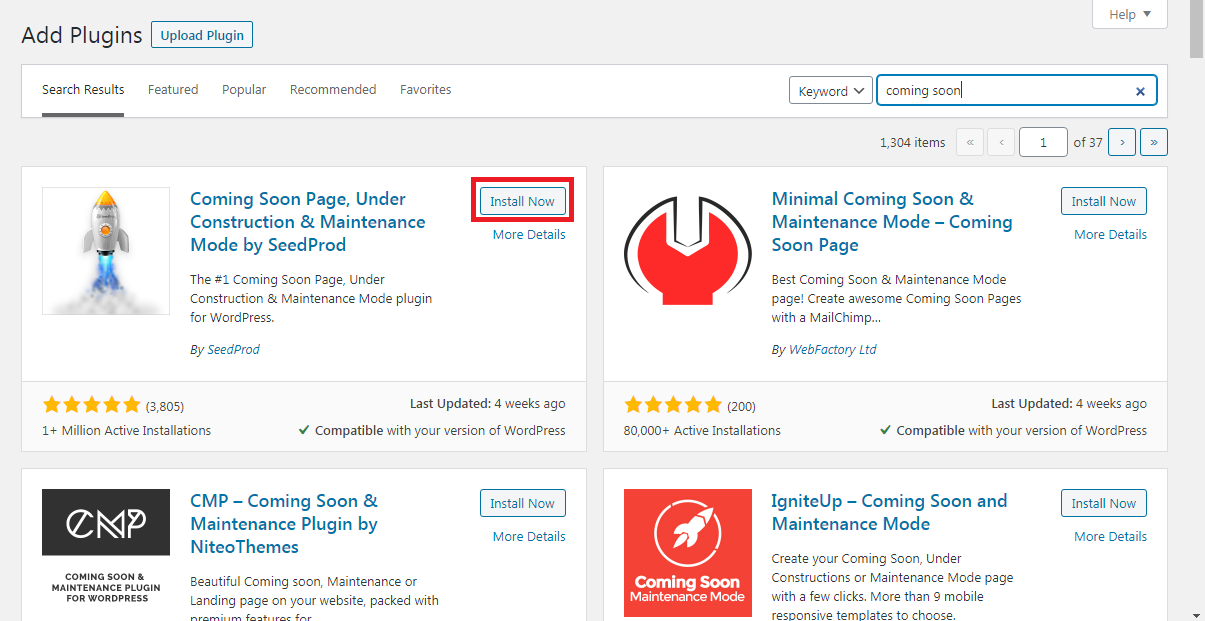
- First you need to go to the admin dashboard of WordPress then go to Plugins option and click on Add new tab. You need to use simple query to find as Maintenance Mode plugin and install it by clicking:
- If you have installed this and completed so click on Activate button to activate this plugin:
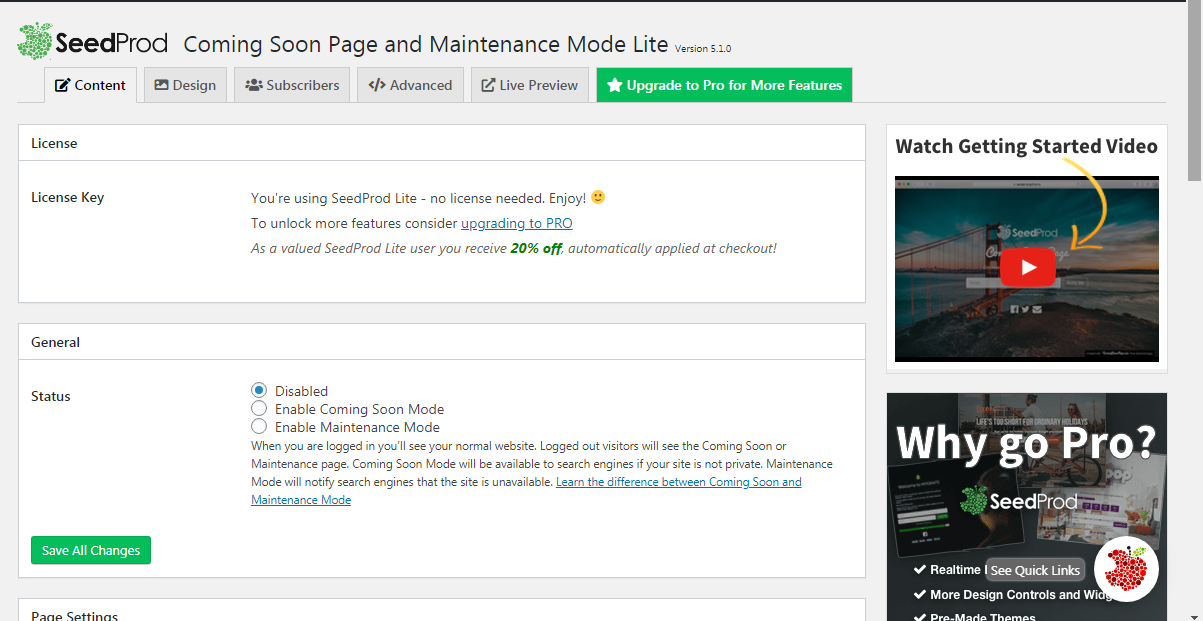
- You will get the customization page automatically by redirecting. Here you are able to see the option, Maintenance Mode or Coming Soon Mode so you need to change status and make it enable in the General section:
If you are already logged in to your dashboard so you can see a normal website. But other users/visitors can not see the same and they will get Maintenance page or Coming Soon page. If your site is public, not private so this Coming Soon Mode will be for the search engines. It will be like the site is not available if this is in Maintenance Mode.
- You are able to add in Page Settings:
Logo - This will present your company so you are able to upload an image or your company logo.
Message - You are able to give any of the message to your users/visitors regarding the website.
If you have completed all the point so you need to click on the Save All Changes option to save all the above information:
- If you need to see the effect of this page so you have to Log out of the dashboard of the WordPress Admin.
If we talk about Joomla so it has a feature that is built-in for making it enable maintenance mode for the website.
Joomla 3.x
- First of all, you need to log into the dashboard of admin by using correct user name and password then go to the section Configuration and after that go to Global as you can see in below image.
- You are able to see the option "Find the Site Offline" so you need to click on yes to make it maintenance mode.
- If you have done all the above-given points so now you can add Offline image and message.
- When you will see your website so it will look like as given below:
Opencart also has a feature for enabling which is built-in for maintenance mode.
Opencart 2.x, 3.x
- First, you need to use the correct user name and password to log into your dashboard of Opencart Admin after that you are able to see the System and then go through with settings option.
- Here you need to select any of your store which is given in the list and then click on the Edit button:
- It will be redirected automatically to you in the settings page of the website. Now you need to go to the tab Server. You are able to see the option Maintenance Mode so make the change of status from No to Yes.Now click on the save button to see the correct effect or change you made.
- You are still able to see the working website if you are seeing in the browser If you are still logged in. So, you need to Log out of the admin dashboard of Opencart to get the correct effect of your changes and see the maintenance page of your website:
- First, you need to Log in using correct username and password to the admin dashboard of Prestashop and then to go to the option Configure then click on Shop Parameters and final click on General tab:
- Now you need to go to the tab Maintenance. Here you are able to see the Shop option and you need to change it's status as a Yes instead of No. You are able to add the local IP address in the field of Maintenance IP so you can see the working website if your site is in maintenance mode. Even you are able to customize any the text which is related to maintenance.
- The website look will be like this.
- If you need to change maintenance page's logo so you have to go to option Improve and then option design menu and Theme & Logo. choose the file select option and select logo from computer which you want to use in your page and click on save button:
- Use the browser to open your website and you are able to see maintenance page which is recently updated.
- In Drupal you have to follow the same for Log into dashboard of admin then you need to go Configuration option and go through maintenance mode
- You need to find the option "Put site into maintenance mode" . You are also able to include message of maintenance mode here.
- You will see the working website if you are already logged in using the browser. First Log out of the dashboard of Drupal admin to get the updated maintenance page:
If we talk about Magento so it doesn't have a feature that is built-in to make it enable as a maintenance mode.
Magento 2.2
- Like all other CMS same you need to follow for Log into cPanel account then find the Files section and go with option File Manager.
- You have to go to the website's root directory (public_html is by default root directory for the main URL/domain), you need to access the folder var and you have to create a file with the name .maintenance.flag in it.
- As you are able to see the following message which will be shown by website:
- If you have made it enables the page as a maintenance mode then you are unable to get or access the UI or simply front end of the website it does not matter that you are logged in your admin dashboard. It’s only possible by a specific IP address to make it allow to get or access the site. You need to go to the folder var and you need to generate another .maintenance.ip file:
- You have to use Code Editor to open it:
- You need to include IP address list for which you want to allow separated by a comma:
- Simply use the username and password to Log into the dashboard of Moodle Admin and go to Site Administration:
- After that you need to go to the Server and then click on Maintenance Mode:
- Now you are on the Maintenance mode page and here you need to choose Enable option from given drop-down. You are also able to include any of the messages for custom maintenance here.
- Click on the Save changes button if you have done all above points:
- You can see the maintenance page If you use browser and open the website:
- Hope this article for Maintenance mode for different CMS will surely assist you and you have got everything about the related topics. Now you are able to do what explained above without hassle. So, follow each and every point as per your need and you can see that is working fine.In this article, we have covered very important CMS with version and that is enough to have sufficient knowledge.So, get ready to start your work by reading and following all the points properly.