How to manually install Wordpress?
What is WordPress?
PHP codes – One of the most competitive programming language for all website designers. PHP code is universal language used widely to design websites with more secured extensions. WordPress is known as open source coder and the backend process runs with PHP code. For well-established content marketing and for the blogging too WordPress is recommended widely. Then and there, WordPress takes the major role from its release 2003. Couldn’t believe isn’t it? But its true!
Few of my folks took a survey on WordPress and the result was 75% of users was already WordPress user and the improvisation of WordPress keeps on going. It doesn’t have end in worldwide.
You may ask what is there in WordPress and why it is so recommended?
WordPress is filled with automatic update and countless themes, widgets and plugins which helps while you are creating website.
How to install WordPress?
You can directly install wordpress through softaculous, but if you won't have any option then you can manually install wordpress without any problem.
In your cPanel, it is very easy to install WordPress. Let us see in detail:
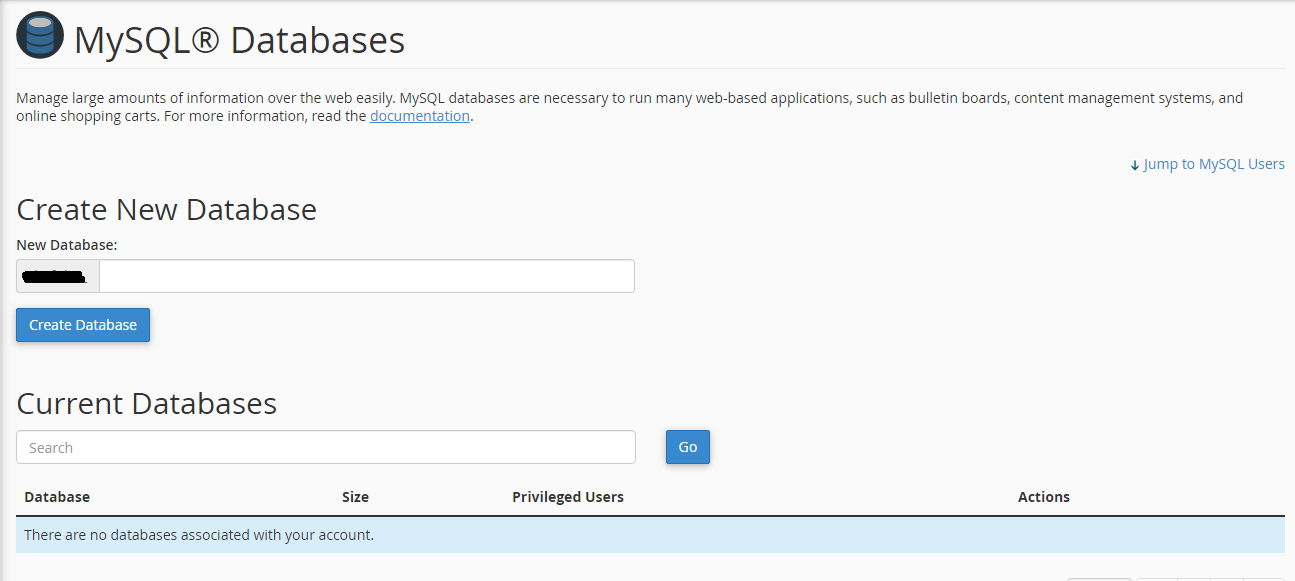
Step 1: cPanel login is very important. Login with correct credentials. After login, create the database by clicking on the database and from that choose MySQL database.
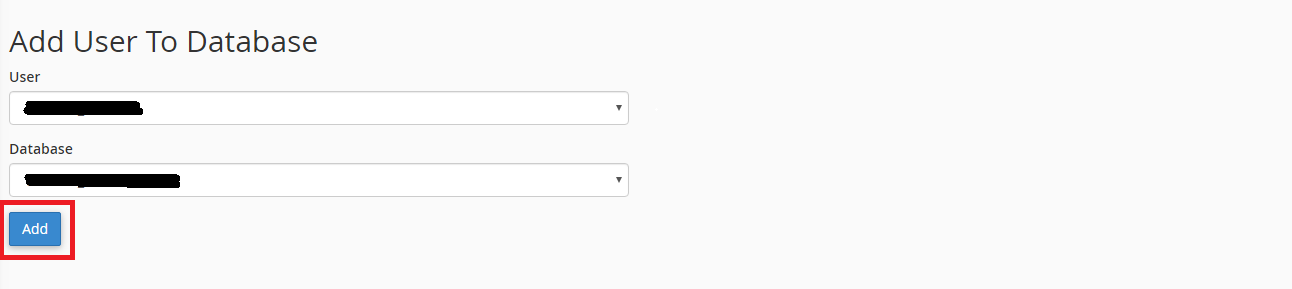
Step 2: Creation of user and their privilege takes place in second step. Once, if you give access to user and then the website comes to full access. No limitations are processed.

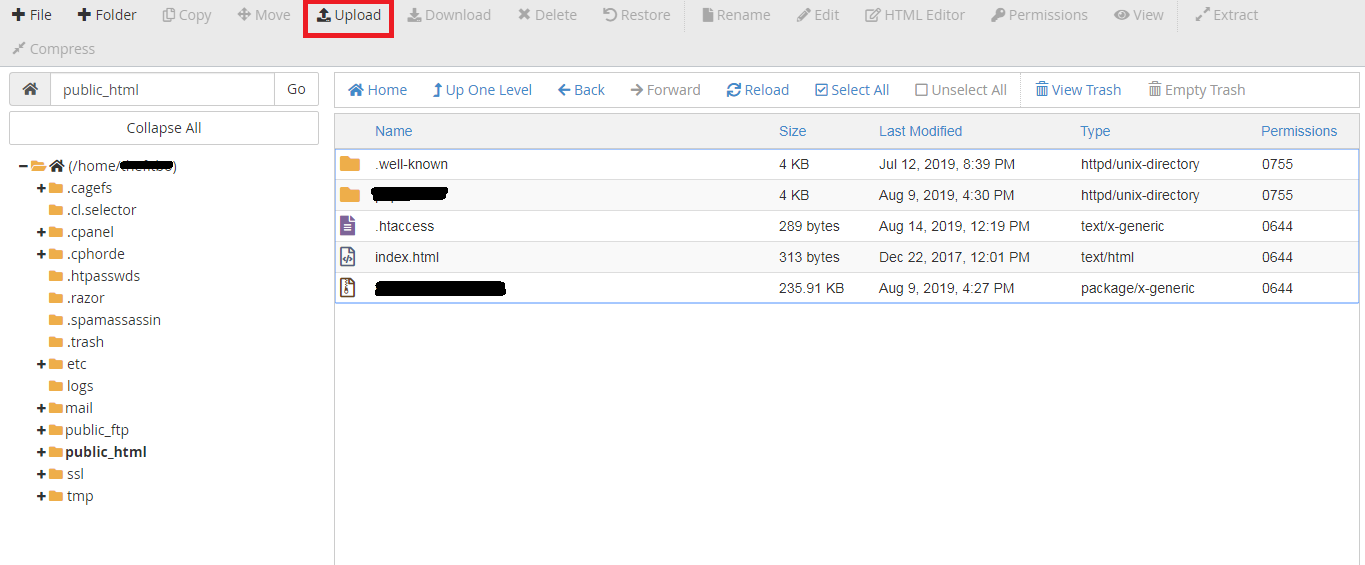
Step 3: From the WordPress official website download it. If you use zip file, it is easy to upload in server by clicking file manager option from cPanel. Choose file and then search for file manager.
Step 4: In file manager, you have choice called upload. Use it to upload the zip file present in your computer. It will automatically upload it to server.
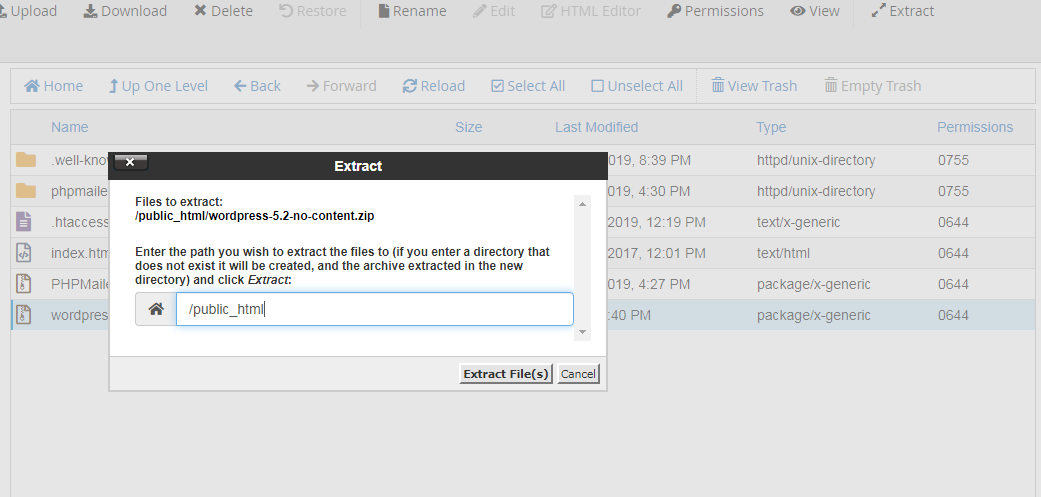
Step 5: It is common to extract zip file. The file should be extracted like public_html. Click on the file it shows the extract option. The window will be opened to store the extract file on your choice. Choose the path where you have to store the extracted file.
Step 6: Check whether the file is extracted in subdirectory. If it is so, we need to move the file from sub directory to parent directory. Run the script by clicking on the URL and then next step you will get configuration page.
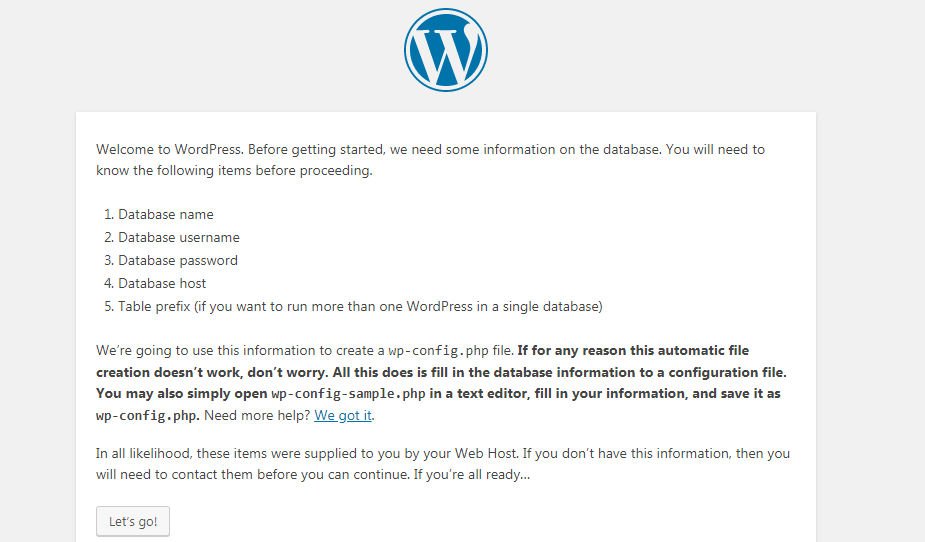
Step 7: After configuration, you will get the language option to choose and then tap on continue option. And after that you can see the Welcome page, you have to click on let’s go button.
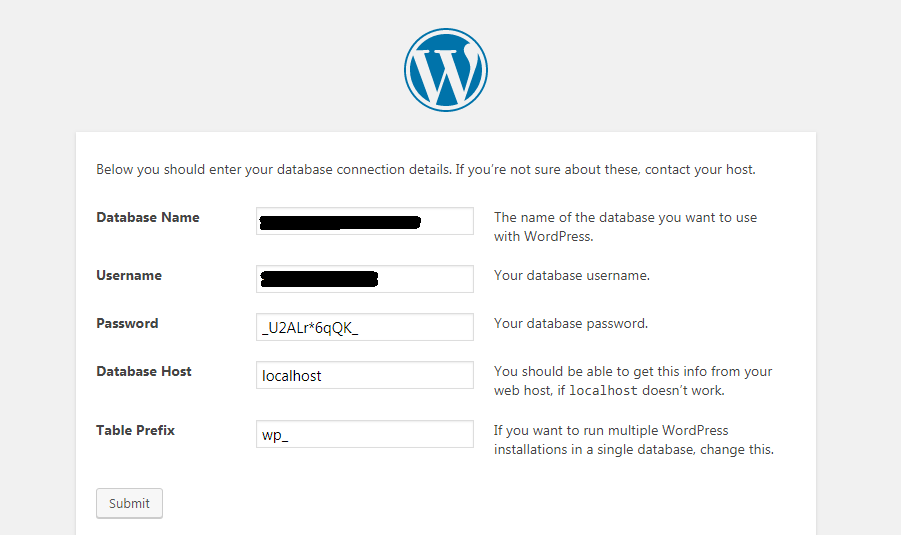
Step 8: You have already submitted database details. It displays again to cross check and click on submit button.
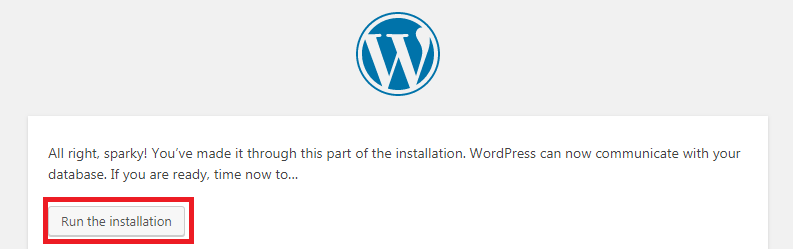
Step 9: Next click on "Run the installation" button. In this step, you need to update the login credentials and title of the website too. Once, if you updated click on install WordPress option.
Cross check by login to WordPress site. That’s it!
What is WordPress?
PHP codes – One of the most competitive programming language for all website designers. PHP code is universal language used widely to design websites with more secured extensions. WordPress is known as open source coder and the backend process runs with PHP code. For well-established content marketing and for the blogging too WordPress is recommended widely. Then and there, WordPress takes the major role from its release 2003. Couldn’t believe isn’t it? But its true!
Few of my folks took a survey on WordPress and the result was 75% of users was already WordPress user and the improvisation of WordPress keeps on going. It doesn’t have end in worldwide.
You may ask what is there in WordPress and why it is so recommended?
WordPress is filled with automatic update and countless themes, widgets and plugins which helps while you are creating website.
How to install WordPress?
You can directly install wordpress through softaculous, but if you won't have any option then you can manually install wordpress without any problem.
In your cPanel, it is very easy to install WordPress. Let us see in detail:
Step 1: cPanel login is very important. Login with correct credentials. After login, create the database by clicking on the database and from that choose MySQL database.
Step 2: Creation of user and their privilege takes place in second step. Once, if you give access to user and then the website comes to full access. No limitations are processed.
Step 3: From the WordPress official website download it. If you use zip file, it is easy to upload in server by clicking file manager option from cPanel. Choose file and then search for file manager.
Step 4: In file manager, you have choice called upload. Use it to upload the zip file present in your computer. It will automatically upload it to server.
Step 5: It is common to extract zip file. The file should be extracted like public_html. Click on the file it shows the extract option. The window will be opened to store the extract file on your choice. Choose the path where you have to store the extracted file.
Step 6: Check whether the file is extracted in subdirectory. If it is so, we need to move the file from sub directory to parent directory. Run the script by clicking on the URL and then next step you will get configuration page.
Step 7: After configuration, you will get the language option to choose and then tap on continue option. And after that you can see the Welcome page, you have to click on let’s go button.
Step 8: You have already submitted database details. It displays again to cross check and click on submit button.
Step 9: Next click on "Run the installation" button. In this step, you need to update the login credentials and title of the website too. Once, if you updated click on install WordPress option.
Cross check by login to WordPress site. That’s it!