Error "Failed to fetch zone file for 'domainname.com'".
DNS Zone is used for the administration of the DNS (Domain Name System) and it directs the domain traffic to the perfect locations. All the DNS records are kept in the DNS Zone. DNS zone of all the domains can be managed and edited using DNS Functions.
If you are getting "Failed to fetch zone file for 'domainname.com'" error in cpanel while checking Zone Editor then it means there are no DNS records available for your domain.
Solution: To resolve this issue you have two ways
DNS server is used to display the site information in the Internet.
Step 1: For resolving the correct address, one should have DNS zone.
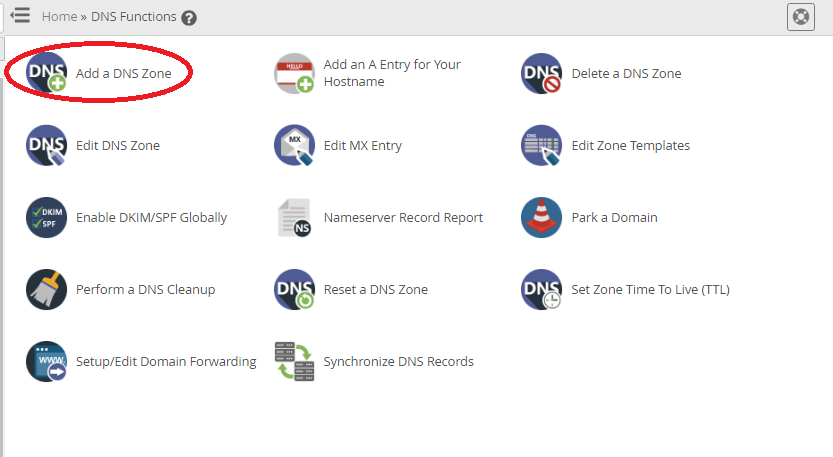
Step 2: For adding DNS zone, first sign in the WHM and select the Add a DNS ZONE from DNS Function.
Step 3: A new page will be opened. In the Domain Selection part, enter the IP Address in the IP field and enter the name of the domain in the Domain Field.
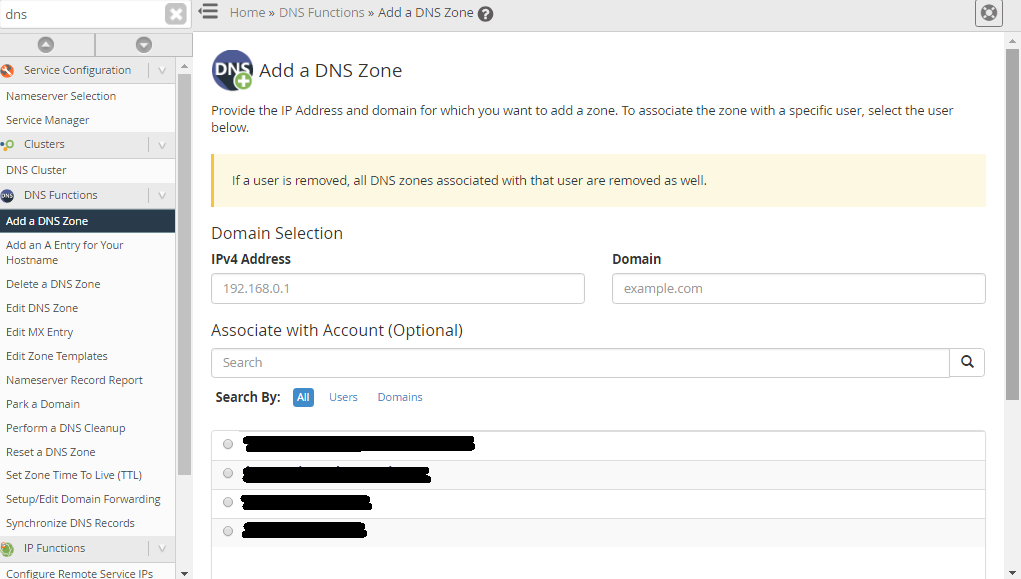
Step 4: Now Click the Add Zone button for creating DNS Zone on the server.
Steps to Editing/Deleting an Existing DNS Zone in WHM
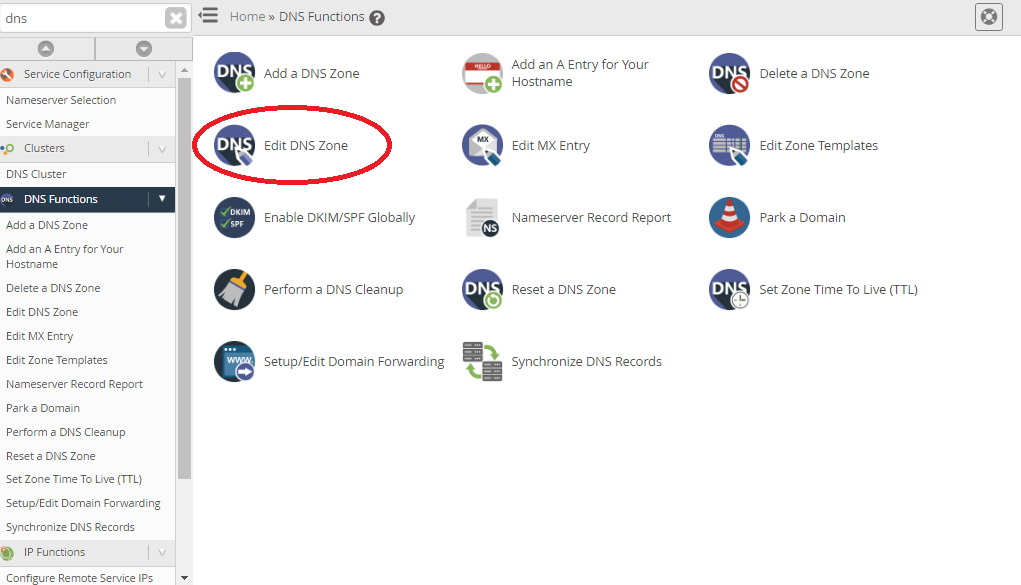
Step 1: DNS Zone can be editing using Edit DNS Zone option from the DNS Function Menu.
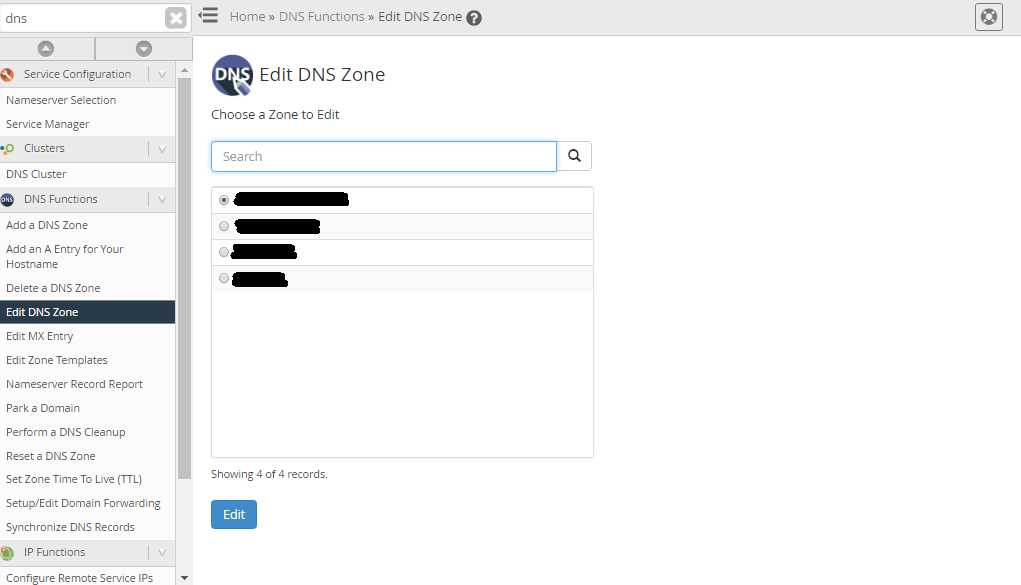
Step 2: Enter the Domain Name of the DNS Zone in Choose a Zone to Edit field. Click Edit button to start.
Step 3: DNS zone can be deleted if it is not needed. Click Delete a DNS Zone option from DNS Function to delete the DNS Zone.
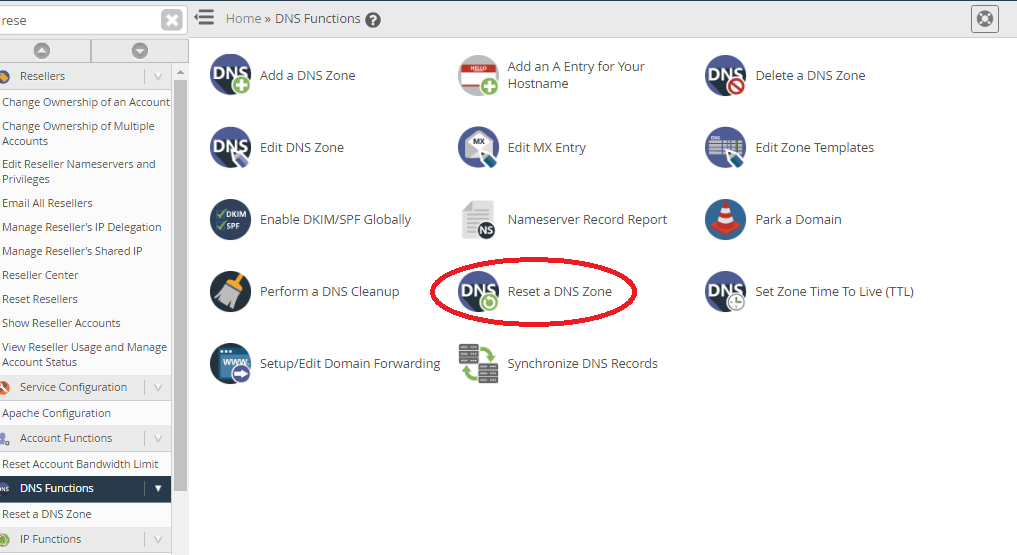
Steps to Resetting the Existing DNS ZONE
Reset a DNS Zone option is used to reset the existing DNS zone. This is useful when the value is changed and the user needs the default value.
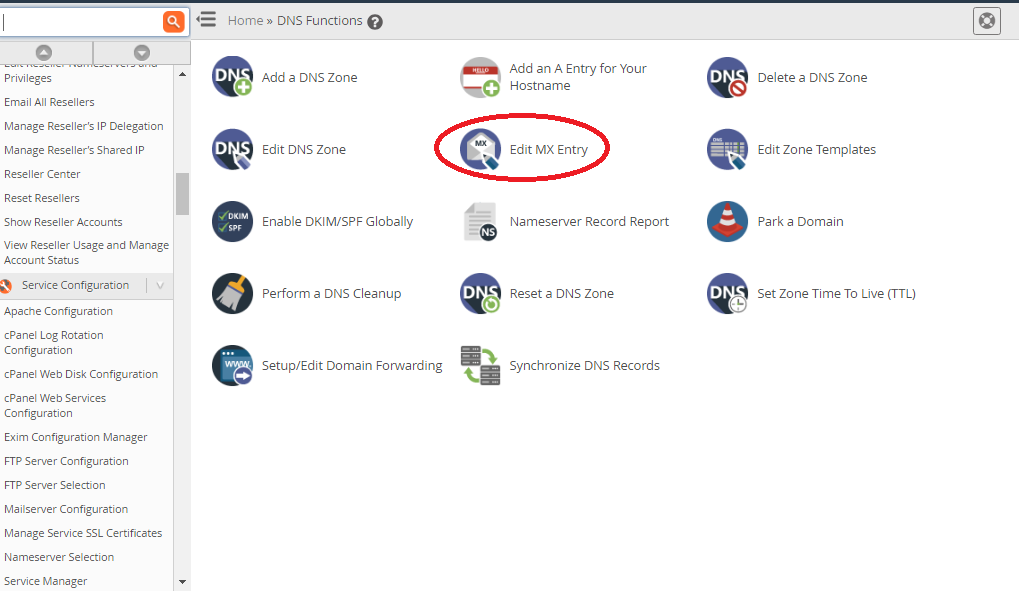
Editing MX Records
MX record is the mail exchange record used for email services.
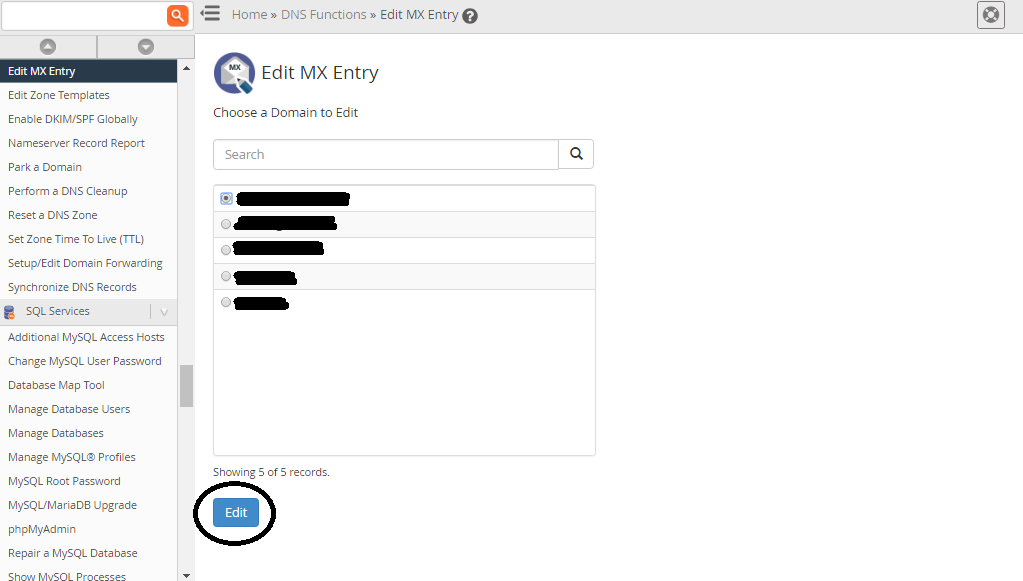
Step 1: By using Edit MX Records option email routing can be configured for the domain.
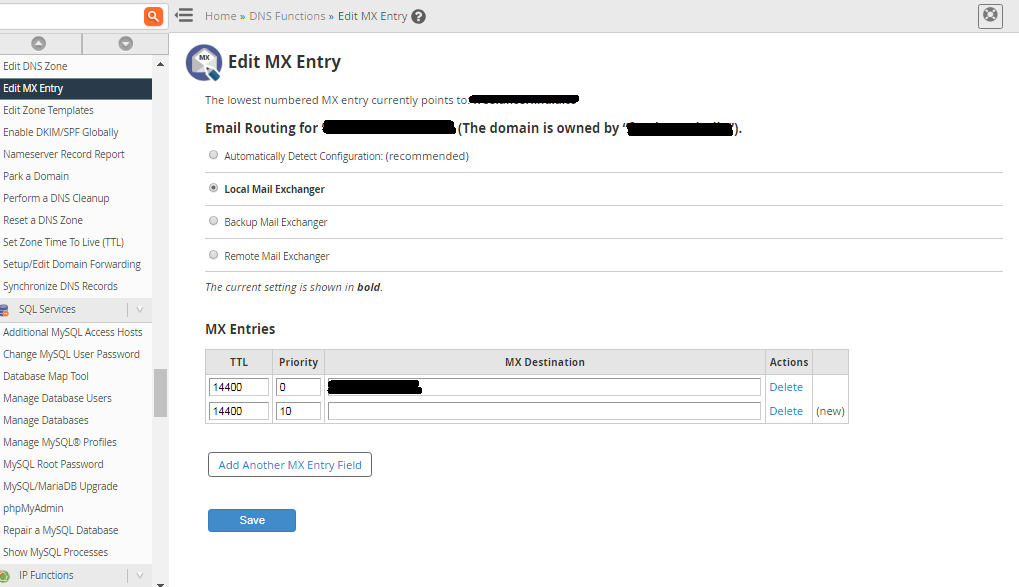
Step 2: Mail servers for the specific domain and priority value of each domain will be listed. Highest priority mail server will handle the domain emails first.
Editing Zone Template
Default DNS zone can be edited using Edit Zone Template option. This option is used only if there is a custom setup.
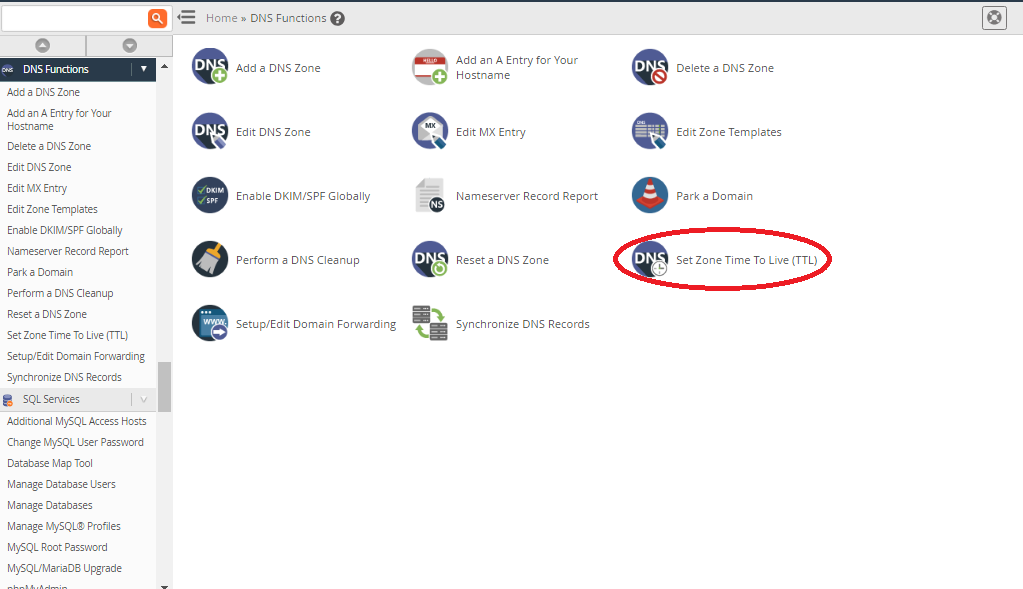
Set Zone Time to Live (TTL)
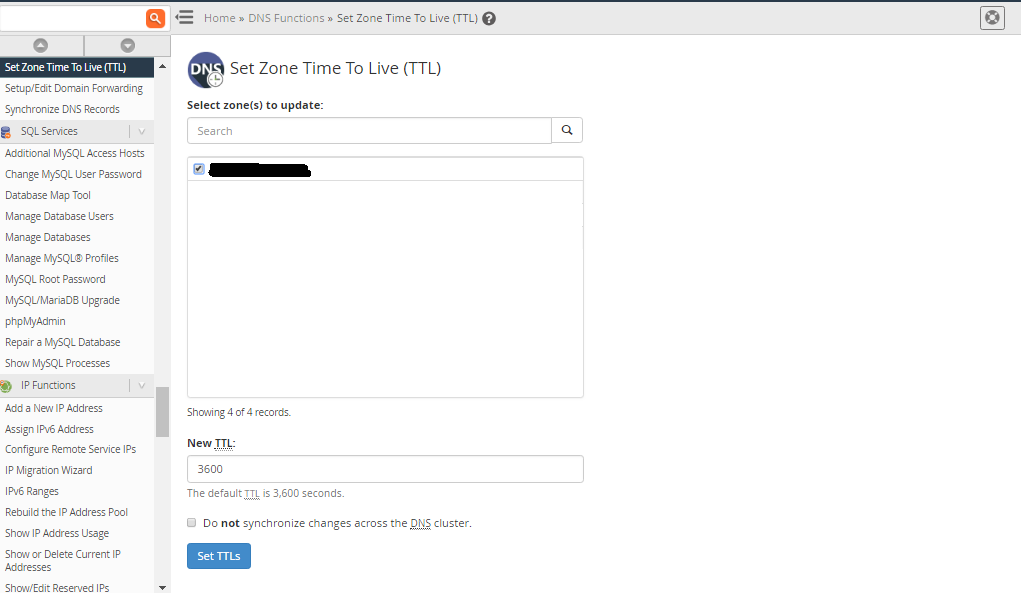
Step 1: By using Set Zone Time to Live tool TTL Value of records can be updated once in the DNS Zone.
Step 2: TTL is not needed if there are multiple DNS servers. For synchronizing the clusters, select Do not sync changes across the DNS cluster option.
Park a Domain
Park a Domain tool is used to park a domain and create aliases. In the first column, the primary domain has to be selected and in second column, domain that needs the park has to be typed.
DNS Zone is used for the administration of the DNS (Domain Name System) and it directs the domain traffic to the perfect locations. All the DNS records are kept in the DNS Zone. DNS zone of all the domains can be managed and edited using DNS Functions.
If you are getting "Failed to fetch zone file for 'domainname.com'" error in cpanel while checking Zone Editor then it means there are no DNS records available for your domain.
Solution: To resolve this issue you have two ways
- You can manually add DNS of new domain through command. For that you can check below article: How to manually add DNS of new domain in Linux?
- You can also add new DNS zone through WHM.
DNS server is used to display the site information in the Internet.
Step 1: For resolving the correct address, one should have DNS zone.
Step 2: For adding DNS zone, first sign in the WHM and select the Add a DNS ZONE from DNS Function.
Step 3: A new page will be opened. In the Domain Selection part, enter the IP Address in the IP field and enter the name of the domain in the Domain Field.
Step 4: Now Click the Add Zone button for creating DNS Zone on the server.
Steps to Editing/Deleting an Existing DNS Zone in WHM
Step 1: DNS Zone can be editing using Edit DNS Zone option from the DNS Function Menu.
Step 2: Enter the Domain Name of the DNS Zone in Choose a Zone to Edit field. Click Edit button to start.
Step 3: DNS zone can be deleted if it is not needed. Click Delete a DNS Zone option from DNS Function to delete the DNS Zone.
Steps to Resetting the Existing DNS ZONE
Reset a DNS Zone option is used to reset the existing DNS zone. This is useful when the value is changed and the user needs the default value.
Editing MX Records
MX record is the mail exchange record used for email services.
Step 1: By using Edit MX Records option email routing can be configured for the domain.
Step 2: Mail servers for the specific domain and priority value of each domain will be listed. Highest priority mail server will handle the domain emails first.
Editing Zone Template
Default DNS zone can be edited using Edit Zone Template option. This option is used only if there is a custom setup.
Set Zone Time to Live (TTL)
Step 1: By using Set Zone Time to Live tool TTL Value of records can be updated once in the DNS Zone.
Step 2: TTL is not needed if there are multiple DNS servers. For synchronizing the clusters, select Do not sync changes across the DNS cluster option.
Park a Domain
Park a Domain tool is used to park a domain and create aliases. In the first column, the primary domain has to be selected and in second column, domain that needs the park has to be typed.