Enabling cPHulk on your Dedicated Server
Your server may be open and exposed to the whole Internet, through which many people can access your services like WHM, cPanel, email accounts, and FTP. Brute Force Attack is unauthorized attacks that access all the services through various automatic login attempts with huge possibility as the attacker has a hope of guessing the correct combination to gain access.
The cPHulk Brute Force Attack is given by cPanel and you are allowed to work with the level of Pluggable Authentication Module (PAL) for detecting the failed login attempts in the IP address. When a failed login attempts reaches the number that has been already set, the further failed login attempts are blocked by the cPHulk. At the PAL level, cPHulk protects the server by blocking the IP address. It is safe to blacklist the whole set of IP address (For instance Specific Country). You did not worry that the users from the countries cannot access your services. The access will be denied if they try to login one of these cPanel Core Services.
It is very easy to enable cPHulk Brute Force Attack on your Dedicated Server. Following steps helps you to enable cPHulk.
Step 1 – Login WHM with the username and password as a root user.
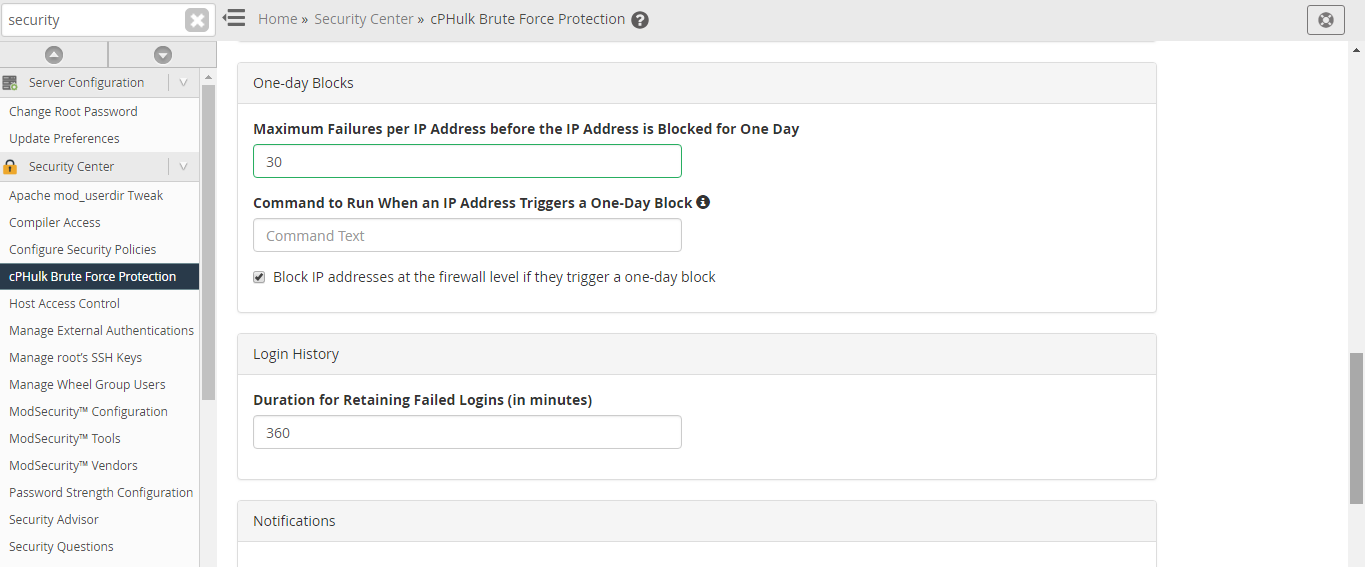
Step 2 – In the search box, type Security. You will get a link for Security center, click on that link.
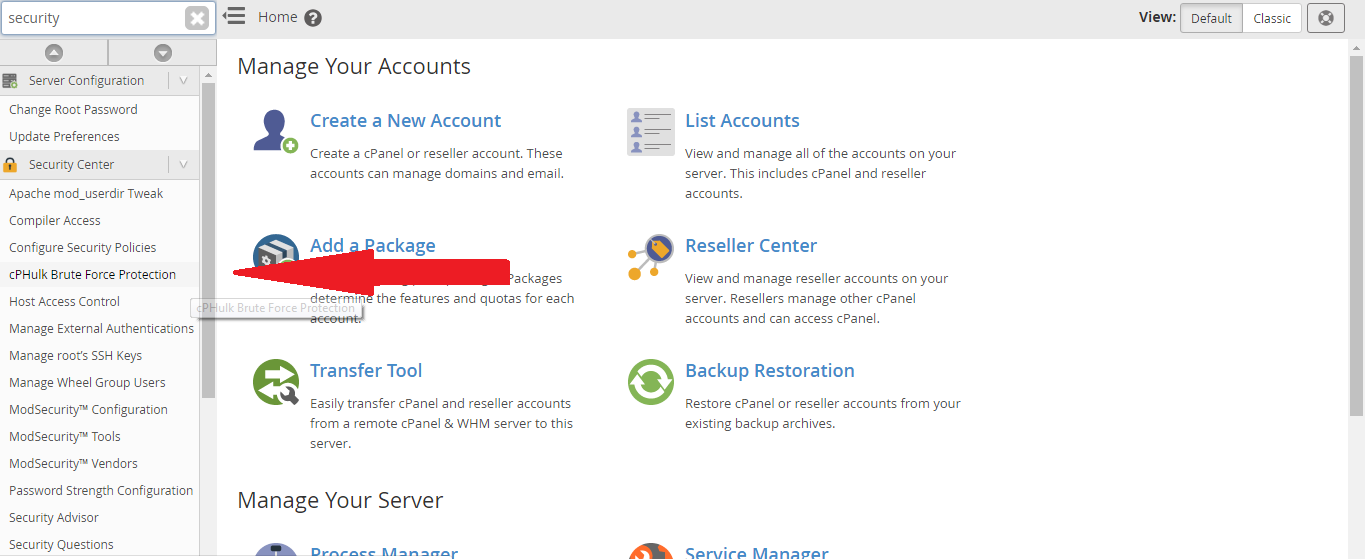
Step 3 – In the security center, click cPHulk Brute Force Protection button.
Step 4 – By default, cPHulk will be disabled. Enable it now by clicking Enable button.
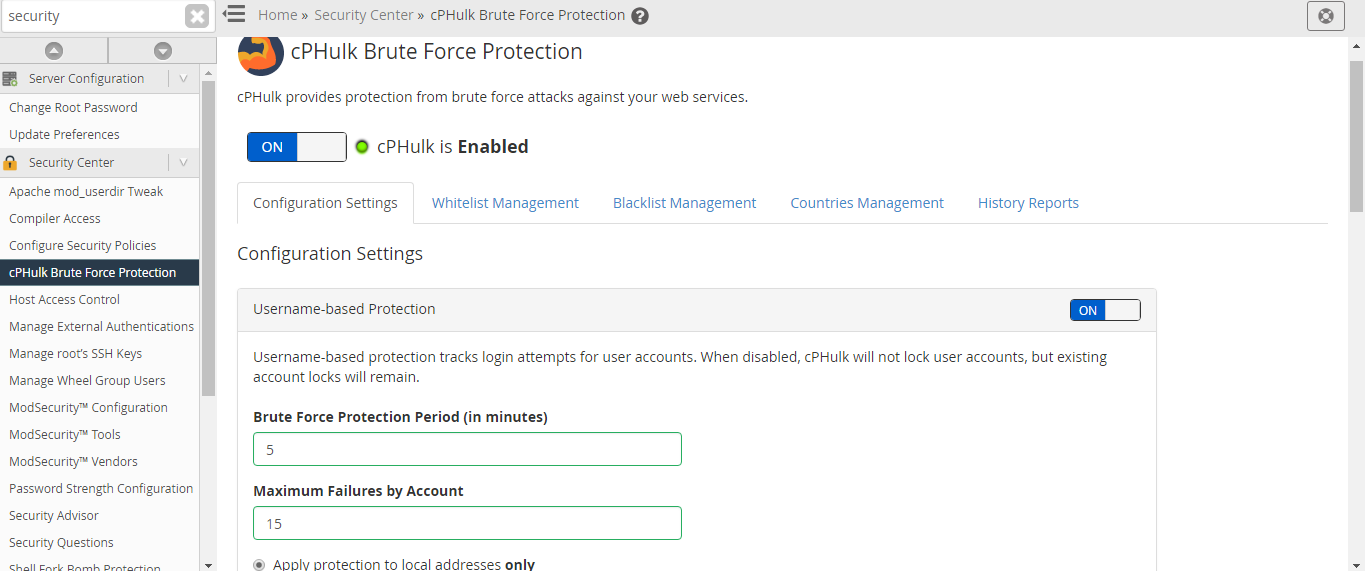
Step 5 – You can make modification in the configuration settings to adjust the handling of cPHulk blocking the IP address. Default options are explained here.
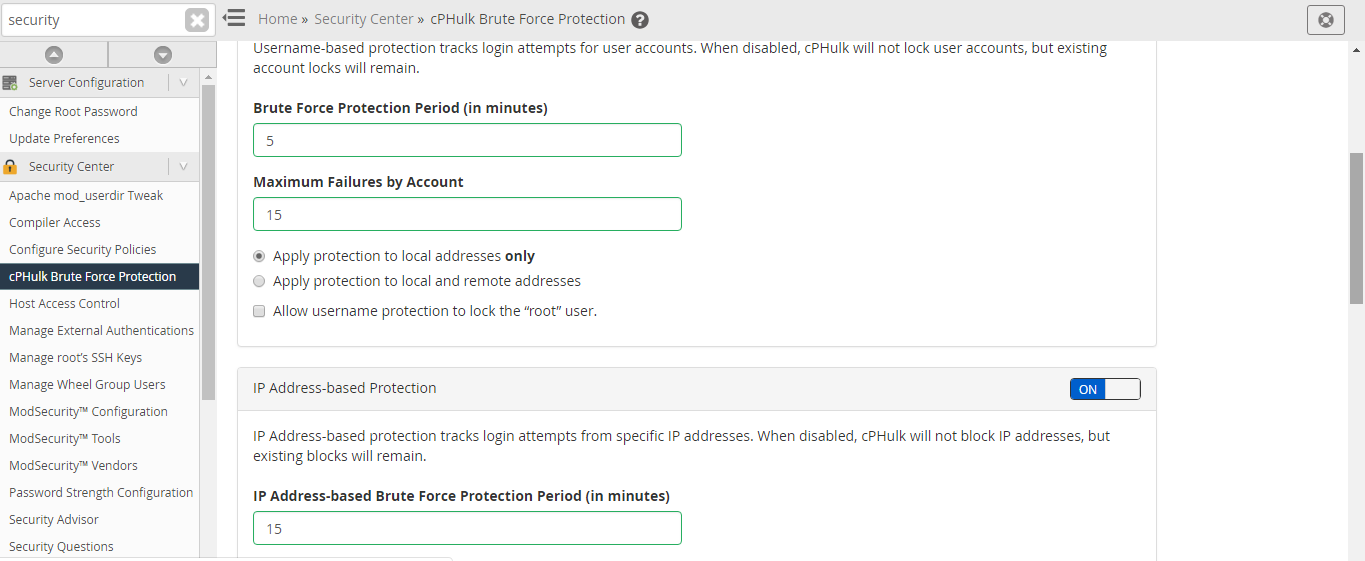
IP Based Brute Force Protection Period in Minutes – To which extent cPHulk will refuse the login attempts made by a specific IP address in minutes.
Brute Force Protection Period in Minutes – To which extent IP address have to hit its maximum failures in minutes to begin blocking.
Maximum Failures by Account – An account should not exceed its limit. If an account reaches its limit, the entire account will refuse additional login attempts.
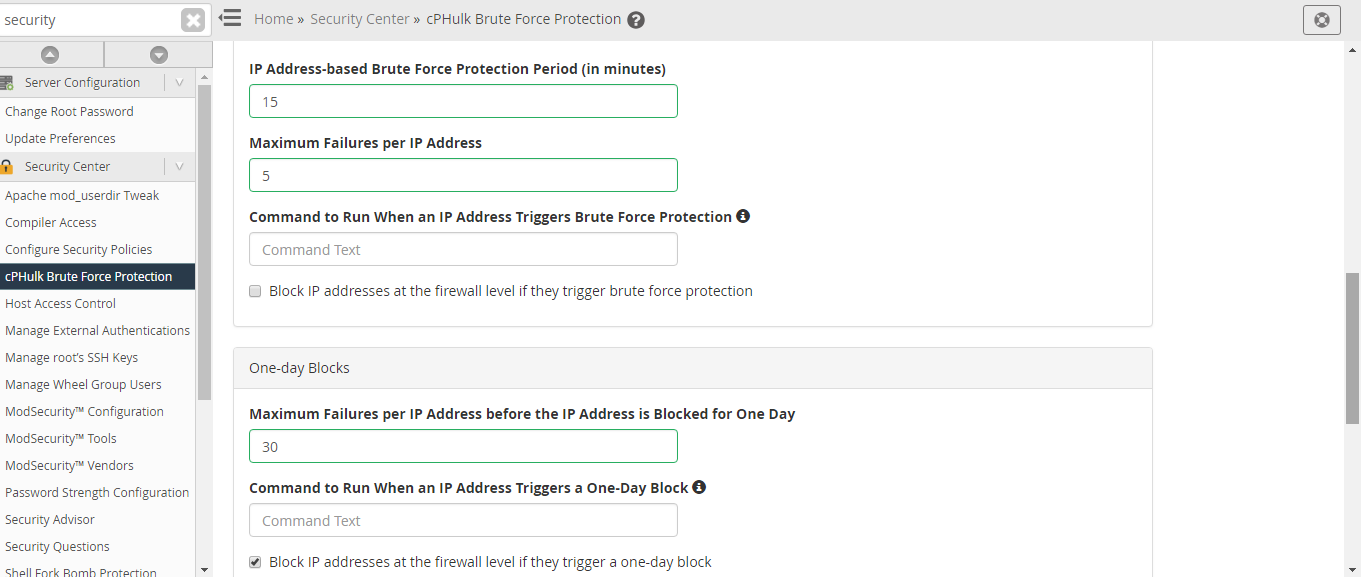
Maximum Failures per IP – If an IP address reaches its limit, the IP address refuses additional login attempts.
Maximum Failures per IP before IP is blocked for Two Weeks Period – If the IP address reaches it limit, the access will be denied for two weeks.
Send Notification Upon Successful Root Login – By default it is disabled, you are allowed to send email to yourself anytime, root login is available from the IP address but not available in your whitelist.
Extend Account Logout Time Upon Additional Authentication Failures – It is enabled by default. When the IP address is blocked and it tries to login continuously, their logout time will be extended each time with every single failure attempts.
Send Notification When Brute Force User is detected – By default, it is disabled. You are allowed to send email to yourself each time when you identify a brute force attack.
Your server may be open and exposed to the whole Internet, through which many people can access your services like WHM, cPanel, email accounts, and FTP. Brute Force Attack is unauthorized attacks that access all the services through various automatic login attempts with huge possibility as the attacker has a hope of guessing the correct combination to gain access.
The cPHulk Brute Force Attack is given by cPanel and you are allowed to work with the level of Pluggable Authentication Module (PAL) for detecting the failed login attempts in the IP address. When a failed login attempts reaches the number that has been already set, the further failed login attempts are blocked by the cPHulk. At the PAL level, cPHulk protects the server by blocking the IP address. It is safe to blacklist the whole set of IP address (For instance Specific Country). You did not worry that the users from the countries cannot access your services. The access will be denied if they try to login one of these cPanel Core Services.
It is very easy to enable cPHulk Brute Force Attack on your Dedicated Server. Following steps helps you to enable cPHulk.
Step 1 – Login WHM with the username and password as a root user.
Step 2 – In the search box, type Security. You will get a link for Security center, click on that link.
Step 3 – In the security center, click cPHulk Brute Force Protection button.
Step 4 – By default, cPHulk will be disabled. Enable it now by clicking Enable button.
Step 5 – You can make modification in the configuration settings to adjust the handling of cPHulk blocking the IP address. Default options are explained here.
IP Based Brute Force Protection Period in Minutes – To which extent cPHulk will refuse the login attempts made by a specific IP address in minutes.
Brute Force Protection Period in Minutes – To which extent IP address have to hit its maximum failures in minutes to begin blocking.
Maximum Failures by Account – An account should not exceed its limit. If an account reaches its limit, the entire account will refuse additional login attempts.
Maximum Failures per IP – If an IP address reaches its limit, the IP address refuses additional login attempts.
Maximum Failures per IP before IP is blocked for Two Weeks Period – If the IP address reaches it limit, the access will be denied for two weeks.
Send Notification Upon Successful Root Login – By default it is disabled, you are allowed to send email to yourself anytime, root login is available from the IP address but not available in your whitelist.
Extend Account Logout Time Upon Additional Authentication Failures – It is enabled by default. When the IP address is blocked and it tries to login continuously, their logout time will be extended each time with every single failure attempts.
Send Notification When Brute Force User is detected – By default, it is disabled. You are allowed to send email to yourself each time when you identify a brute force attack.