In this trending world, without an email nothing is possible. Email and internet is the powerful tool which helps you to gain you up and down. Ofcourse! We have to accept it. All of a sudden – you can send the email to the client but at the same time you can’t receive the emails from the client. You have only sending option and no receiving option. Imagine! How will you handle this technique? Very tough!
No worry! We give you the solution!
First – you have to check some settings in your email. Quota issues, Settings of DNS, email client settings etc. Sometimes, your cPanel may exceed its quota in disk. This would be the reason for your problem “Not receiving the emails”. You can judge 2 option for your issue.
1. Quota issue in Email account.
2. Quote issue in cPanel account.
Quota issues in email account:
Do you know how your emails are getting stored in multiple files? It is done with the help of quota which is assigned uniquely to the email address. It is nothing but disk space known as “Quota”. The quota is assigned whenever you create or edit your email address. It can limit usage or unlimited usage. At some cases, you won’t get mails because the quota may extend its capacity. To sort out this problem you have to increase the space in disk and so you will be fixed with the point.
Quota testing:
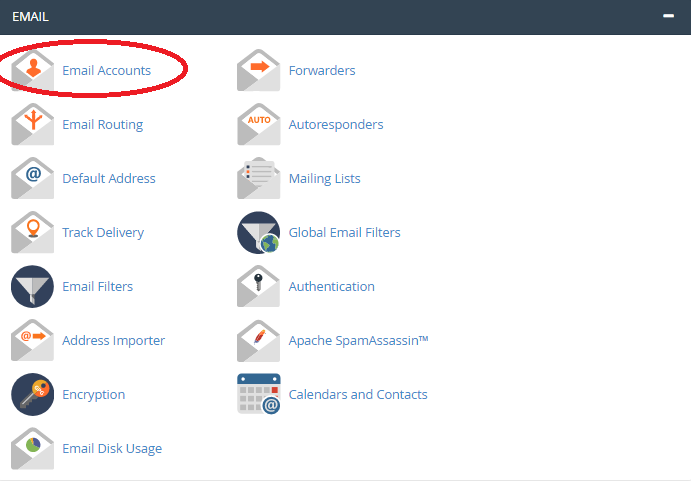
Simply, send the mail in form of question to the email account. If you box mail is full then you will get a bounce back message saying “Disk space have exceeded”. Another option you can check directly in cPanel and just click “Email accounts”. Cross-check the quota usage and you will get the result.
You can also change the quota:
1. Use your credentials to login the cPanel and click the “Email Accounts”.
2. If you have multiple email address – select the one which is in problem.
3. Tap the “change quota”. There is an option to enter your amount of quota or select the unlimited quota.
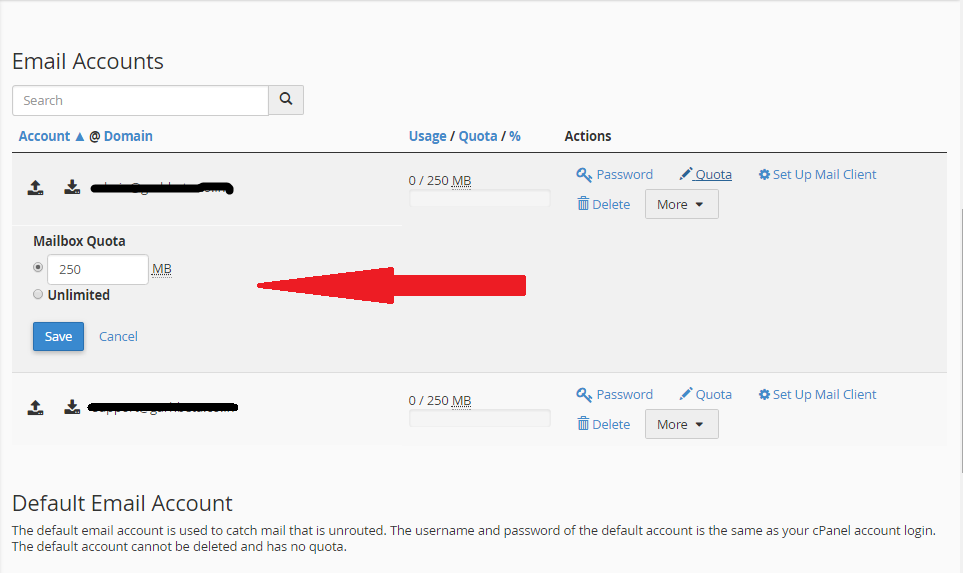
4. Tap the “Change quota”.
Quota issue in cPanel:
Again the cPanel may exceed its count in disk space. It may be another cause. Follow the below steps:
1. Login to the WHM account.
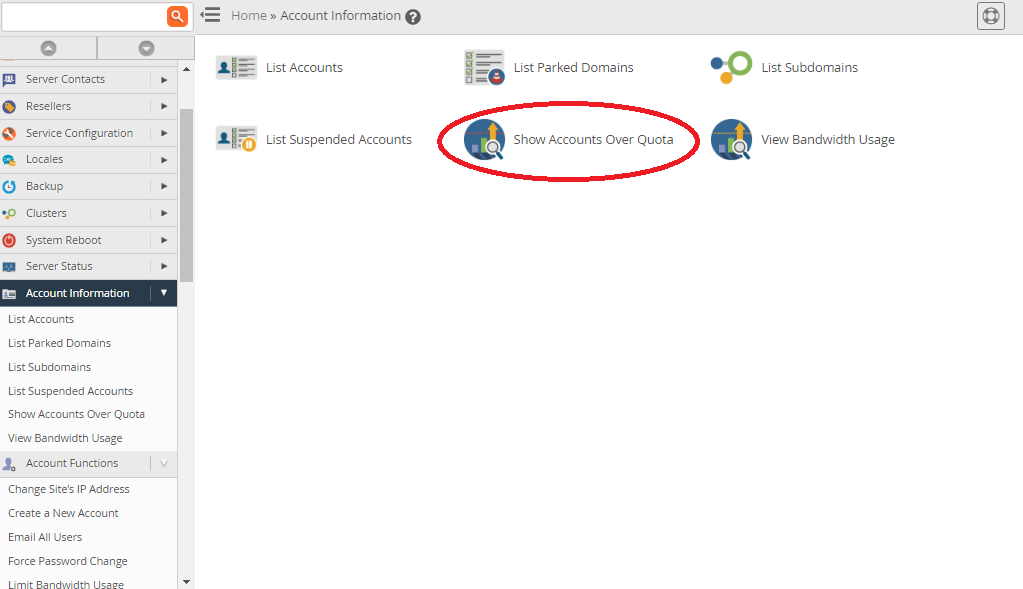
2. At the left site, you will find a menu and select the account information.
3. Now you can choose the “Show accounts over quota”.
4. You can analyze the disk space from there. Checks the disk space have reached its target or not. If yes! You have to modify it.
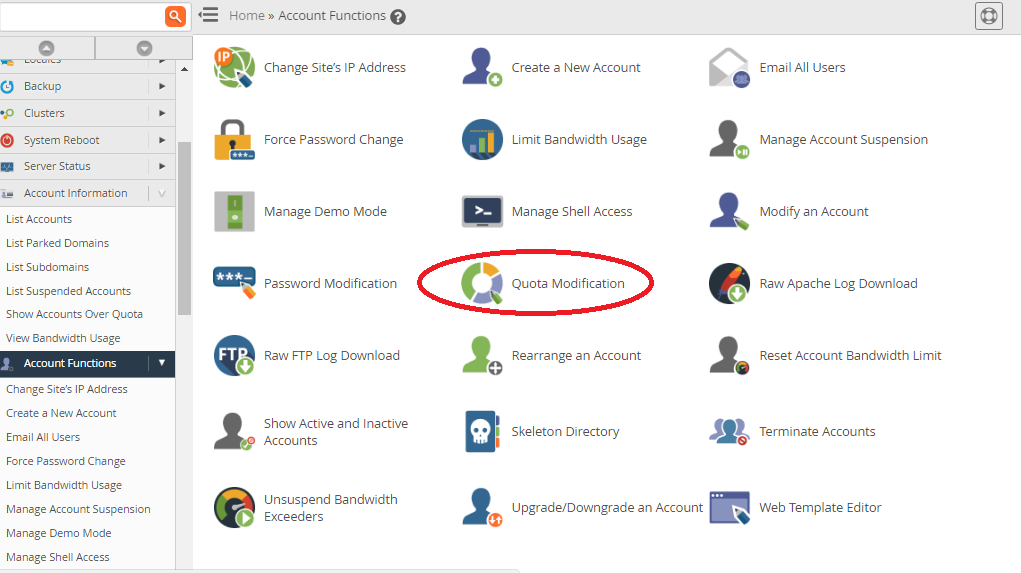
You can increase the quota of disk space by following the below steps:
Login to WHM account >> Account functions >> Quota modifications >> Username >> Modify >> change the quota disk space >> save.
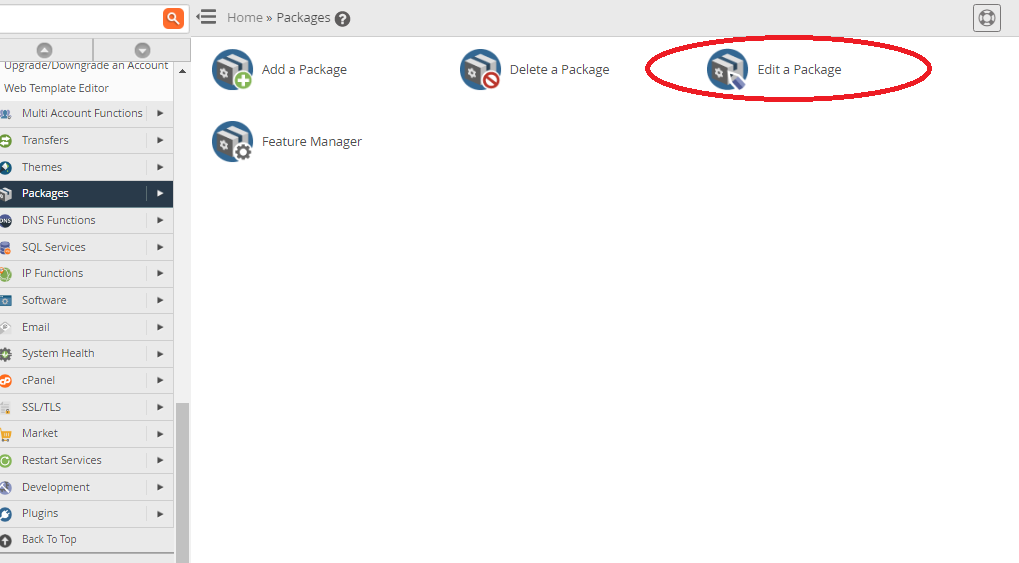
If there are numerous users to change the quota disk space; follow the below steps:
WHM >> packages >> Edit a package >> edit >> save.
Note: You would have some ideas to increase the quota of disk space. Have a pleasant ways to increase your disk space!
No worry! We give you the solution!
First – you have to check some settings in your email. Quota issues, Settings of DNS, email client settings etc. Sometimes, your cPanel may exceed its quota in disk. This would be the reason for your problem “Not receiving the emails”. You can judge 2 option for your issue.
1. Quota issue in Email account.
2. Quote issue in cPanel account.
Quota issues in email account:
Do you know how your emails are getting stored in multiple files? It is done with the help of quota which is assigned uniquely to the email address. It is nothing but disk space known as “Quota”. The quota is assigned whenever you create or edit your email address. It can limit usage or unlimited usage. At some cases, you won’t get mails because the quota may extend its capacity. To sort out this problem you have to increase the space in disk and so you will be fixed with the point.
Quota testing:
Simply, send the mail in form of question to the email account. If you box mail is full then you will get a bounce back message saying “Disk space have exceeded”. Another option you can check directly in cPanel and just click “Email accounts”. Cross-check the quota usage and you will get the result.
You can also change the quota:
1. Use your credentials to login the cPanel and click the “Email Accounts”.
2. If you have multiple email address – select the one which is in problem.
3. Tap the “change quota”. There is an option to enter your amount of quota or select the unlimited quota.
4. Tap the “Change quota”.
Quota issue in cPanel:
Again the cPanel may exceed its count in disk space. It may be another cause. Follow the below steps:
1. Login to the WHM account.
2. At the left site, you will find a menu and select the account information.
3. Now you can choose the “Show accounts over quota”.
4. You can analyze the disk space from there. Checks the disk space have reached its target or not. If yes! You have to modify it.
You can increase the quota of disk space by following the below steps:
Login to WHM account >> Account functions >> Quota modifications >> Username >> Modify >> change the quota disk space >> save.
If there are numerous users to change the quota disk space; follow the below steps:
WHM >> packages >> Edit a package >> edit >> save.
Note: You would have some ideas to increase the quota of disk space. Have a pleasant ways to increase your disk space!