When it comes to uploading data, software codes, or media files to your remote server, FTP is a preferred method for most admins. While there are more intuitive methods like Control Panels, they often restrict the size you can upload. FTP or File Transfer Protocol have no such restrictions (unless explicitly exercised). In this article, we explain how you can create multiple FTP accounts on your Windows Virtual Private Server or Dedicated Server, whichever one you’re using, without control panel.
Steps to Create FTP Accounts in Windows Server
Here are the steps you need to follow to create FTP accounts. The process is almost the same for all Windows versions. So you should have no problem following the tutorial. The steps are:
Steps to Create FTP Accounts in Windows Server
Here are the steps you need to follow to create FTP accounts. The process is almost the same for all Windows versions. So you should have no problem following the tutorial. The steps are:
- Login to the Windows server using the correct credentials. You need to use RDP or Remote Desktop Access for this purpose.
- Once logged in, navigate into this directory: Start >> Administrative Tools >> Server Manager
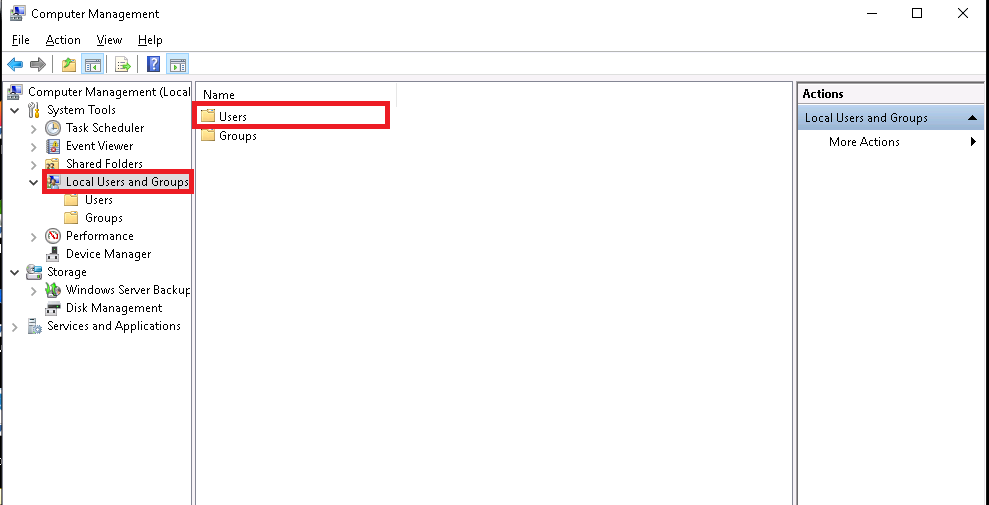
- Inside Server Manager, you need to further go into Configuration >> Local Users and Groups >> Users. This lists all the users you have created for the server
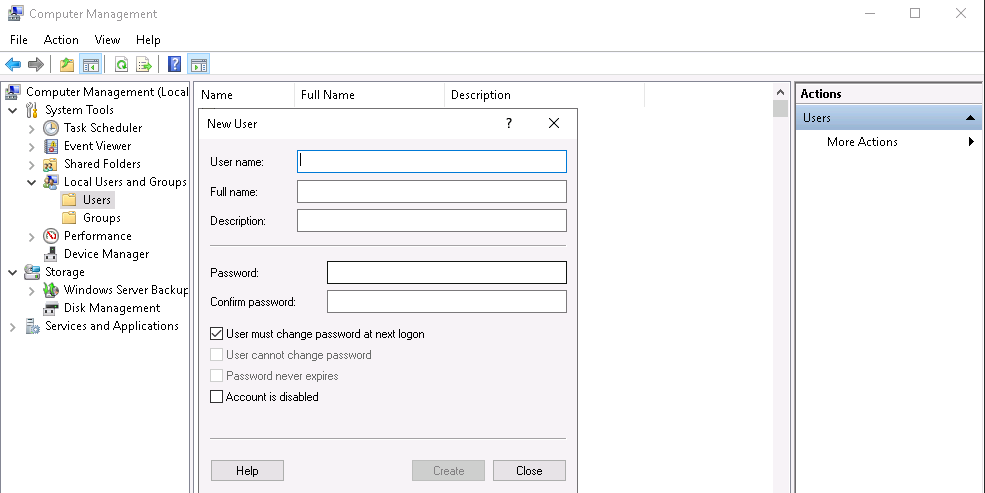
- In the Users section, you’d have to create a new user account that will serve as FTP username. Alternatively, you can use any of the existing users
- The newly-created user will need FTP permissions to transfer files back and forth. For this purpose, open IIS manager and right-click on the “Default FTP Site” option
- Once the Default FTP Site opens, click on the “Add Virtual Directory” option
- You’d need to fill two fields, one is Alias and other is Physical Path. Alias should be the FTP username while Path should be path to virtual directory
- Now open the newly-created FTP website. Under FTP, you’d find the FTP Authorization Rules. Double-click on it to open
- Select All Users and click on Edit to make changes
- You need to tick the Read and Write check boxes and then click on OK to save the changes
- Next, you’re required to open the Windows explorer and navigate into the folder path that stores your web content and files
- Right-click on the root folder and then select the Properties option
- Select the “Security” option and then click on the Edit button. It’d open a panel where you can set permissions for this particular folder
- To allow permission to the newly-created user, click on the Add button
- You’ll also find an “Advanced” option in the panel. Tap on the Find button, which will initiate a Popup window that lists all the users. You need to select the newly-created user
- You need to allow the permission Read, Read & Execute, and List Folder Content to the user
- To apply the changes made, click on Apply and then OK. This will close the wizards of folder properties