Today data privacy is somewhat challenging, especially in internet. Don’t worry. SSL/TLS Certificates protect sensitive data by encryption method. With valid SSL/TLS Certificate, SSL/TLS Certificate is required to protect data in internet. Thus, to provide security with Plesk and Plesk Mail Server, it is highly recommended to go with SSL/TLS Certificates. While you install it, Plesk mail server will be secured automatically with self-signed SSL/TLS Certificate. This will create encrypt connections to Plesk and Plesk Mail Server. If anyone attempts to visit Self-Signed SSL, there will be a warning shown. It is to make one clear that, website is unprotected. In order to avoid this, Secured Plesk and Plesk Mail server is asked to use with SSL Certificate.
Steps to click SSL Certificates from Let’s Encrypt:
One can choose SSL Certificate from “Let’s Encrypt”. It is an open certificate authority. It is a place from which one can buy trusted free SSL Certificates. It is better to get secured Plesk and Plesk Mail Server with SSL/TLS Certificates. When one install the Let’s encrypt extension, check whether Plesk is secured with self-signed certificate and if it is verified as true, a valid SSL/TLS Certificate will get installed. But, in order to make sure that, secured mail server is issued from Let’s Encrypt, follow the steps below,
Note:
In Plesk for Linux, while attempting to secure Plesk, Let’s Encrypt will replace automatic self-signed certificate.
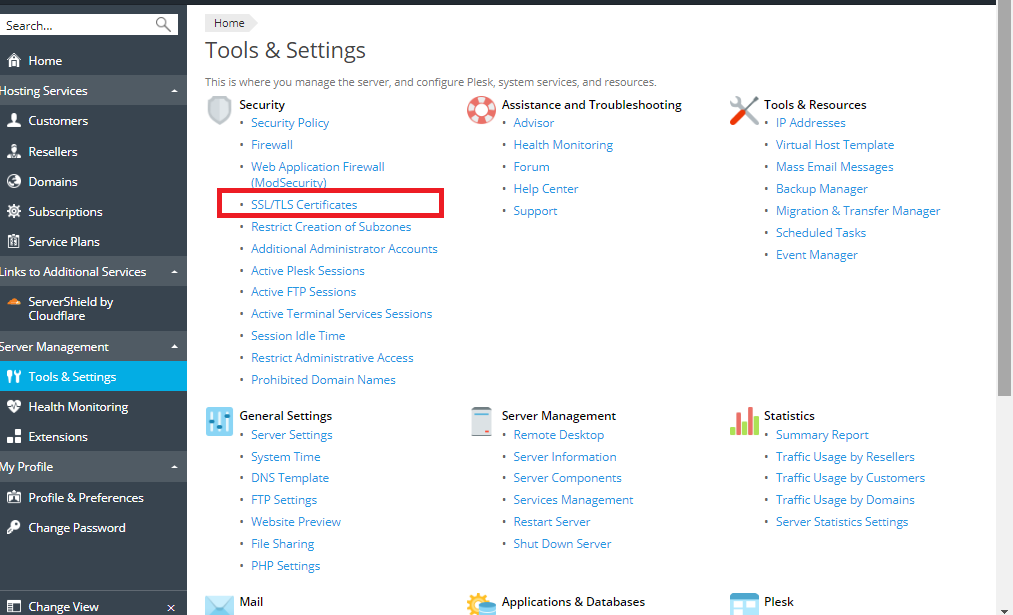
Check Tools and Settings and choose SSL/TLS Certificates.
For Windows, the name of default certificate will be replaced by the name of Let’s Encrypt Certificate, but, it occurs only when reloading the Tools and Settings after visiting TLS/SSL Certificates web page in the browser.
An Alternate Option to Let’s Encrypt:
Like Let’s Encrypt, Plesk can be secured with TLS/SSL Certificate from another Certificate Authority.
Procedure:
Now, a private key will be created from Plesk. Besides, it is also common to see Certificate signing Request.
Find the certificate under “List of Certificates in Server Pool” and click on the name.
Now, copy all content of the CSR Section to the clipboard.
How to Secure Plesk and Mail Server with Self Signed Certificate:
Steps to click SSL Certificates from Let’s Encrypt:
One can choose SSL Certificate from “Let’s Encrypt”. It is an open certificate authority. It is a place from which one can buy trusted free SSL Certificates. It is better to get secured Plesk and Plesk Mail Server with SSL/TLS Certificates. When one install the Let’s encrypt extension, check whether Plesk is secured with self-signed certificate and if it is verified as true, a valid SSL/TLS Certificate will get installed. But, in order to make sure that, secured mail server is issued from Let’s Encrypt, follow the steps below,
- Make sure to install let’s encrypt extension.
- Go to Tools and Settings and choose SSL/TLS Certificates.
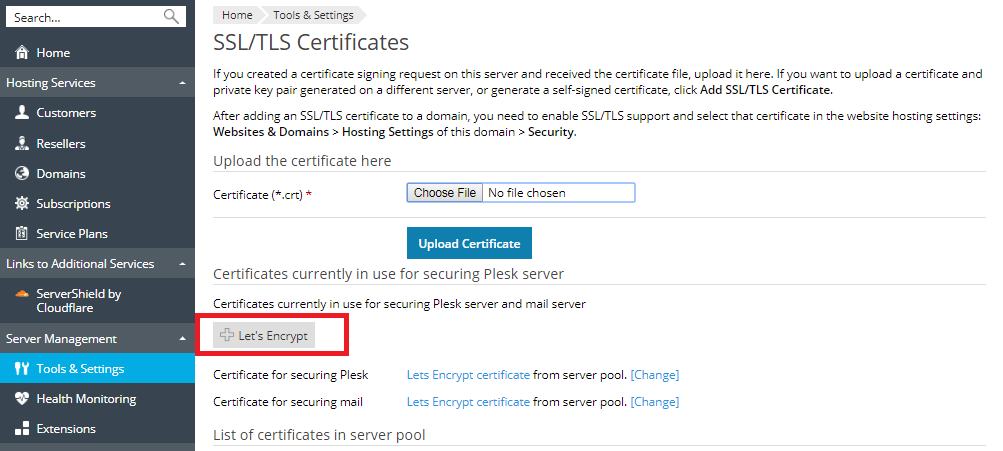
- Click the Let’s Encrypt button.
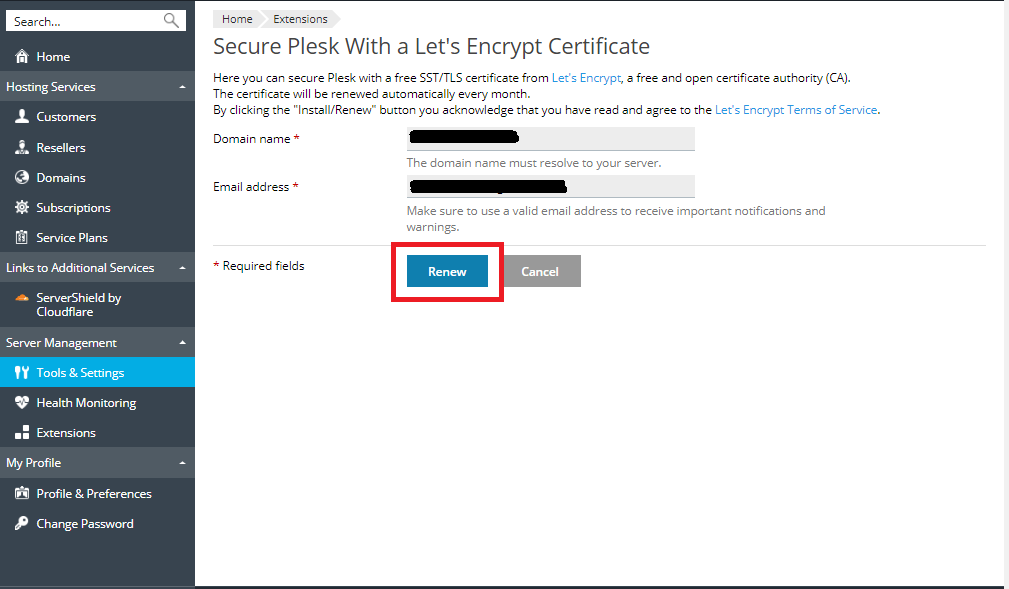
- Ensure that the mail address in the E-Mail address field is correct, because, email address will be used to send some important notifications.
- Click Install.
- At this level, Let’s Encrypt will generate the Certificate which is used to secure Plesk automatically.
- In order to secure the mail server, click on Change Link. It occurs immediately after “Certificate for Securing Mail”.
- Choose the “Let’s Encrypt Certificate”. Then click OK.
Note:
In Plesk for Linux, while attempting to secure Plesk, Let’s Encrypt will replace automatic self-signed certificate.
Check Tools and Settings and choose SSL/TLS Certificates.
For Windows, the name of default certificate will be replaced by the name of Let’s Encrypt Certificate, but, it occurs only when reloading the Tools and Settings after visiting TLS/SSL Certificates web page in the browser.
An Alternate Option to Let’s Encrypt:
Like Let’s Encrypt, Plesk can be secured with TLS/SSL Certificate from another Certificate Authority.
Procedure:
- After visiting Tools and Settings Option, choose SSL/TLS Certificates and click “ADD” button.
- Give the details, especially, which are marked up with Asterisk,
- Certificate Name
- Bits
- Domain Name
Now, a private key will be created from Plesk. Besides, it is also common to see Certificate signing Request.
Find the certificate under “List of Certificates in Server Pool” and click on the name.
Now, copy all content of the CSR Section to the clipboard.
How to Secure Plesk and Mail Server with Self Signed Certificate:
- Go to Tools and Settings and visit SSL/TLS Certificates and click Add button.
- Fill up the fields like Certificate Name, Bits and Domain.
- As all of them are given, click Self-Signed.Plesk will generate certificate and display it under List of Certificates.
- In order to secure Plesk, click on the link next appears to “Certificate for securing Plesk” and choose the certificate and click OK.