CPanel is the online website hosting control panel and it is Linux based. GUI and automation tools are used for simplifying the website hosting process. cPanel functions are virtual private server or dedicated server. It cannot be uninstalled easily and the server has to be reformatted for installation. One have to transfer the website data to another server when the host performance is bad or charge is high. In that situation the all the data needed to be downloaded and uploaded to a new server or professionals has to be appointed to do the service.
CPanel has a website backup tool built in it which helps in transferring all the data to new server. The files don’t want to be downloaded or uploaded manually, all the MySQL files and data are transferred to the server automatically.
Old Server cPanel Account:
First of all login the cPanel of the old server domain account. WHM login is made for the new server for creating the same domain in the new server. The following step has to be done in the old server cPanel account.
Generate backup button is selected to compress and transfer the data to new server. A notification mail is sent to the user after the completion of backup process.
New Server cPanel Account:
CPanel has a website backup tool built in it which helps in transferring all the data to new server. The files don’t want to be downloaded or uploaded manually, all the MySQL files and data are transferred to the server automatically.
Old Server cPanel Account:
First of all login the cPanel of the old server domain account. WHM login is made for the new server for creating the same domain in the new server. The following step has to be done in the old server cPanel account.
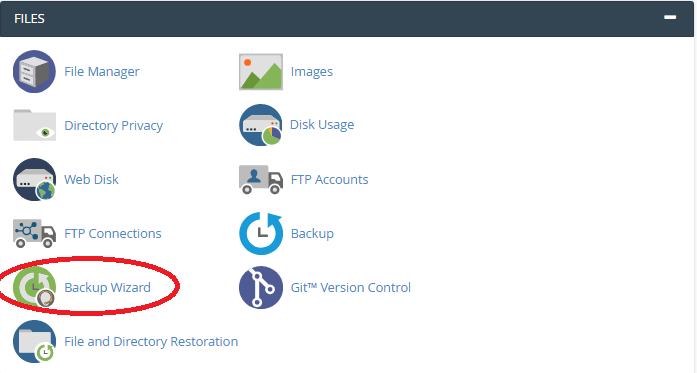
- First of all the old cPanel account has to be logged in, next Backup Wizard icon is selected.
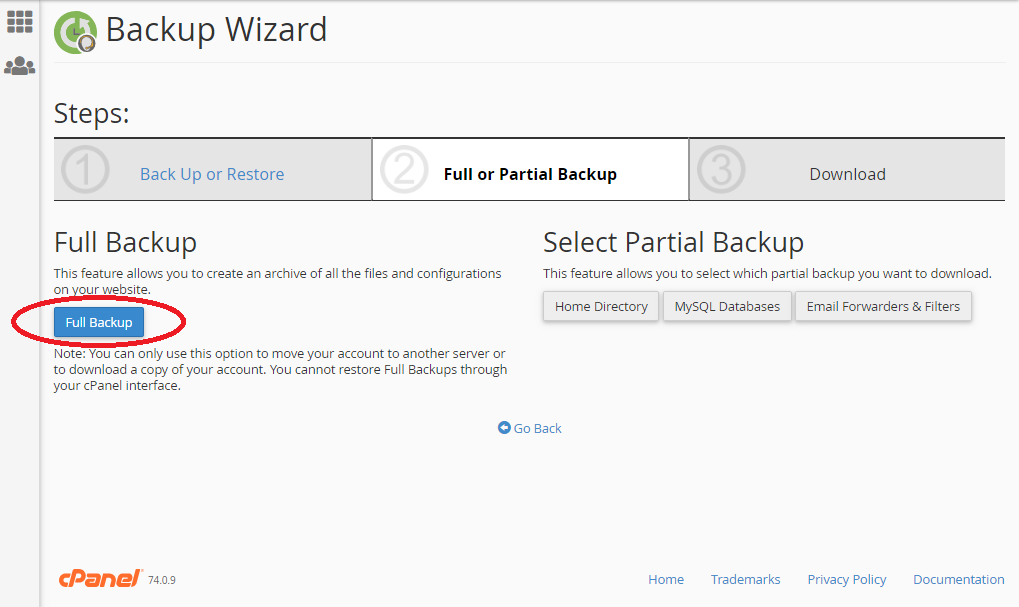
- Next page appears, in that page select Full Backup button.
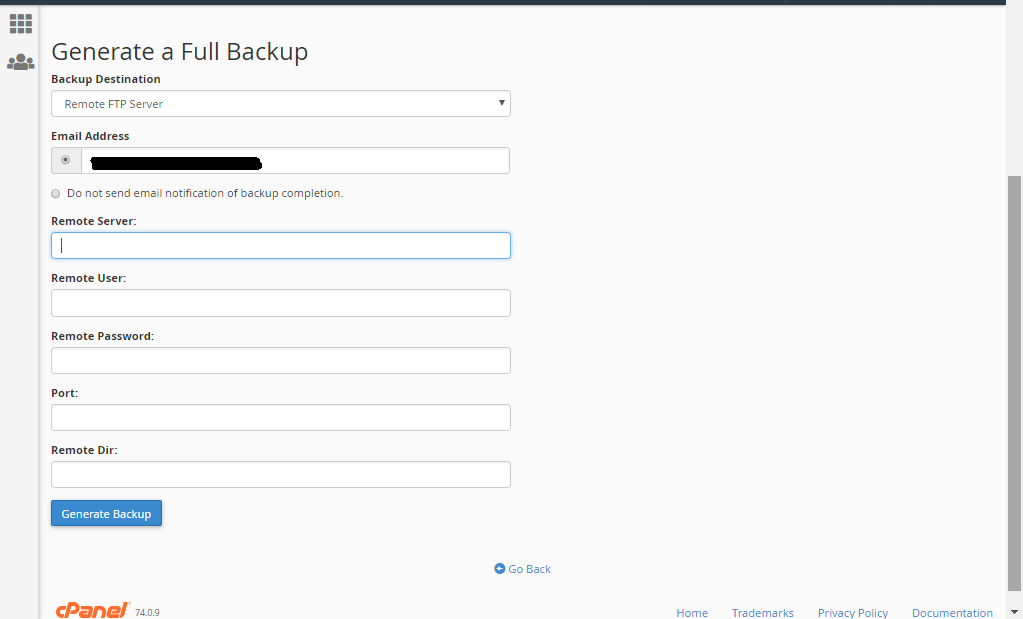
- New page will be opened and this page is used to set up the file transfer.
- Backup Destination should be selected as Remote FTP Server.
- In the Email address, mail address of the person has to be entered. A notification is sent to that email address after the completion of the file transfer/backup.
- In the Remote Server option, enter the IP of the new server.
- In the Remote User option, enter the username of the new cPanel server account.
- In the Remote Password option, the password of the new cPanel server account has to be given.
- In the Port option, port number 21 has to be selected. It is the default FTP port number.
- The directory where the data needed to be transferred has to be mentioned in Remote Dir option.
New Server cPanel Account:
- New cPanel account is logged in and the steps given below are followed,
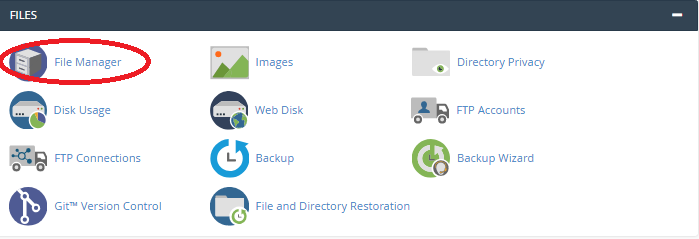
- After finishing the backup, File Manager icon is selected.
- In the File Manager ZIP File is seen. It contains all the files from the old server. Now the ZIP file is selected and Extract button from the Toolbar is clicked.
- Extract File button is clicked in the window. For the ZIP file extraction default values are used.
- After extracting the ZIP file, a directory having the same name of the ZIP file will be seen.
- The Directory is opened and the sub directory “homedir” is navigated.
- In the homedir, a subdirectory name “public_html” will be created.
- Contents in the “public_html” is selected and moved using the Move tool.
- A pop-up menu is appear, in that the target location for moving the files has to be specified.
- All the files in the “public_html” sub directory will move to the root “public_html” root document. The file is transferred now. As the file is moved to “public_html” root directory, the ZIP file can be deleted now.