The most effective method to flush WordPress caching plugins
It is safe to say that you are attempting to change something for WordPress however changes don't make a difference? For instance, you just included another picture, altered your topic or fixed a grammatical mistake in a blog yet can't see the progressions toward the front?
There is an incredible possibility this issue is brought about by caching plugins of WordPress.
Kind of plugins effect on loading time of the site by producing server-side WordPress blog cache. In any case, here and there serving a stored duplicate of the site can cause burden, particularly in the event that you need to apply changes for your blog.
As its name indicates that caching plugin is one of the site enhancement techniques that accelerate the website loading time. It is possible because of a static duplicate copy of a dynamic website to overcome the time to render by the server.
This is your responsibility to clear the cache of kind of plugins as it might show the old version of the website to your guests/visitors and you too.
In this instructional exercise, you will figure out how to clear the WordPress cache by using the most important caching plugins.
If your website contains the W3 Total Cache plugin, you are able to clear all the cache by using a few steps:
1. First, you need to log in to Admin Dashboard of WordPress by using the correct username and password.
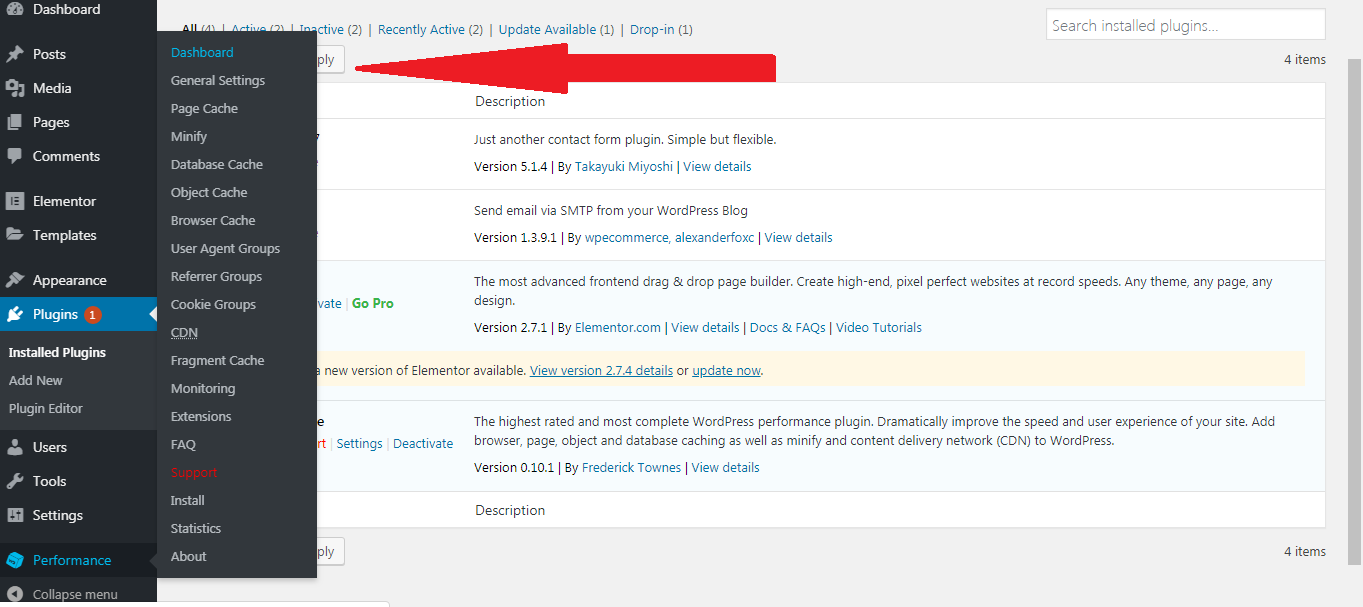
2. Now you need to go ahead and click on Performance which is inside the Dashboard.
See the below image which will assist you to understand better.
3. Now, you need to go to "Empty all caches" option and click on it.
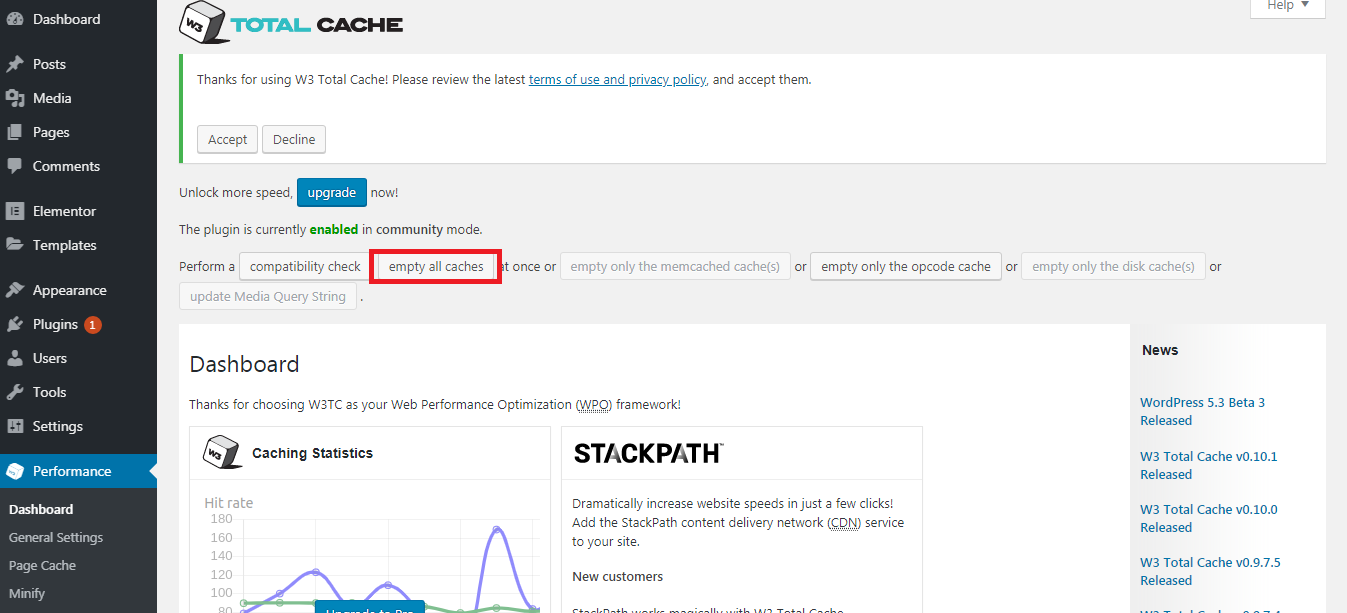
4. You are able to see the following message “cache has been successfully emptied" if you have followed all above-given instruction.
WP Super Cache
If your website has WP Super Cache plugin, so follow the below steps to clear the cache:
1. The first step is the same as you have done in the above means you need to log in Admin Dashboard of the WordPress by using correct username and password.
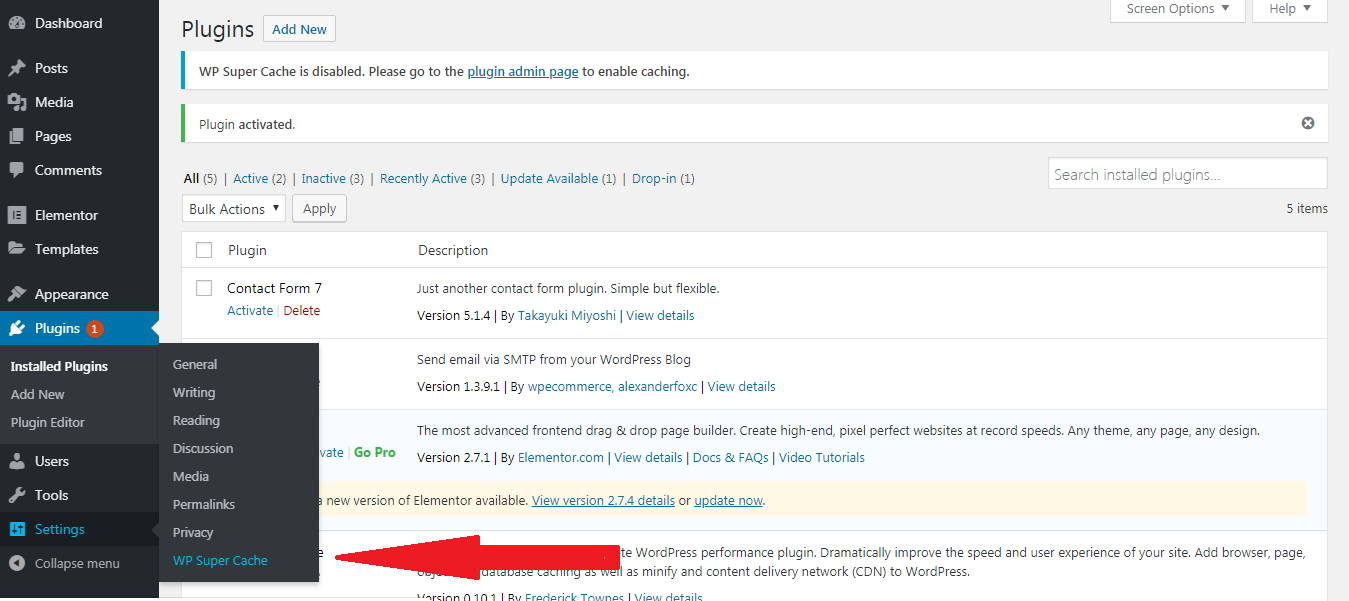
2. Second, you need to go ahead and click on settings and after that click on WP Super Cache option.
3. Now you are able to see the "Contents" option in menu tab, you need to click on it.
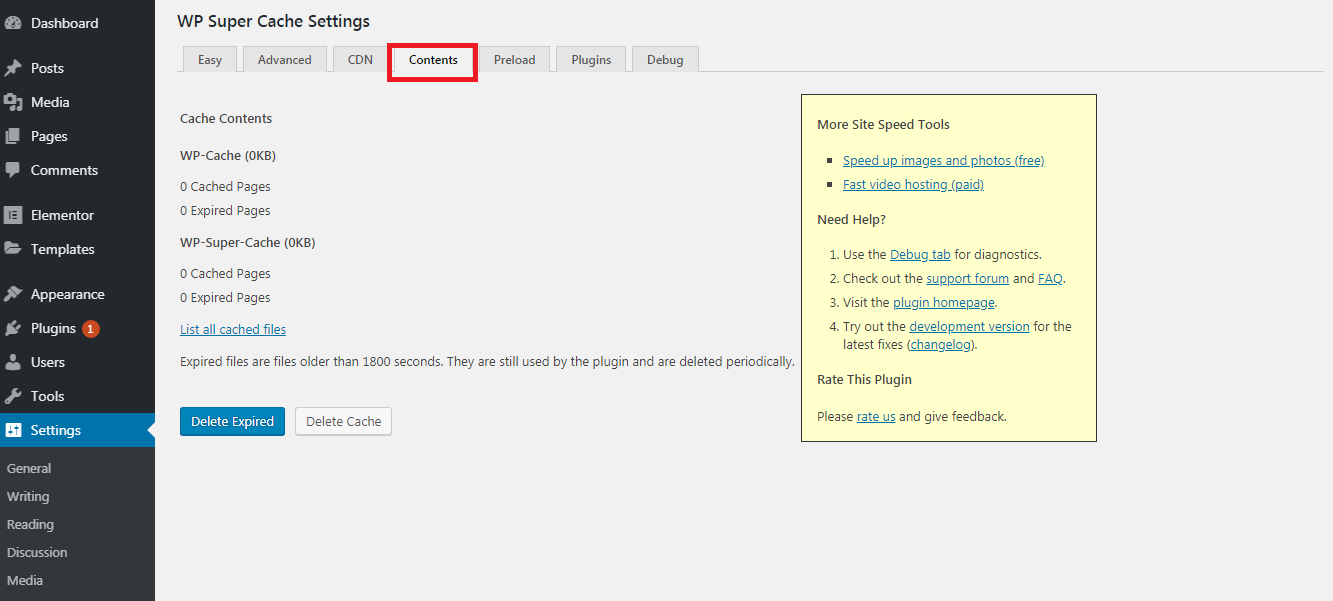
4. Here you will have the option to see the condition of your cached information and which is generated the last time.
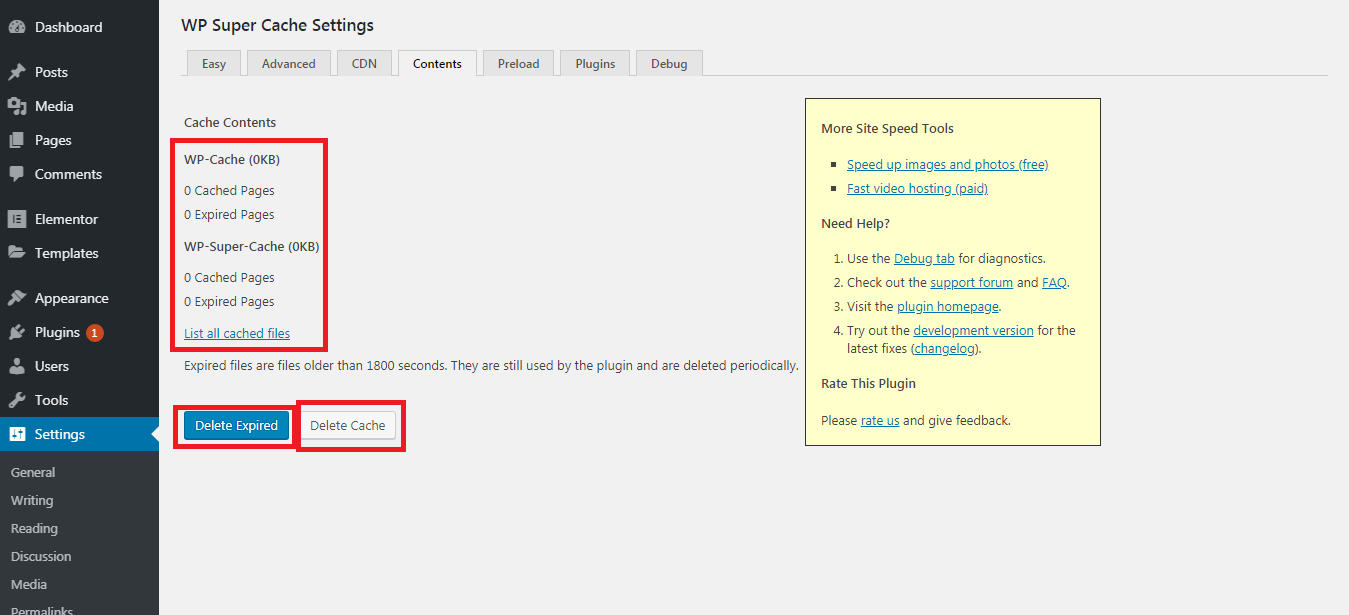
If you click on the List of all cached files option so you will be shown the files list which is recently in the cache.
If you want to delete all the expired file cache so you need to click on the delete expired button which will delete or clear all cache.
WP Fastest Cache
If you are dealing with WP Fastest Cache plugin so you have to follow these steps to clear the cache:
1. Obviously first step is the same as we are doing with the above plugin because to perform any activity, we just need to login into Admin Dashboard of WordPress website.
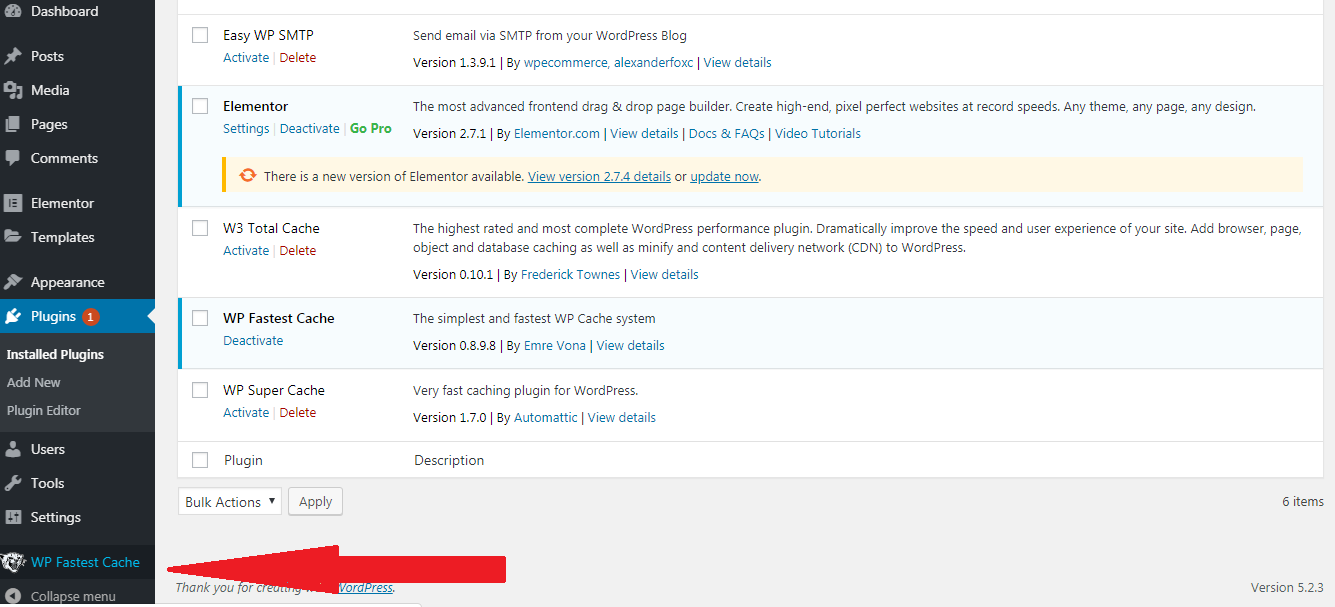
2. Now you need to click on WP Fastest Cache option as you can see on below image.
3. Go to the option Delete Cache.

4. Now you need to go one step ahead and click on the "Delete Cache and Minified CSS/JS" or "Delete Cache" button to perform the action
5. You will get a message "All cache files have been deleted " if you have followed all the steps correctly and now your cache is cleared.
It is safe to say that you are attempting to change something for WordPress however changes don't make a difference? For instance, you just included another picture, altered your topic or fixed a grammatical mistake in a blog yet can't see the progressions toward the front?
There is an incredible possibility this issue is brought about by caching plugins of WordPress.
Kind of plugins effect on loading time of the site by producing server-side WordPress blog cache. In any case, here and there serving a stored duplicate of the site can cause burden, particularly in the event that you need to apply changes for your blog.
As its name indicates that caching plugin is one of the site enhancement techniques that accelerate the website loading time. It is possible because of a static duplicate copy of a dynamic website to overcome the time to render by the server.
This is your responsibility to clear the cache of kind of plugins as it might show the old version of the website to your guests/visitors and you too.
In this instructional exercise, you will figure out how to clear the WordPress cache by using the most important caching plugins.
- W3 Total Cache
- WP Super Cache
- WP Fastest Cache
If your website contains the W3 Total Cache plugin, you are able to clear all the cache by using a few steps:
1. First, you need to log in to Admin Dashboard of WordPress by using the correct username and password.
2. Now you need to go ahead and click on Performance which is inside the Dashboard.
See the below image which will assist you to understand better.
3. Now, you need to go to "Empty all caches" option and click on it.
4. You are able to see the following message “cache has been successfully emptied" if you have followed all above-given instruction.
WP Super Cache
If your website has WP Super Cache plugin, so follow the below steps to clear the cache:
1. The first step is the same as you have done in the above means you need to log in Admin Dashboard of the WordPress by using correct username and password.
2. Second, you need to go ahead and click on settings and after that click on WP Super Cache option.
3. Now you are able to see the "Contents" option in menu tab, you need to click on it.
4. Here you will have the option to see the condition of your cached information and which is generated the last time.
If you click on the List of all cached files option so you will be shown the files list which is recently in the cache.
If you want to delete all the expired file cache so you need to click on the delete expired button which will delete or clear all cache.
WP Fastest Cache
If you are dealing with WP Fastest Cache plugin so you have to follow these steps to clear the cache:
1. Obviously first step is the same as we are doing with the above plugin because to perform any activity, we just need to login into Admin Dashboard of WordPress website.
2. Now you need to click on WP Fastest Cache option as you can see on below image.
3. Go to the option Delete Cache.
4. Now you need to go one step ahead and click on the "Delete Cache and Minified CSS/JS" or "Delete Cache" button to perform the action
5. You will get a message "All cache files have been deleted " if you have followed all the steps correctly and now your cache is cleared.