Steps to setup Wordpress contact form using EasyWP
What is contact form?
There was a usual mechanism called internet surfing. When a user needs something he surfs in internet; he used to visit many websites and select one as a priority. Then, he needs to contact the website proprietor or customer support to enquire about his need. Few website has a contact number and few not. In this case, one has to contact the customer support team of the respective website in way of contact form.
In this contact form, you no need to send your email address it’s just an enquiry form where it acts as the intermediate between you and the website team. So, creating a contact form is not a big deal but when it comes to WordPress it assumes few steps to be clear.
Let us see how to setup contact form 7 in WordPress using EasyWP:
Step 1: First step will be login. Enter your username and password so that you can enter into WordPress panel.
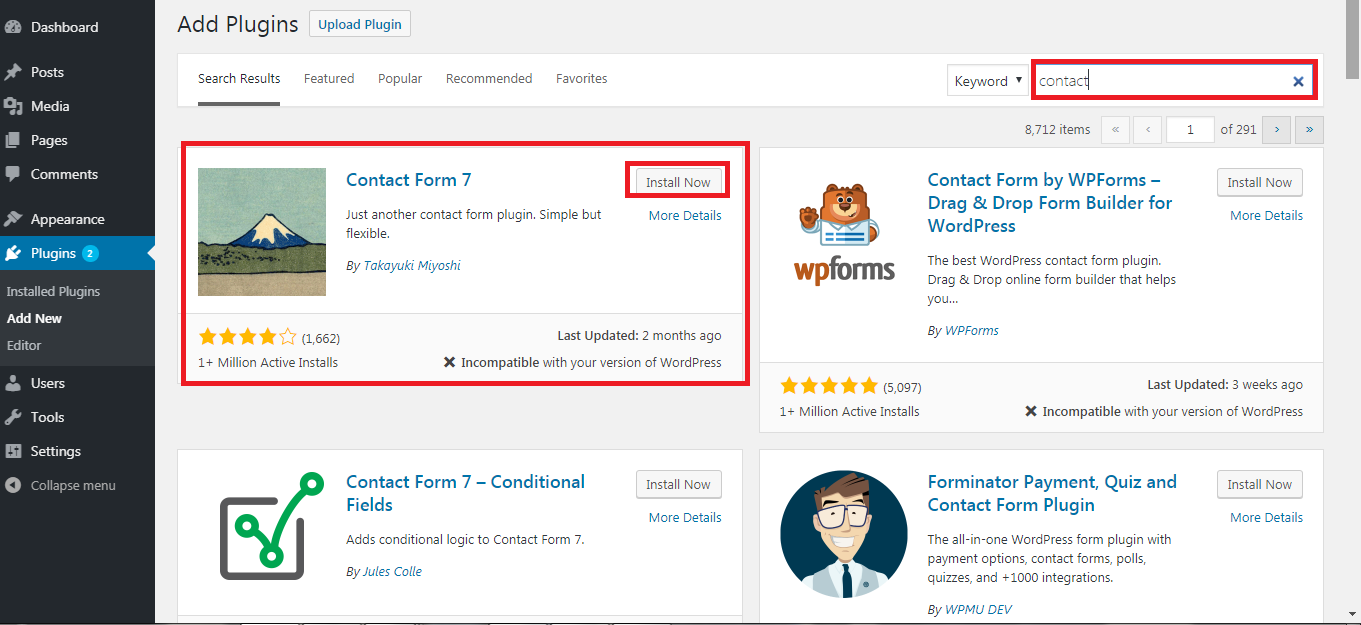
Step 2: Search for “plugin” and from that choose the option “add new”. In add new option, you can search whatever you need. Now, our need is to get contact form 7. Type contact form 7 and it reflects on the screen.
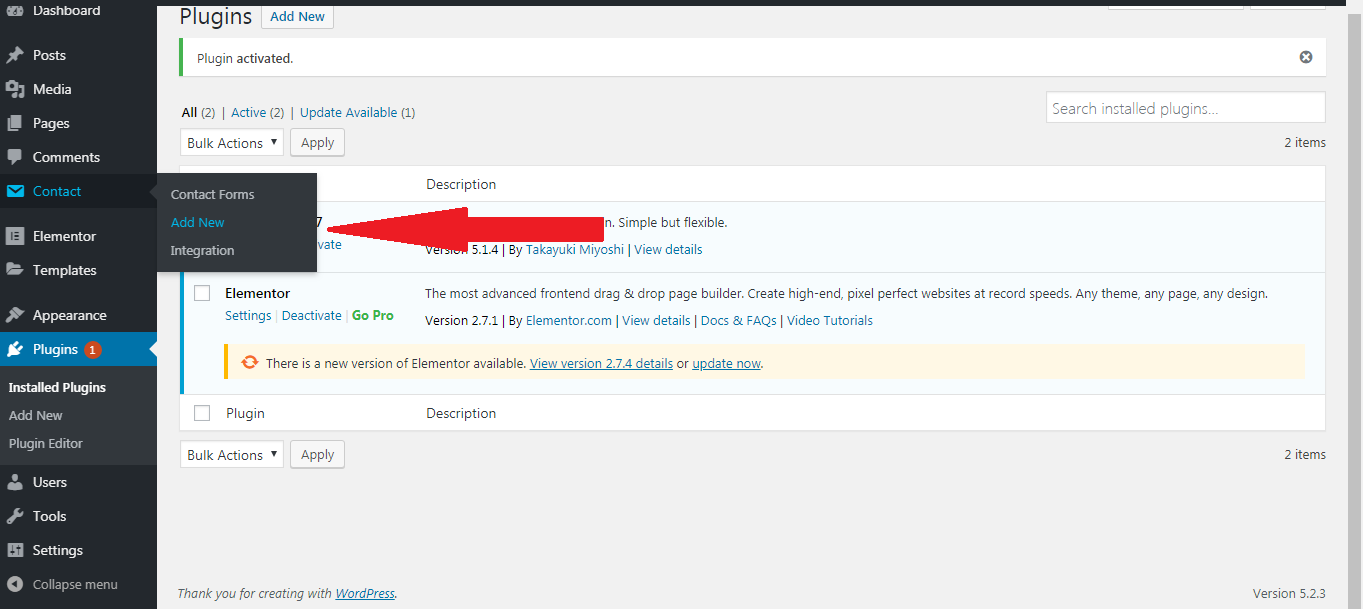
Step 3: You have a button called “install now”. After installation, activate the plugin and in your WordPress dashboard contact form 7 listed in. Click on the contact form and then tap on the option add new.
Step 4: In add new page, there are four tabs such as form, mail, message and additional settings. Select first tab and start processing on the form tab.
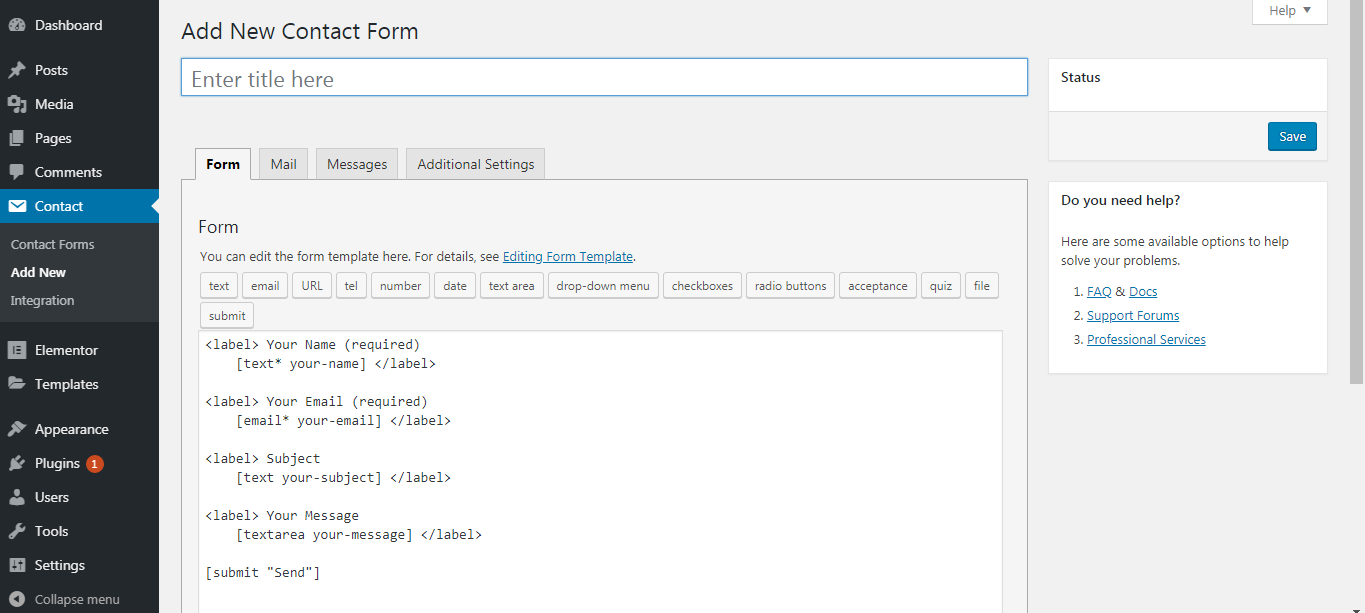
Step 5: You can set the title for your contact form. Don’t worry it won’t visible to others. So, you can use whatever title you wish. Right now, there will be default fields such as Name, email, subject and message. Finally, click on the submit button.
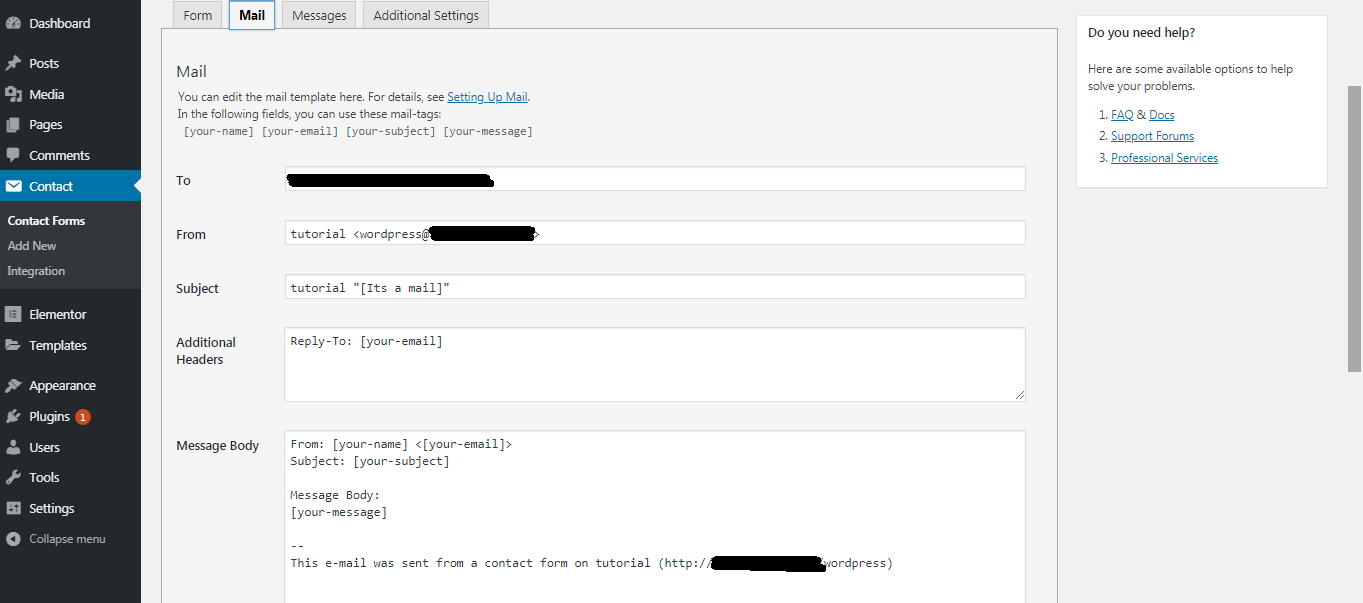
Step 6: Now, select second tab “mail”. There, you can see few fields such as to, from, subject, additional headers and message body.
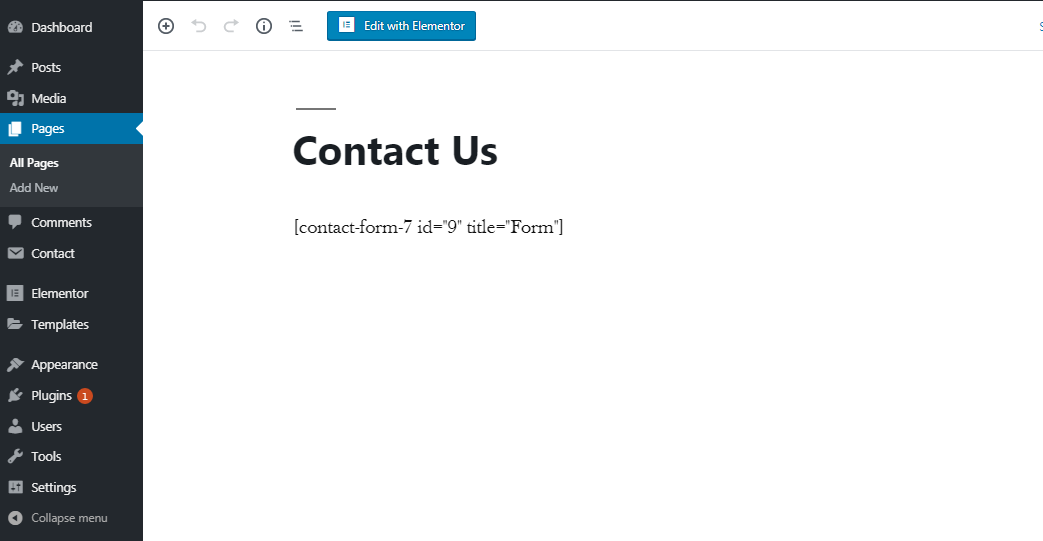
Step 7: Once, if you entered all details click on save button. You will get a line code just copy paste into the page where you have to fetch the contact form. Click on update and now, the contact form 7 will be displayed in your website.
Steps: 8 After that you will get a code, you have to copy that code and paste on your page.

Step: 9 Now copy that code paste it.
Configuration of WordPress SMTP:
Step 1: Login to WordPress account and click on the plugin option. From the plugin option choose add new and then easyWP SMTP.
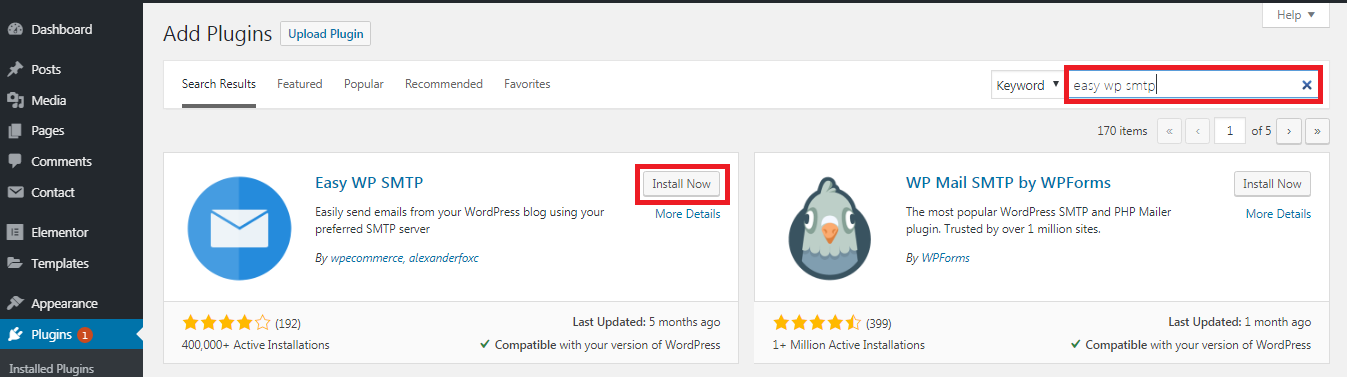
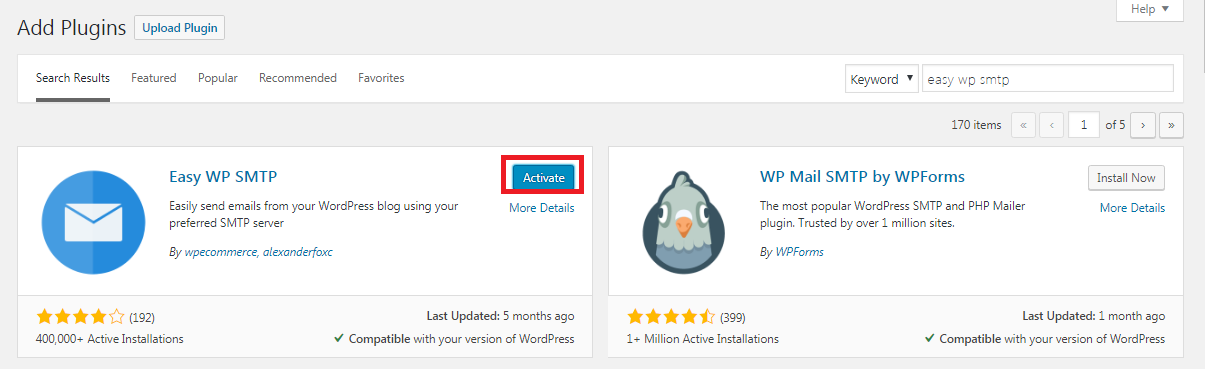
Step 2: Install and activate the easyWP SMTP.
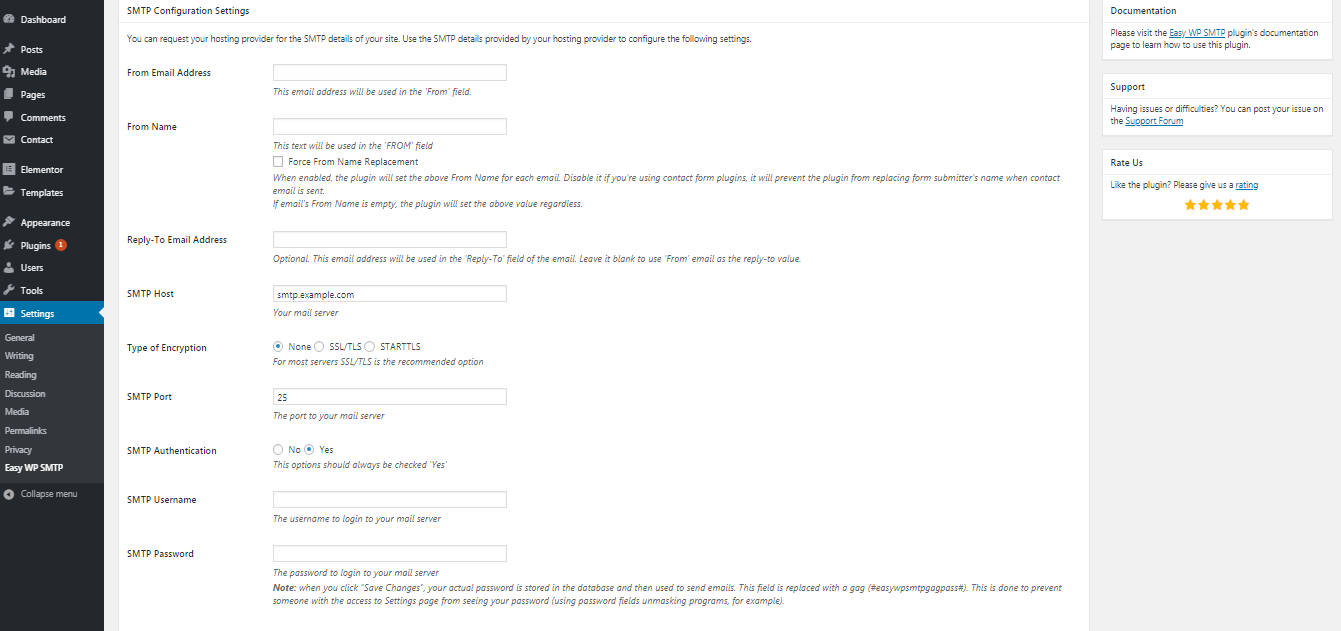
It will ask you to fill details such as from email address, from name, SMTP host, type of encryption, SMTP port, SMTP authentication, SMTP username and SMTP password.
Step 3: Save the process and go for testing. Test email >> settings >> EasyWP SMTP. Fill out fields and click on send test email.
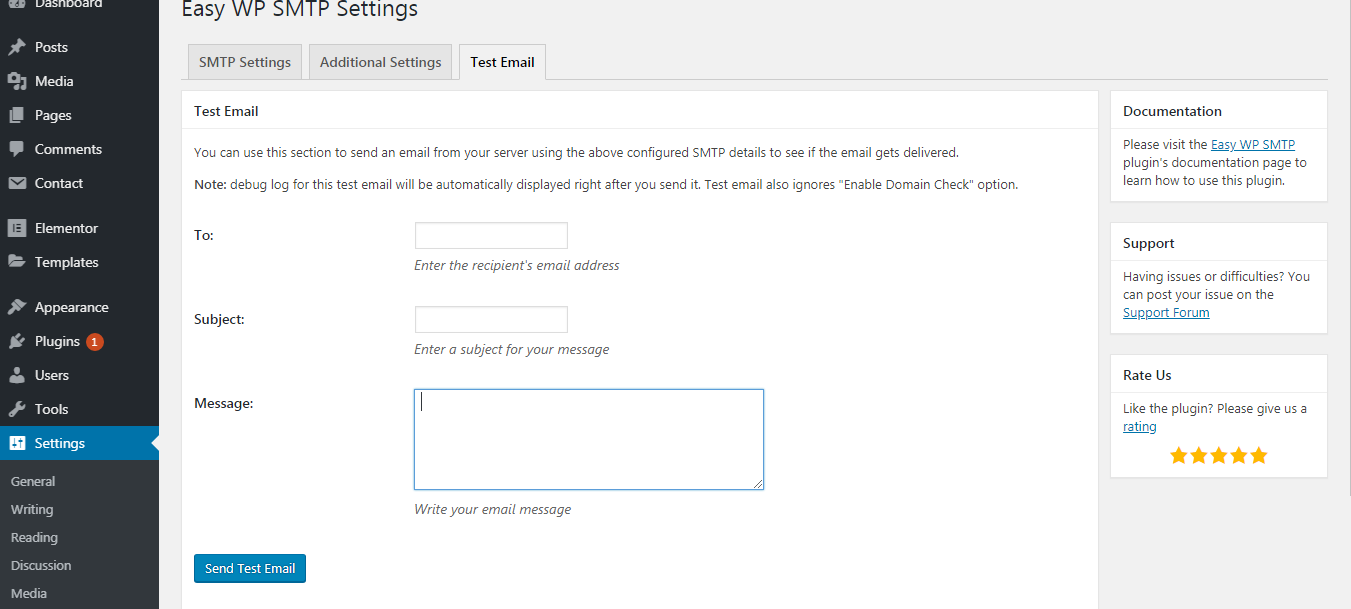
Crosscheck whether you got email successfully. That’s it!
What is contact form?
There was a usual mechanism called internet surfing. When a user needs something he surfs in internet; he used to visit many websites and select one as a priority. Then, he needs to contact the website proprietor or customer support to enquire about his need. Few website has a contact number and few not. In this case, one has to contact the customer support team of the respective website in way of contact form.
In this contact form, you no need to send your email address it’s just an enquiry form where it acts as the intermediate between you and the website team. So, creating a contact form is not a big deal but when it comes to WordPress it assumes few steps to be clear.
Let us see how to setup contact form 7 in WordPress using EasyWP:
Step 1: First step will be login. Enter your username and password so that you can enter into WordPress panel.
Step 2: Search for “plugin” and from that choose the option “add new”. In add new option, you can search whatever you need. Now, our need is to get contact form 7. Type contact form 7 and it reflects on the screen.
Step 3: You have a button called “install now”. After installation, activate the plugin and in your WordPress dashboard contact form 7 listed in. Click on the contact form and then tap on the option add new.
Step 4: In add new page, there are four tabs such as form, mail, message and additional settings. Select first tab and start processing on the form tab.
Step 5: You can set the title for your contact form. Don’t worry it won’t visible to others. So, you can use whatever title you wish. Right now, there will be default fields such as Name, email, subject and message. Finally, click on the submit button.
Step 6: Now, select second tab “mail”. There, you can see few fields such as to, from, subject, additional headers and message body.
Step 7: Once, if you entered all details click on save button. You will get a line code just copy paste into the page where you have to fetch the contact form. Click on update and now, the contact form 7 will be displayed in your website.
Steps: 8 After that you will get a code, you have to copy that code and paste on your page.
Step: 9 Now copy that code paste it.
Configuration of WordPress SMTP:
Step 1: Login to WordPress account and click on the plugin option. From the plugin option choose add new and then easyWP SMTP.
Step 2: Install and activate the easyWP SMTP.
It will ask you to fill details such as from email address, from name, SMTP host, type of encryption, SMTP port, SMTP authentication, SMTP username and SMTP password.
Step 3: Save the process and go for testing. Test email >> settings >> EasyWP SMTP. Fill out fields and click on send test email.
Crosscheck whether you got email successfully. That’s it!