Steps to create custom error pages in Plesk
Custom page error comes under the category of runtime error. Based on the configuration of the website the custom page acts as the interface to provide good look and feel.
In this article, let us see how the custom error page is turned on:
Step 1: Go to Plesk and log in using the credentials. Select the tab “Websites & Domains” so that it would be easy for you to tap on Hosting Settings. For reference, it would be next to your configured domain.
Step 2: In this step, you need to check a "Custom error documents" box. Tap on the OK button!
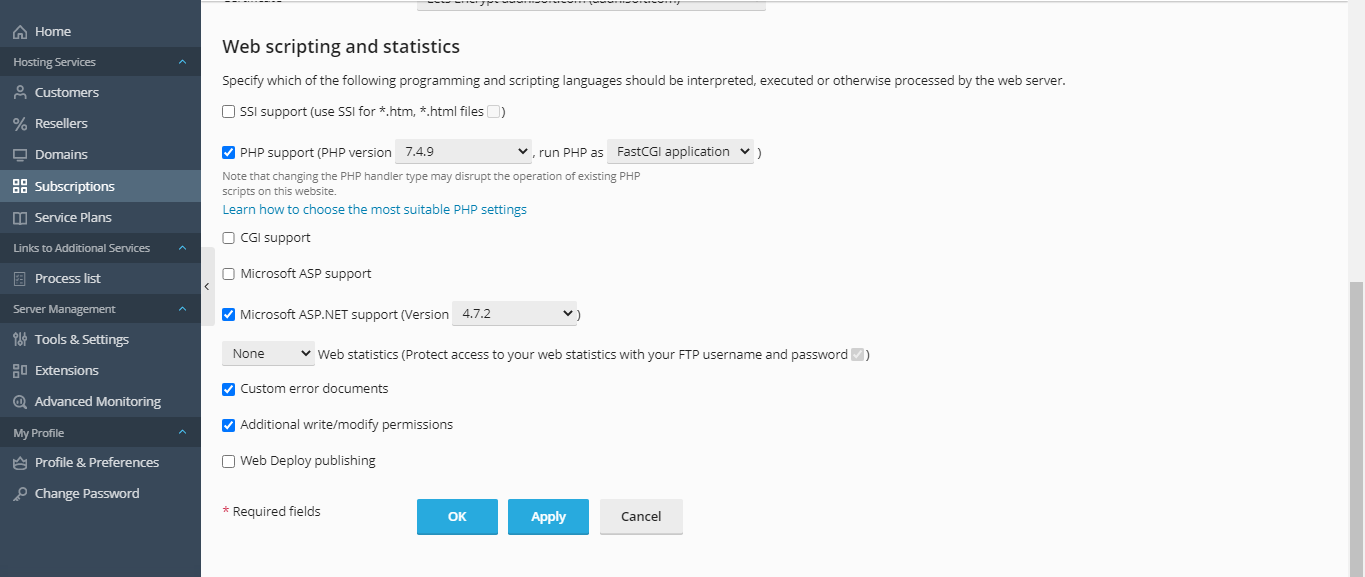
After clicking on the Ok button, you will be directed to “website & domain”. There you can see the message “The settings are successfully updated”.
The custom error page is turned on by following the above steps. This process has three sets up such as working on the existing custom error page, new custom error page and web.config.
How to edit already created custom error page?
It may take more time to create a new custom error page. So, better it would be useful if you choose already created a custom error page.
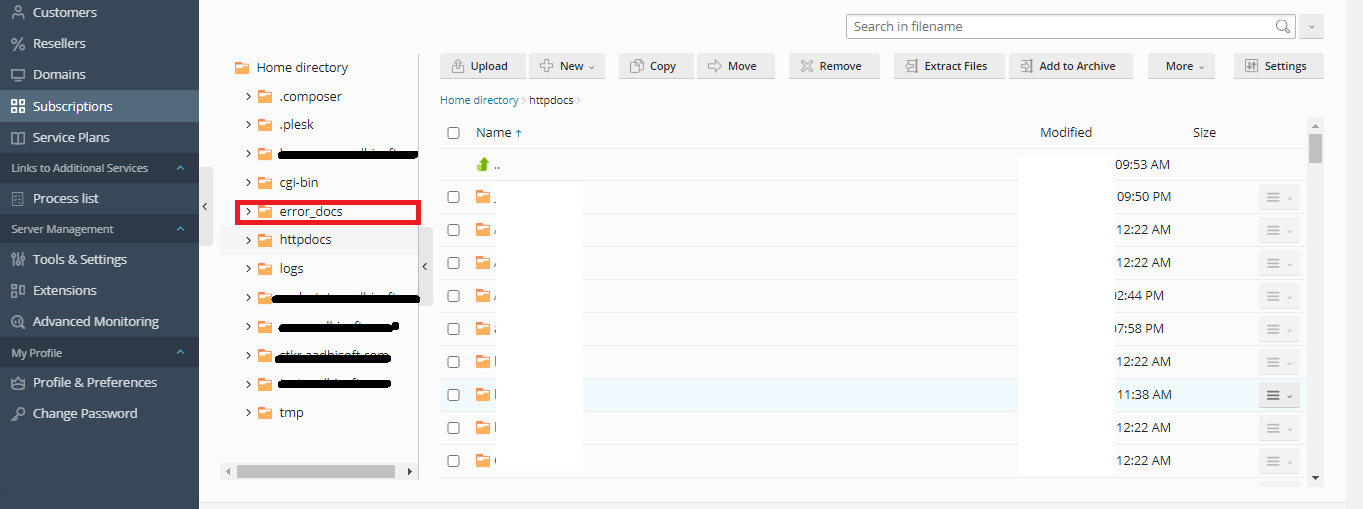
Step 1: From the tab “Websites & Domains”, choose File manager and then to root directory.
Step 2: Root directory has the folder called “error_docs”. Here’s the chance to make changes in the error page. Just go through the occurrence of error and try to resolve it by using HTML editor from Plesk.
Finally, click Ok to save all the changes!
How to set up a new custom error page?
If you have created the custom error page already then make changes on it. But in case, you might be in a situation to create a new one. Kindly follow the below steps:
Firstly, the custom error page should be created and then do the upload. There is no specific language for creating custom error page. So, whatever may be the language is accepted for creation.
For creating a new file, we recommend you to use Plesk file manager. Once you are done with this process kindly carry on with the server upload by using FTP.
How to convey the server for creating a new error page?
Step 1: Again, from the tab “Websites & Domains” select the option “show advanced option”. After clicking on it, choose Virtual directories and then go to Error documents.

Step 2: Setting up the error option will be easier than you think.
Type: Here, you have three options such as default, file and URL.
Default: Make use of default error page from Windows IIS
File: Choose the file which is located in the directory of error_docs.
URL: Here, don’t select the document from error_docs instead choose from another directory.
Location: If you choose document from other directory then follow below-mentioned path for execution.
root (i.e. <vhosts>\<domain>\httpdocs).
For example, /my_errors/forbidden_403_1.html
If you go deep into the path formation, you can easily find the virtual host-related commands.
Step 3: Tap on the OK button.
How to use web.config for custom error page?
Web.config is a document present in IIS websites to store information such as configuration.
Step 1: Choose the tab “File” and then open the root directory or httpdocs
Step 2: Use Plesk text editor to make changes in the web.config file
There are more chances to create a new web.config file. So, just add below text:
Step 3: In the section of httperrors, you can add the document of custom error. If there is already an error document kindly removes it by executing below command:
Here, we have stated 403 as the error document. You can replace whatever the existence of error code.
Step 4: Add up the below code for creating error page newly:
Custom error page is a new task but easy to create new one or making changes in the old one. Hope, this article will help you more! Thank you!
Custom page error comes under the category of runtime error. Based on the configuration of the website the custom page acts as the interface to provide good look and feel.
In this article, let us see how the custom error page is turned on:
Step 1: Go to Plesk and log in using the credentials. Select the tab “Websites & Domains” so that it would be easy for you to tap on Hosting Settings. For reference, it would be next to your configured domain.
Step 2: In this step, you need to check a "Custom error documents" box. Tap on the OK button!
After clicking on the Ok button, you will be directed to “website & domain”. There you can see the message “The settings are successfully updated”.
The custom error page is turned on by following the above steps. This process has three sets up such as working on the existing custom error page, new custom error page and web.config.
How to edit already created custom error page?
It may take more time to create a new custom error page. So, better it would be useful if you choose already created a custom error page.
Step 1: From the tab “Websites & Domains”, choose File manager and then to root directory.
Step 2: Root directory has the folder called “error_docs”. Here’s the chance to make changes in the error page. Just go through the occurrence of error and try to resolve it by using HTML editor from Plesk.
Finally, click Ok to save all the changes!
How to set up a new custom error page?
If you have created the custom error page already then make changes on it. But in case, you might be in a situation to create a new one. Kindly follow the below steps:
Firstly, the custom error page should be created and then do the upload. There is no specific language for creating custom error page. So, whatever may be the language is accepted for creation.
For creating a new file, we recommend you to use Plesk file manager. Once you are done with this process kindly carry on with the server upload by using FTP.
How to convey the server for creating a new error page?
Step 1: Again, from the tab “Websites & Domains” select the option “show advanced option”. After clicking on it, choose Virtual directories and then go to Error documents.
Step 2: Setting up the error option will be easier than you think.
Type: Here, you have three options such as default, file and URL.
Default: Make use of default error page from Windows IIS
File: Choose the file which is located in the directory of error_docs.
URL: Here, don’t select the document from error_docs instead choose from another directory.
Location: If you choose document from other directory then follow below-mentioned path for execution.
root (i.e. <vhosts>\<domain>\httpdocs).
For example, /my_errors/forbidden_403_1.html
If you go deep into the path formation, you can easily find the virtual host-related commands.
Step 3: Tap on the OK button.
How to use web.config for custom error page?
Web.config is a document present in IIS websites to store information such as configuration.
Step 1: Choose the tab “File” and then open the root directory or httpdocs
Step 2: Use Plesk text editor to make changes in the web.config file
There are more chances to create a new web.config file. So, just add below text:
Code:
<?xml version="1.0"?>
<configuration>
<system.web>
<customErrors mode="On"/>
</system.web>
<system.webServer>
<httpErrors errorMode="Custom">
</httpErrors>
</system.webServer>
</configuration>
Code:
<remove statusCode=”403” subStatusCode=”-1”/>Step 4: Add up the below code for creating error page newly:
Code:
<error statusCode=”404” path=”/path/to/error-file” responseMode=”ExecuteURL”/>
This is the final statement after running all the above-mentioned codes:
<?xml version="1.0"?>
<configuration>
<system.web>
<customErrors mode="On"/>
</system.web>
<system.webServer>
<httpErrors errorMode="Custom">
<remove statusCode=”404” subStatusCode=”-1”/>
<error statusCode=”404”path=”/error_docs/NothingHere.html” responseMode=”ExecuteURL”/>
</httpErrors>
</system.webServer>
</configuration>