Steps to create an Email signature in webmail.
E-mail signatures are kind of digitized or computerized forms of a person’s signatures which is set up for outgoing messages. These signature files are can be easily created using the options available on the webmail clients. They are often called as the “sig”. These are common in the webmail such as Roundcube, Horde and SquirrelMail. In this article, let’s have a look at the step by step guide on setting up e-mail signatures in Webmail. In this article, let’s find the answer to the simple question of
Steps to create an Email signature in webmail.
Roundcube
The main feature of the webmail Roundcube is that it is absolutely free of cost without any amount charges. The steps for setting up e-mail signature in the webmail Roundcube are as follows;
Step 1: Log in to your account on the webmail Roundcube.
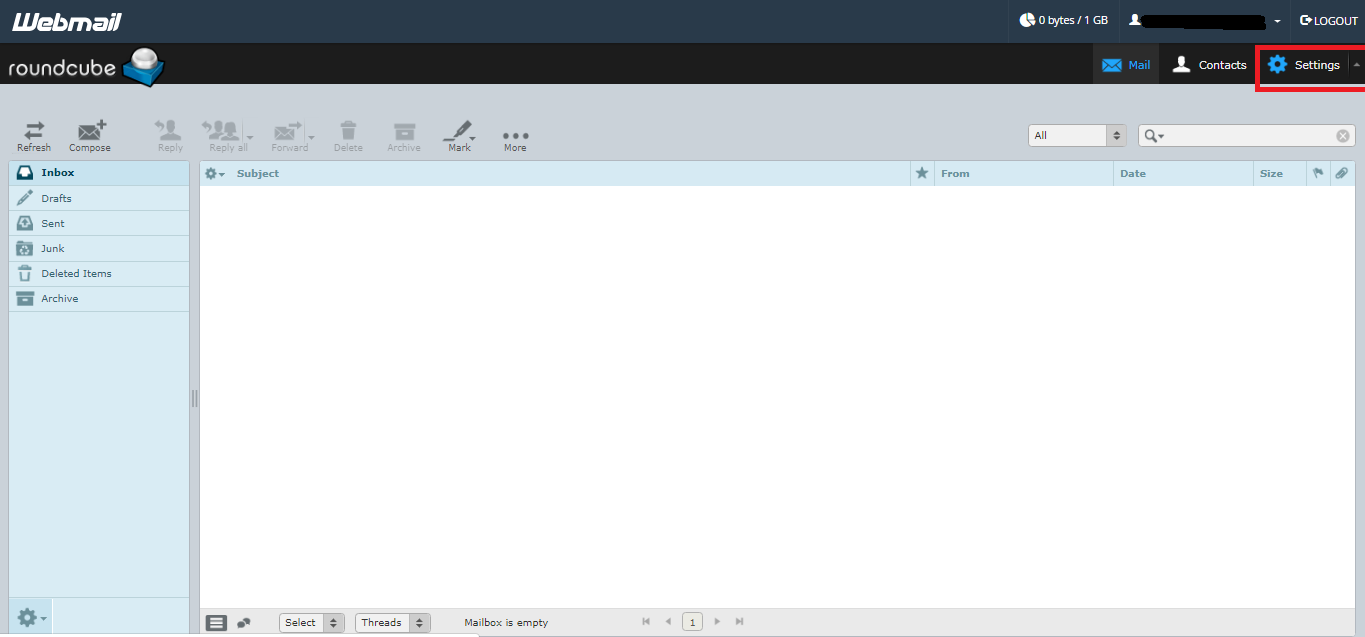
Step 2: Now tap on the “settings” option. This settings option can be found on the top right area of the page.
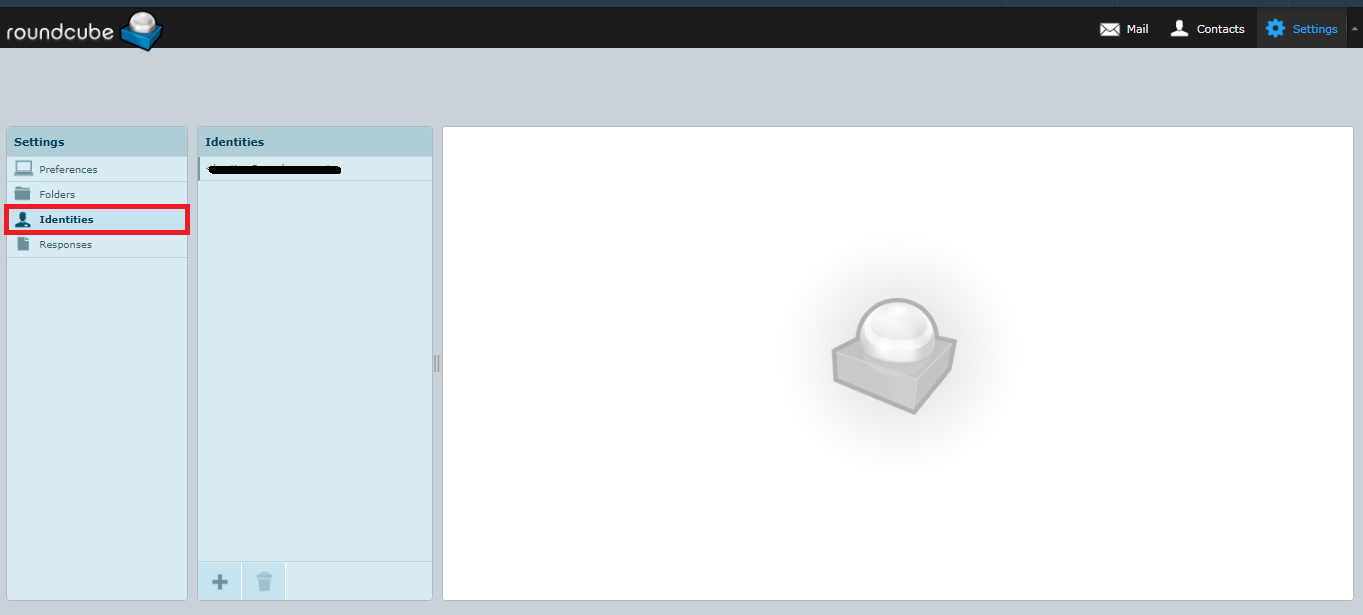
Step 3: The next step is to tap on the “identities” option which can be found in the “settings” page.
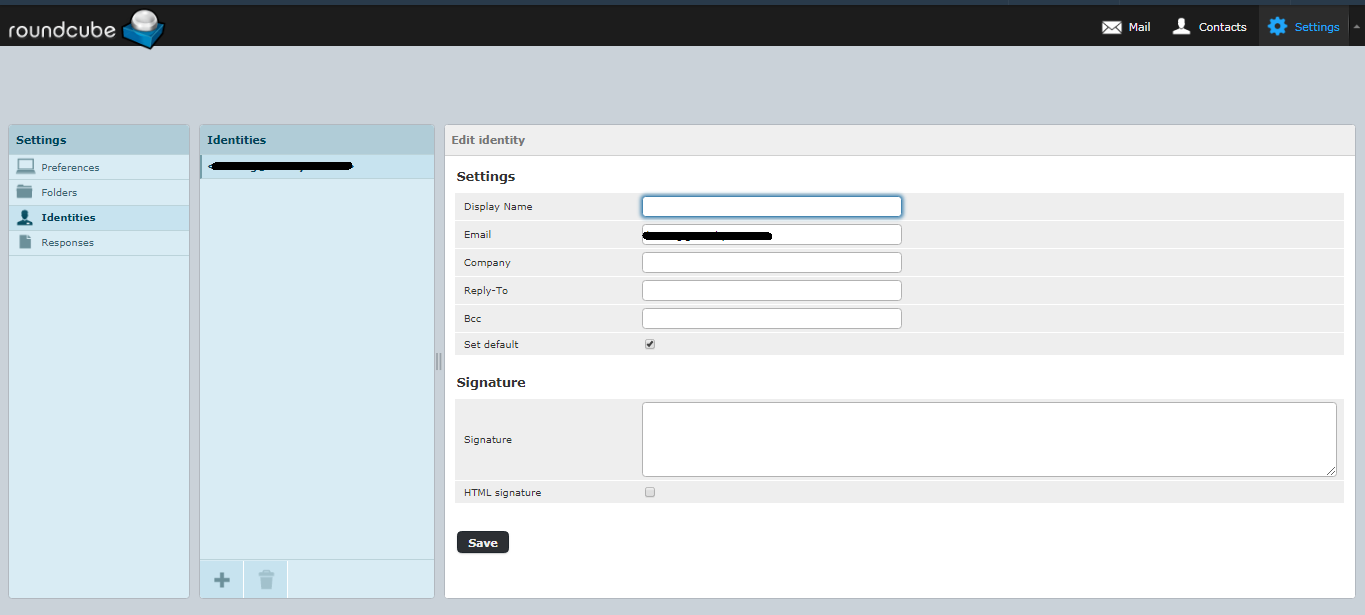
Step 4: Find the e-mail ID for which you want to set a signature. The final step is to add the signature to the e-mail ID and save it.
Horde
In this paragraph, steps for creating and changing the signature in the webmail Horde are included.
Step 1: Log in to your account on the webmail Horde.
Step 2: At the top left corner of the page you will be able to see a gear-like icon. Tap on the gear-like icon.
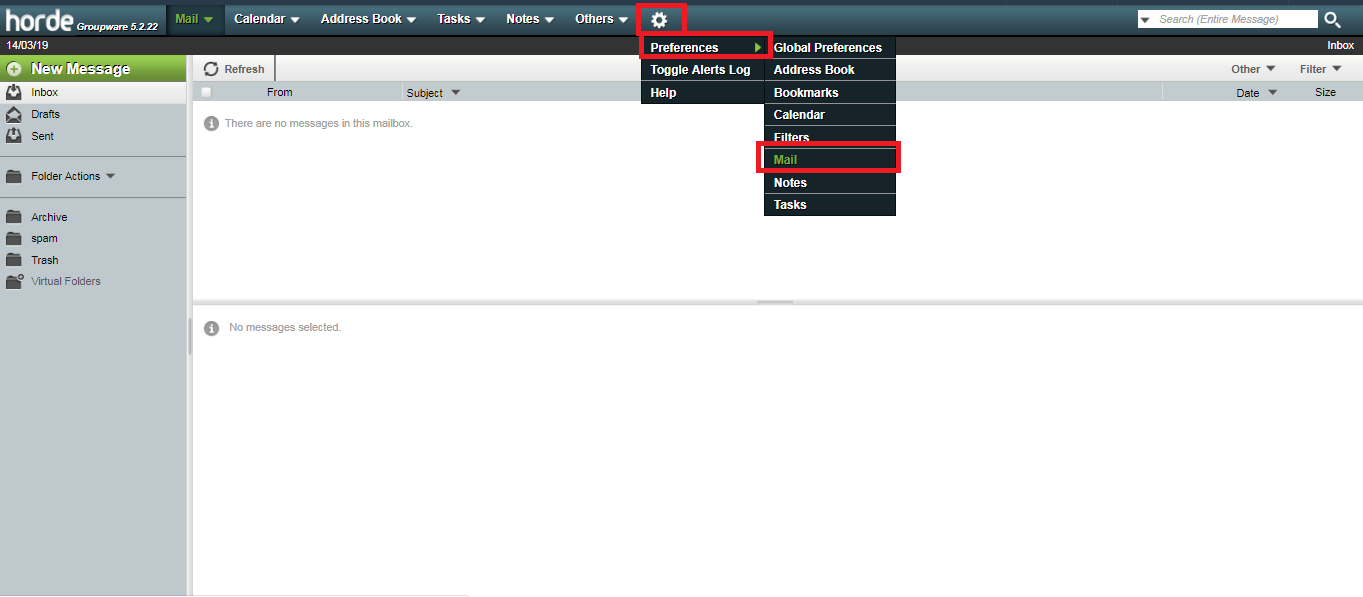
Step 3: Now you will see a list below that gear-like icon after clicking on it. In that list tap on the option “Preferences”. Then click on the option “Mail”.
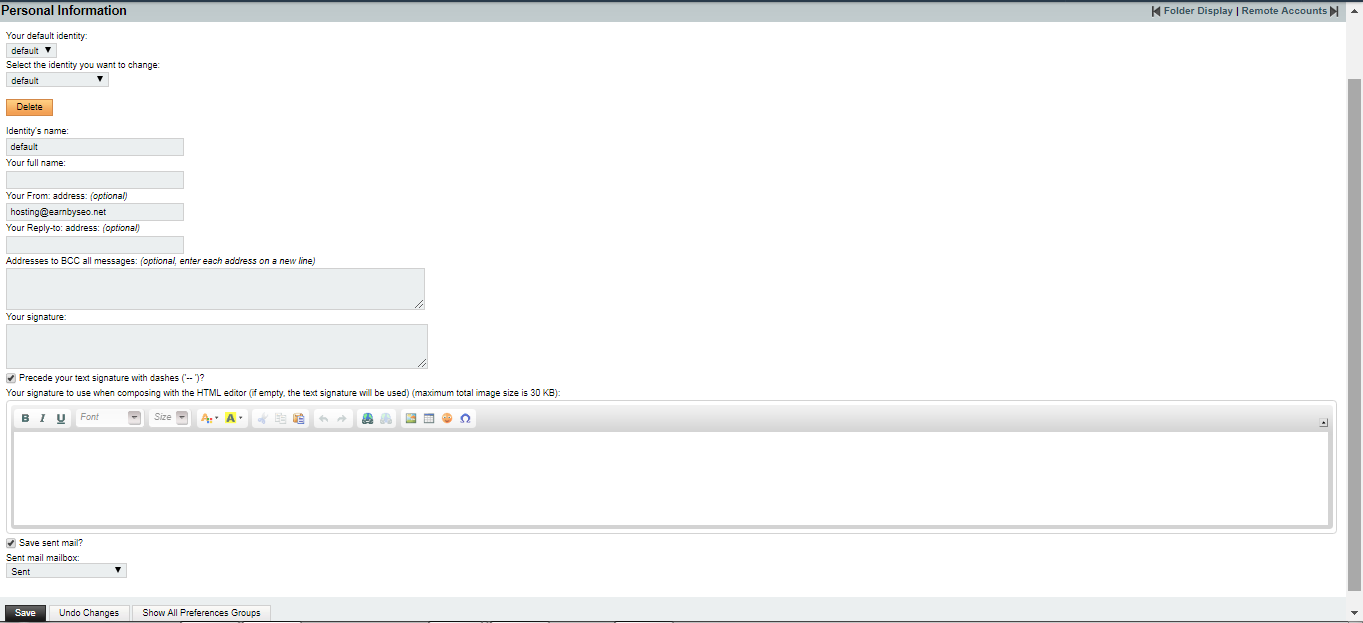
Step 4: Here you will come across a heading named “General” Below that you will able to see an option “Personal Information”. Tap on that option.

Step 5: In this page, you will be given the options of editing and changing your email signatures as per your wish. The final step is to save the changes. For saving, click on “Save” which is located at the bottom of the page.
SquirrelMail
If you wish to have a personalized signature that will be sent with all of your outgoing emails, then you can create or add one in the webemailSquirrelMail.
Step 1: The first step is to log in to your account on the webmail SquirellMail.
Step 2: Now you will be able to find a tab called “Options” on the top of your screen. Click on the “options” tab.
Step 3: The next step is to tap on the option “Personal Information”.
Step 4: Then a screen will appear. In that screen, you will be able t find the options for setting or changing the signature for your e-mail ID on the webmail SquirrelMail.
Note: If you are using devices such as mobile or clients of local e-mail for the purpose of sending e-mails, then you will have to add or set your signature in the above-stated webmails.
E-mail signatures are kind of digitized or computerized forms of a person’s signatures which is set up for outgoing messages. These signature files are can be easily created using the options available on the webmail clients. They are often called as the “sig”. These are common in the webmail such as Roundcube, Horde and SquirrelMail. In this article, let’s have a look at the step by step guide on setting up e-mail signatures in Webmail. In this article, let’s find the answer to the simple question of
Steps to create an Email signature in webmail.
Roundcube
The main feature of the webmail Roundcube is that it is absolutely free of cost without any amount charges. The steps for setting up e-mail signature in the webmail Roundcube are as follows;
Step 1: Log in to your account on the webmail Roundcube.
Step 2: Now tap on the “settings” option. This settings option can be found on the top right area of the page.
Step 3: The next step is to tap on the “identities” option which can be found in the “settings” page.
Step 4: Find the e-mail ID for which you want to set a signature. The final step is to add the signature to the e-mail ID and save it.
Horde
In this paragraph, steps for creating and changing the signature in the webmail Horde are included.
Step 1: Log in to your account on the webmail Horde.
Step 2: At the top left corner of the page you will be able to see a gear-like icon. Tap on the gear-like icon.
Step 3: Now you will see a list below that gear-like icon after clicking on it. In that list tap on the option “Preferences”. Then click on the option “Mail”.
Step 4: Here you will come across a heading named “General” Below that you will able to see an option “Personal Information”. Tap on that option.
Step 5: In this page, you will be given the options of editing and changing your email signatures as per your wish. The final step is to save the changes. For saving, click on “Save” which is located at the bottom of the page.
SquirrelMail
If you wish to have a personalized signature that will be sent with all of your outgoing emails, then you can create or add one in the webemailSquirrelMail.
Step 1: The first step is to log in to your account on the webmail SquirellMail.
Step 2: Now you will be able to find a tab called “Options” on the top of your screen. Click on the “options” tab.
Step 3: The next step is to tap on the option “Personal Information”.
Step 4: Then a screen will appear. In that screen, you will be able t find the options for setting or changing the signature for your e-mail ID on the webmail SquirrelMail.
Note: If you are using devices such as mobile or clients of local e-mail for the purpose of sending e-mails, then you will have to add or set your signature in the above-stated webmails.