Steps to Blacklist/Whitelist an IP Address in WHM
WHM or Web Host Manager is a program that is used to access the administrative control of VPS or dedicated server of cPanel. You can resell the web hosting services or use the old server. It’s the reseller of cPanel. Hosting accounts in the server are managed individually with the cPanel. WHM is flexible and allows the user to manage the host or domain accounts. Automatic and manual system backups are configured and the accounts are transferred with the server, without the installation of the system or server. WHM and cPanel create a full-featured control panel system.
cPHulk is a service offered by cPanel which protects your server from Brute Force Attack. Brute Force attack is a method used to hack your automated system or server by guessing the password. cPHulk is used to monitor the web server. cPHulk blocks the IP address after several failed login attempts. Brute force attack does the same but it is automated for guessing the password of the account. If you install cPHulk on your server, you will get new security features. This feature whitelist (allows) or blacklist (block) IP address to access the server.
Blacklist IP Address in cPHulk
Your IP address can be blacklisted for several reasons. You can list your IP address in a single blacklist or multiple blacklist. You have to maintain each blacklist separately.
Step 1 – Login WHM with the username and password as a root user.
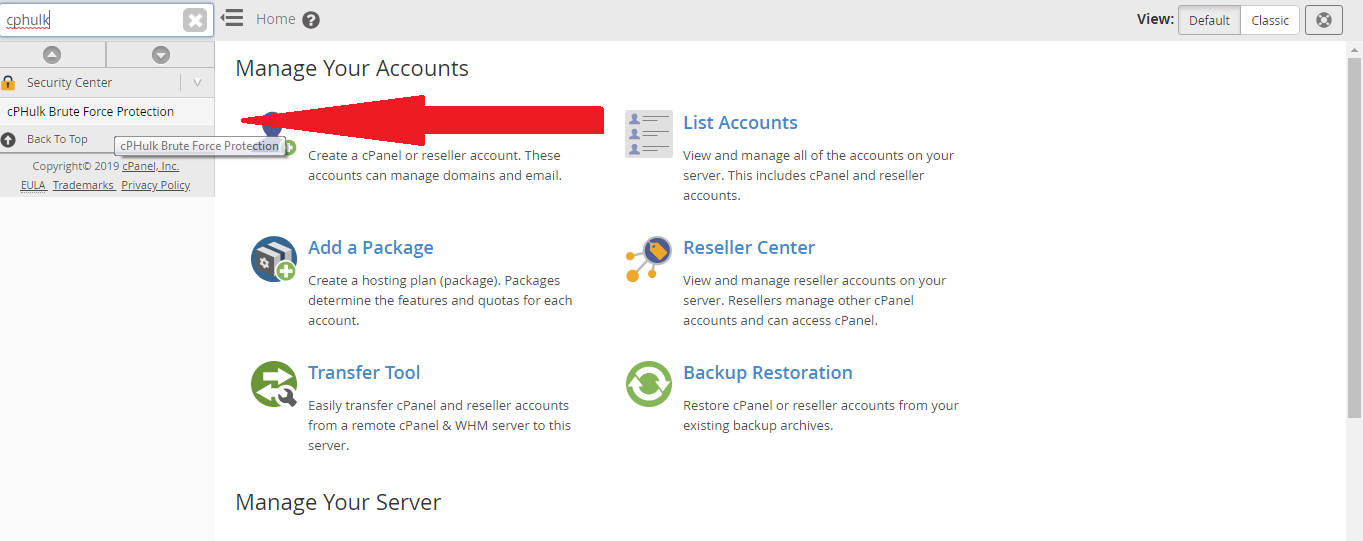
Step 2 – In the search box, type cphulk.

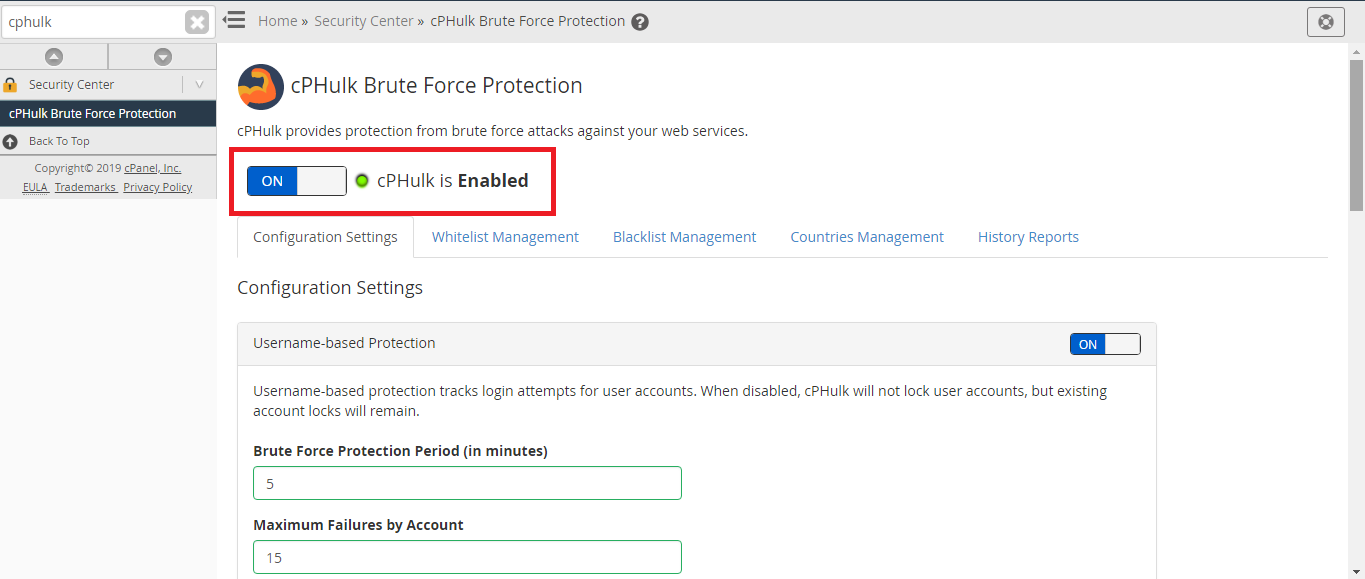
Step 3 – In the Security Centre section, click cPHulk Brute Force Protection link. Make sure that the cPHulk Brute Force Protection is enabled.
Step 4 – Select Blacklist Management to blacklist an IP address.
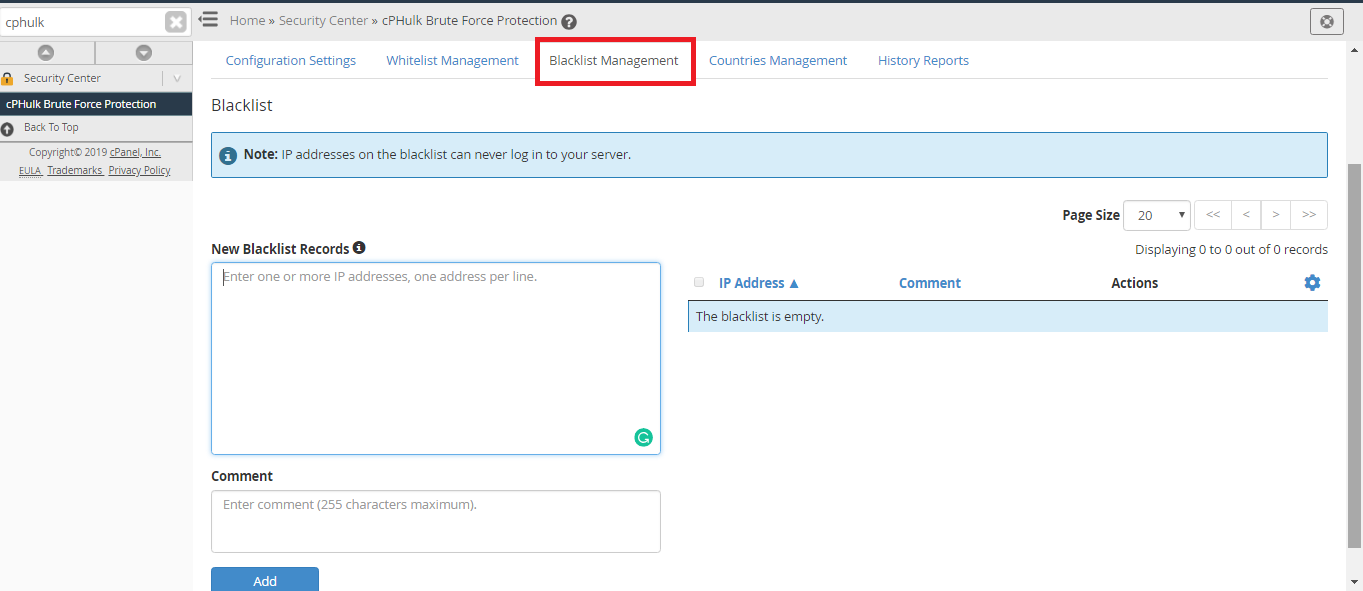
Step 5 – In the New Blacklist Records section, give the IP address you want to block. Enter each address in a new line.
Step 6 – In the Comment section, add your justification reason.
Step 7 – Click Add button to blacklist the IP address. You will receive a message.
Step 8 – IP address you entered will be listed in the blacklist with the comment given by you.
Whitelist IP Address in cPHulk
Whitelisting IP address is to create a list of IP range or IP addresses through which the user can access the domain. The access is controlled and limited only to the trusted users.
Step 1 – Login WHM with the username and password as a root user.
Step 2 – In the search box, type cphulk.
Step 3 – In the Security Centre section, click cPHulk Brute Force Protection link. Make sure that the cPHulk Brute Force Protection is enabled.

Step 4 – Select Whitelist Management to whitelist an IP address.
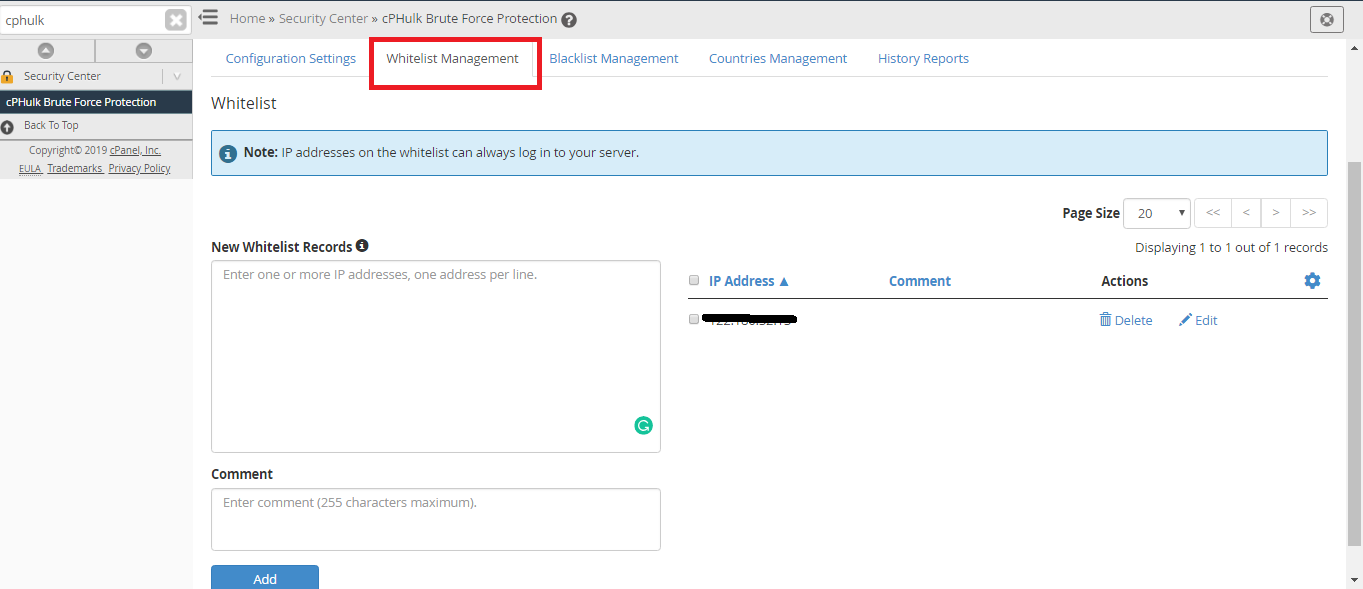
Step 5 – In the New Whitelist Records section, give the IP address you want to allow. Enter each address in a new line.
Step 6 – In the Comment section, add your justification reason.
Step 7 – Click Add button to whitelist the IP address. You will receive a message.
Step 8 – IP address you entered will be listed in the whitelist with the comment given by you.
WHM or Web Host Manager is a program that is used to access the administrative control of VPS or dedicated server of cPanel. You can resell the web hosting services or use the old server. It’s the reseller of cPanel. Hosting accounts in the server are managed individually with the cPanel. WHM is flexible and allows the user to manage the host or domain accounts. Automatic and manual system backups are configured and the accounts are transferred with the server, without the installation of the system or server. WHM and cPanel create a full-featured control panel system.
cPHulk is a service offered by cPanel which protects your server from Brute Force Attack. Brute Force attack is a method used to hack your automated system or server by guessing the password. cPHulk is used to monitor the web server. cPHulk blocks the IP address after several failed login attempts. Brute force attack does the same but it is automated for guessing the password of the account. If you install cPHulk on your server, you will get new security features. This feature whitelist (allows) or blacklist (block) IP address to access the server.
Blacklist IP Address in cPHulk
Your IP address can be blacklisted for several reasons. You can list your IP address in a single blacklist or multiple blacklist. You have to maintain each blacklist separately.
Step 1 – Login WHM with the username and password as a root user.
Step 2 – In the search box, type cphulk.
Step 3 – In the Security Centre section, click cPHulk Brute Force Protection link. Make sure that the cPHulk Brute Force Protection is enabled.
Step 4 – Select Blacklist Management to blacklist an IP address.
Step 5 – In the New Blacklist Records section, give the IP address you want to block. Enter each address in a new line.
Step 6 – In the Comment section, add your justification reason.
Step 7 – Click Add button to blacklist the IP address. You will receive a message.
Step 8 – IP address you entered will be listed in the blacklist with the comment given by you.
Whitelist IP Address in cPHulk
Whitelisting IP address is to create a list of IP range or IP addresses through which the user can access the domain. The access is controlled and limited only to the trusted users.
Step 1 – Login WHM with the username and password as a root user.
Step 2 – In the search box, type cphulk.
Step 3 – In the Security Centre section, click cPHulk Brute Force Protection link. Make sure that the cPHulk Brute Force Protection is enabled.
Step 4 – Select Whitelist Management to whitelist an IP address.
Step 5 – In the New Whitelist Records section, give the IP address you want to allow. Enter each address in a new line.
Step 6 – In the Comment section, add your justification reason.
Step 7 – Click Add button to whitelist the IP address. You will receive a message.
Step 8 – IP address you entered will be listed in the whitelist with the comment given by you.