Introduction:
Accessing database with ODBC in windows version is no more a complicated task. It is really simple. Let’s discuss the steps or method for creating MS access database DSN in Plesk control panel. The need for ODBC connection in Plesk rises when the application needs or asks for granting access to the external databases through ODBC. The first step here is to create the ODBC connection to the Plesk. There are facilities and options available which allow you to customize the application on the basis of your comfort. Using this you will be able to customize the application for the purpose of using the ODBC connection which will aid in accessing information in the database. The main thing to note here is that it is not mandatory that the database should be external here. The ODBC connection can be used to access both local as well as the external databases. Now let’s see a step by step guide on how to create MS access database DSN in Plesk control panel.
How to upload the database?
Step 1: Login to control panel of plesk and select File Manager.
Step 2: Now, search for the folder “App_data” and choose upload files.
Step 3: Browse the file into the computer and select .mdb files from the database.
Step 4: Click “OK”.
Step 5: Also you have to give permission write permission to your .mdb file. You can give the file permission in plesk by following steps:
Step 1: Go to the "Websites & Domains". Now click on "ODBC Data Sources".
Step 2: To add the ODBC click on the button "Add ODBC DSN".
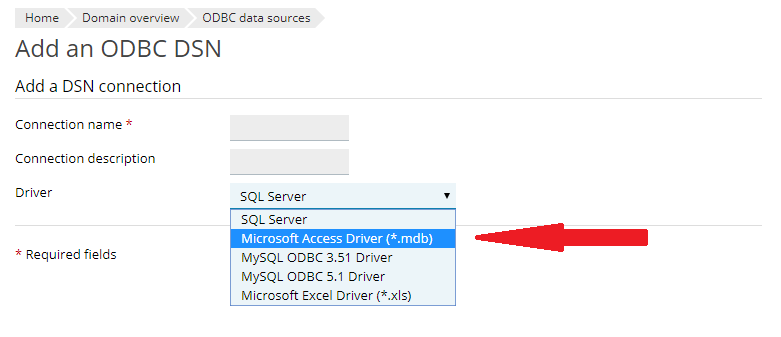
Step 3: Open a new ODBC connection by entering the name and description if you want.

Step 4: You will get the drop-down list and select Microsoft Access Driver (.mdb). Click “OK”.
Step 5: Now, get the database path file:
C:\inetpub\vhosts\<yourdomain.com>\App_Data\<yourdatabasename.mdb>
Set the database as website .mdb C:\inetpub\vhosts\ yourdomain.com\ App_Data\website.mdb
Step 6: Check out the button to test and enable the connection. If you created the username and password then access it to open the connection.
The following steps are for changing the settings of an existing ODBC connection:
Step 1: Now go to the websites & domains and tap on ODBC Data Sources.
Step 2: Select the specified connection name. Customize the settings.
Step 3: Select “Test” for checking the functioning of the connection provided in the new settings. Then tap “Finish”.
The following steps are for removing a ODBC connection:
Step 1: Go to the websites & domains and select ODBC Data Sources.
Step 2: Click on the checkbox which can be seen near to the connection that you want to remove or deselect.
Step 3: Click “Remove”. Then confirm the removing option and then select “Ok”.
Accessing database with ODBC in windows version is no more a complicated task. It is really simple. Let’s discuss the steps or method for creating MS access database DSN in Plesk control panel. The need for ODBC connection in Plesk rises when the application needs or asks for granting access to the external databases through ODBC. The first step here is to create the ODBC connection to the Plesk. There are facilities and options available which allow you to customize the application on the basis of your comfort. Using this you will be able to customize the application for the purpose of using the ODBC connection which will aid in accessing information in the database. The main thing to note here is that it is not mandatory that the database should be external here. The ODBC connection can be used to access both local as well as the external databases. Now let’s see a step by step guide on how to create MS access database DSN in Plesk control panel.
How to upload the database?
Step 1: Login to control panel of plesk and select File Manager.
Step 2: Now, search for the folder “App_data” and choose upload files.
Step 3: Browse the file into the computer and select .mdb files from the database.
Step 4: Click “OK”.
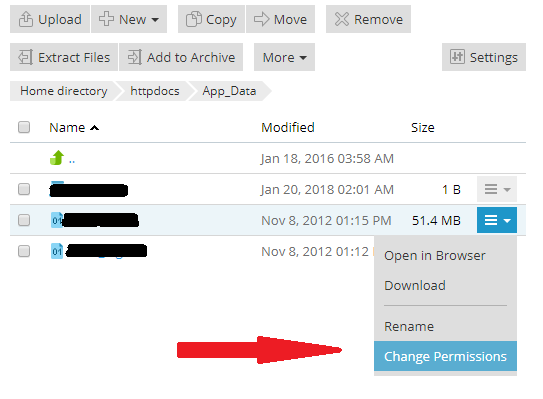
Step 5: Also you have to give permission write permission to your .mdb file. You can give the file permission in plesk by following steps:
- Once logged into your Plesk panel, go to the "Files" tab and browse to the file/directory in question.
- Hover your mouse pointer over the file/directory -- you will notice a small "down-arrow" button to the right. Click this and select "Change Permissions".
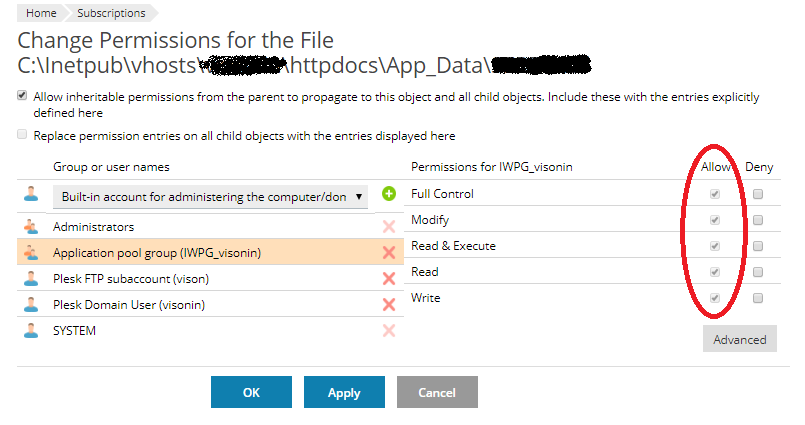
- Click to select the user account "Application pool group (IWPG_youraccount)".
- Click the "Allow" checkbox for "Full Control".
- Click OK to save changes.
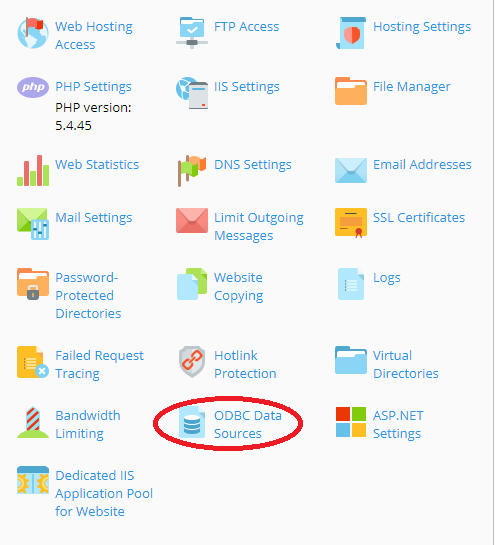
Step 1: Go to the "Websites & Domains". Now click on "ODBC Data Sources".
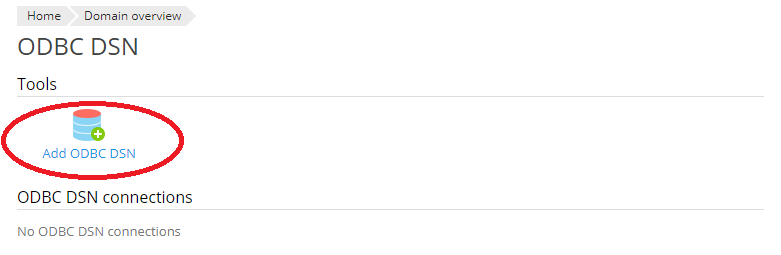
Step 2: To add the ODBC click on the button "Add ODBC DSN".
Step 3: Open a new ODBC connection by entering the name and description if you want.
Step 4: You will get the drop-down list and select Microsoft Access Driver (.mdb). Click “OK”.
Step 5: Now, get the database path file:
C:\inetpub\vhosts\<yourdomain.com>\App_Data\<yourdatabasename.mdb>
Set the database as website .mdb C:\inetpub\vhosts\ yourdomain.com\ App_Data\website.mdb
Step 6: Check out the button to test and enable the connection. If you created the username and password then access it to open the connection.
The following steps are for changing the settings of an existing ODBC connection:
Step 1: Now go to the websites & domains and tap on ODBC Data Sources.
Step 2: Select the specified connection name. Customize the settings.
Step 3: Select “Test” for checking the functioning of the connection provided in the new settings. Then tap “Finish”.
The following steps are for removing a ODBC connection:
Step 1: Go to the websites & domains and select ODBC Data Sources.
Step 2: Click on the checkbox which can be seen near to the connection that you want to remove or deselect.
Step 3: Click “Remove”. Then confirm the removing option and then select “Ok”.