How to assign an IP address in Plesk?
IP address plays important role in all website verifications.Many of them have a question to assign IP address in Plesk. Plesk administrator decides to restrict and allow the IP address based on their activities. Users would love to assign IP address accordingly to shared and dedicated choices. In this article let us see how to assign IP address as dedicated in Plesk
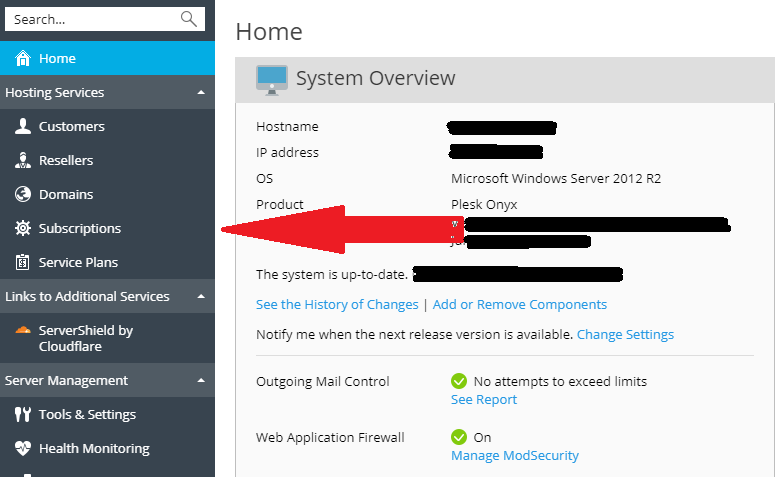
Step 1: Open the Plesk and login as administrator. In your Plesk panel, on the left side of the screen you can see more menus listed one by one.
Step 2: Choose the fourth menu “subscription”. Your new subscription page will be displayed in front of view. On the right side of the screen, you can see search option. Just enter the domain name and search or enter the domain directly.
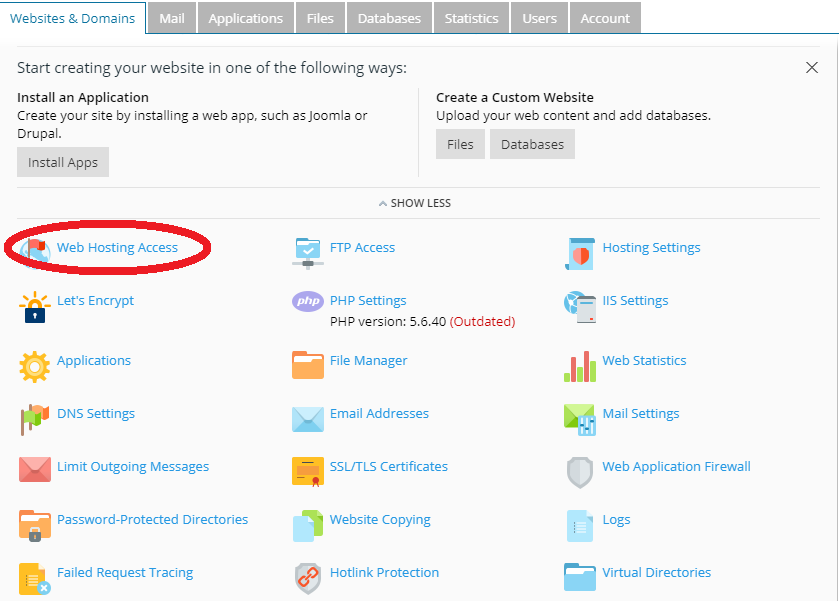
Step 3: Now, the domain will be shown. Just click on it to give access and start doing subscription option. Again, on the right side, find the option called “Web hosting access”
Step 4: By clicking on the change web hosting access, a new screen will be displayed. There is a drop-down list in “IP address” tab. Click on the IP address tab and so, drop down list will be appeared.
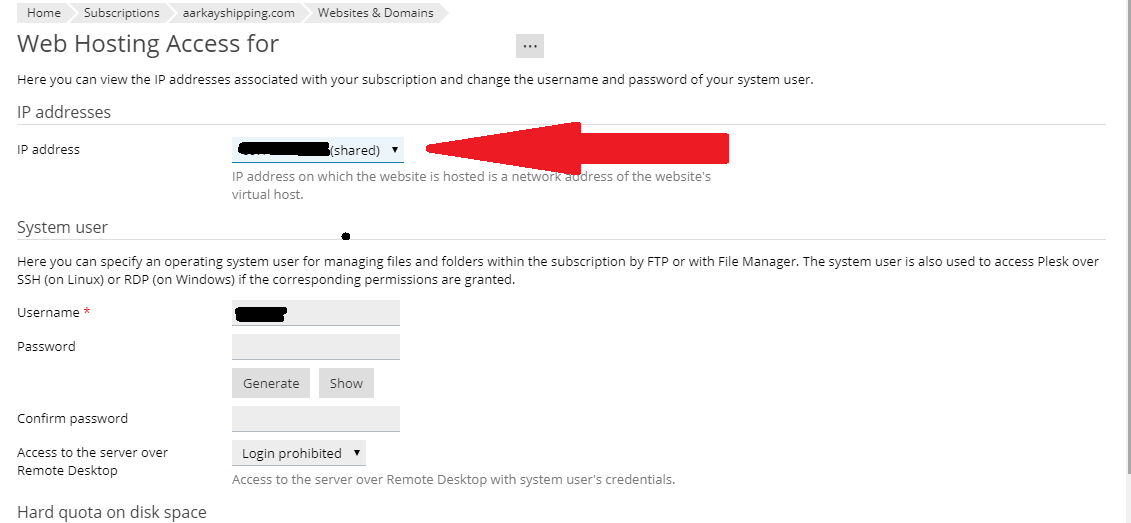
Step 5: Select the IP address and finally click on the apply present below.
This is very simple process doesn’t require any security measures to handle assigning process. You can access it easily by simplifying solid methods based on your opinion. IP address reflects the individuality and terms for all accounts. Most of the developers knows the importance of IP address and based on the IP address all our activities will be visualized at any instances.
IP address plays important role in all website verifications.Many of them have a question to assign IP address in Plesk. Plesk administrator decides to restrict and allow the IP address based on their activities. Users would love to assign IP address accordingly to shared and dedicated choices. In this article let us see how to assign IP address as dedicated in Plesk
Step 1: Open the Plesk and login as administrator. In your Plesk panel, on the left side of the screen you can see more menus listed one by one.
Step 2: Choose the fourth menu “subscription”. Your new subscription page will be displayed in front of view. On the right side of the screen, you can see search option. Just enter the domain name and search or enter the domain directly.
Step 3: Now, the domain will be shown. Just click on it to give access and start doing subscription option. Again, on the right side, find the option called “Web hosting access”
Step 4: By clicking on the change web hosting access, a new screen will be displayed. There is a drop-down list in “IP address” tab. Click on the IP address tab and so, drop down list will be appeared.
Step 5: Select the IP address and finally click on the apply present below.
This is very simple process doesn’t require any security measures to handle assigning process. You can access it easily by simplifying solid methods based on your opinion. IP address reflects the individuality and terms for all accounts. Most of the developers knows the importance of IP address and based on the IP address all our activities will be visualized at any instances.