Steps to install Let's Encrypt SSL certificate for a domain in plesk
Encrypt is an extraordinary activity from the ISRG which is stands for Internet Security Research Group which is committed to all Plesk clients to make an SSL declaration and give encryption. Encode traffic between server and customer internet browser that typically something good and secure which is a very important point. On account of Let's Encrypt, it will give full encryption to your site. You can get it onto your Plesk server just inside a couple of few steps.
Here, we are demonstrating how to introduce the Let's Encrypt expansion on a Plesk based windows server.
Indications / Symptoms
If you are trying to issue a Let's Encrypt certificate for your particular domain which is in Plesk for Windows Server, it may be possible to show following error messages which are given below:
A file created as a test .txt in the example.com\httpdocs\.well-known\acme-challenge\ folder (Let's Encrypt temporary files) which is not approachable in a browser at http://example.com/.well-known/acme-challenge/test.txt showing 403/404 error or:
This page unable to show due to an internal server error occurred.
Solution:
- First, you need to log into your Plesk
- Second, you need to rename the file web.config into the name as a web.config.bak in the domainname.com\httpdocs directory.
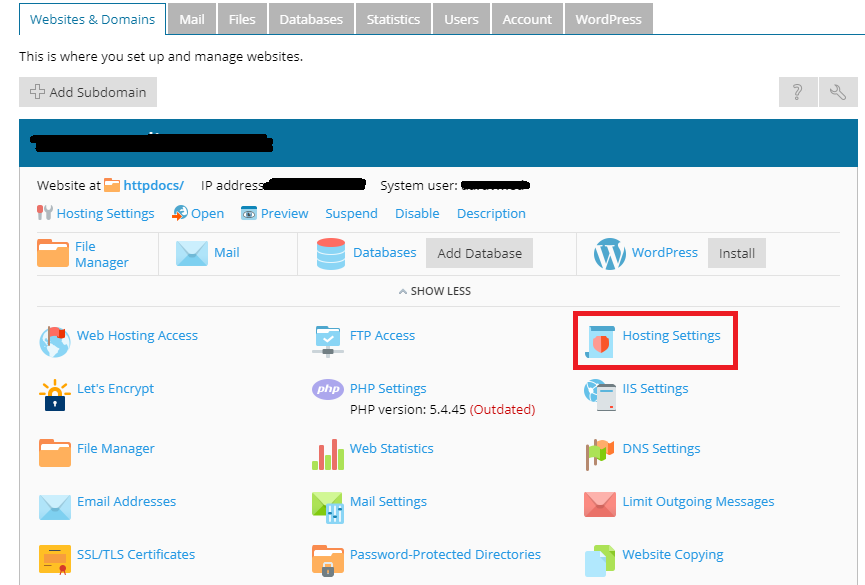
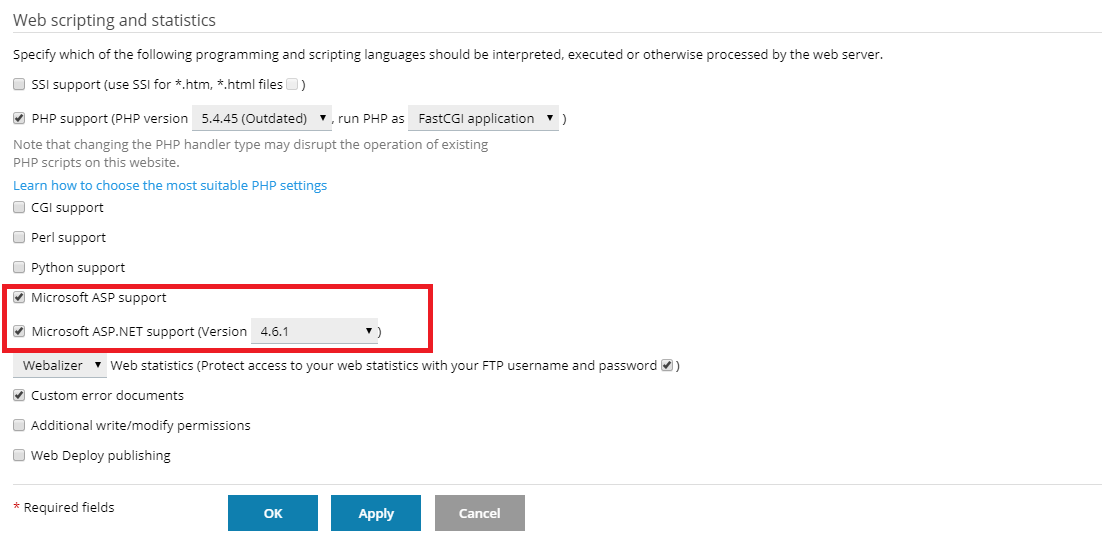
- You need to disable Microsoft ASP.NET support and Microsoft ASP support by going to Domains then go to example.com and click on Hosting Settings. See the structure Domains >> example.com >> Hosting Settings.
- Here you have to confirm that test .txt file has been created inside your domain example.com\httpdocs\.well-known\acme-challenge\ directory and it is accessible by online or Internet at http://domainname.com/.well-known/acme-challenge/test.txt.
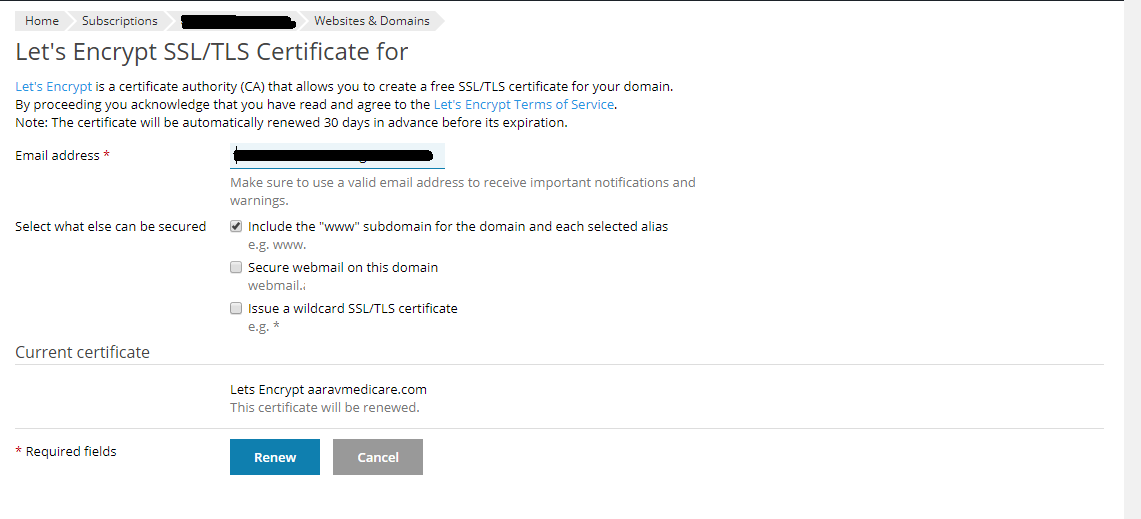
- Now you need to install a Let's Encrypt certificate at on given domain by clicking on Domains >> domainname.com >> Let's Encrypt.
- Now you need to enable Microsoft ASP.NET support and Microsoft ASP support again.
- At last, you need to rename as it was before like web.config back from web.config.bak file.