Error "TLS Negotiation failed, the certificate doesn't match the host" in Gmail
One of the best applications to send emails through Gmail! Yes, either to reach out to other specification Gmail has an extreme user-friendly approach. In that case, if you get an error by saying TLS Negotiation failed, the certificate doesn’t match the host then what’s your next move? Yes, in this article we are going to learn how to overcome the situation if you couldn’t able to send an email via Gmail.
Why are getting this error?
Gmail has the functionality to check whether the server name and SSL certificate common name is the same or different. You would know that the SSL certificate is assigned with a common name. So, CN hasn’t differed with the name of the mail server. If it gets differ then you cannot send the email through the Gmail application.
Go to Gmail and search for a setting option. From there, click on accounts and imports to choose to send mail as an option.
By doing this, if you get an error by saying:
TLS Negotiation failed, the certificate doesn’t match the host
Let’s see how to solve this problem: Making out three solutions will fit our problem existence.
Method 1:
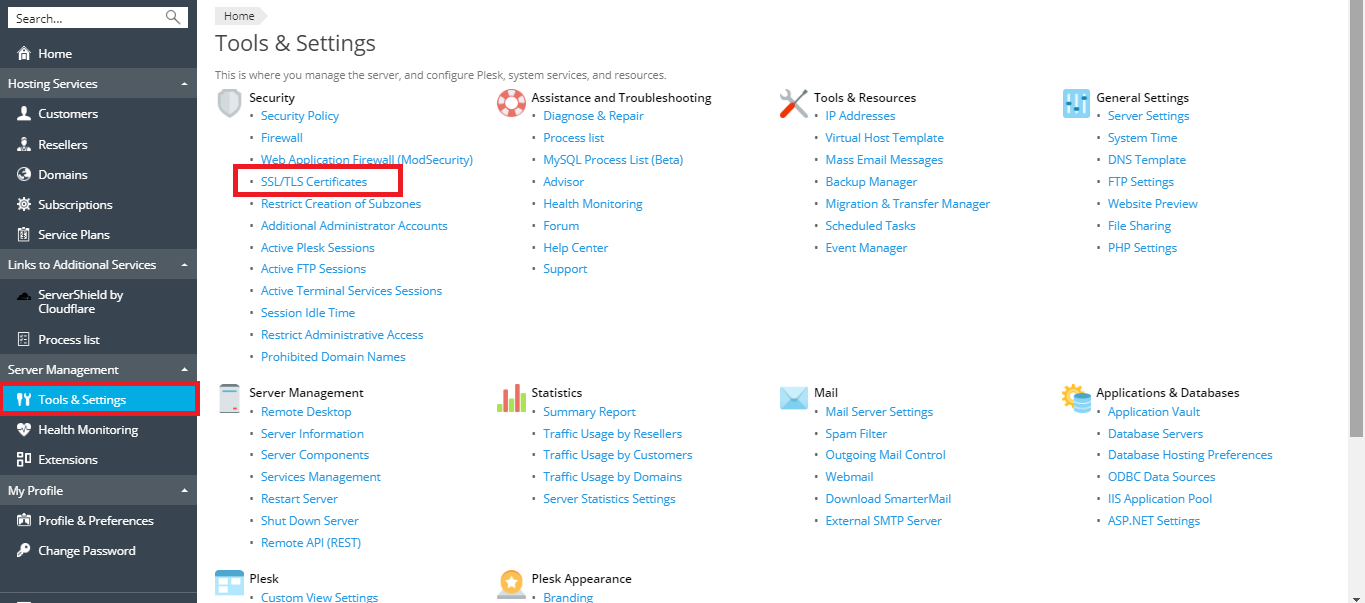
Step 1: Just do Plesk login. You need to go for a certificate for mail protection by clicking on SSL & TLS certificates option. To go for SSL & TLS certificates click on Tools & Settings.
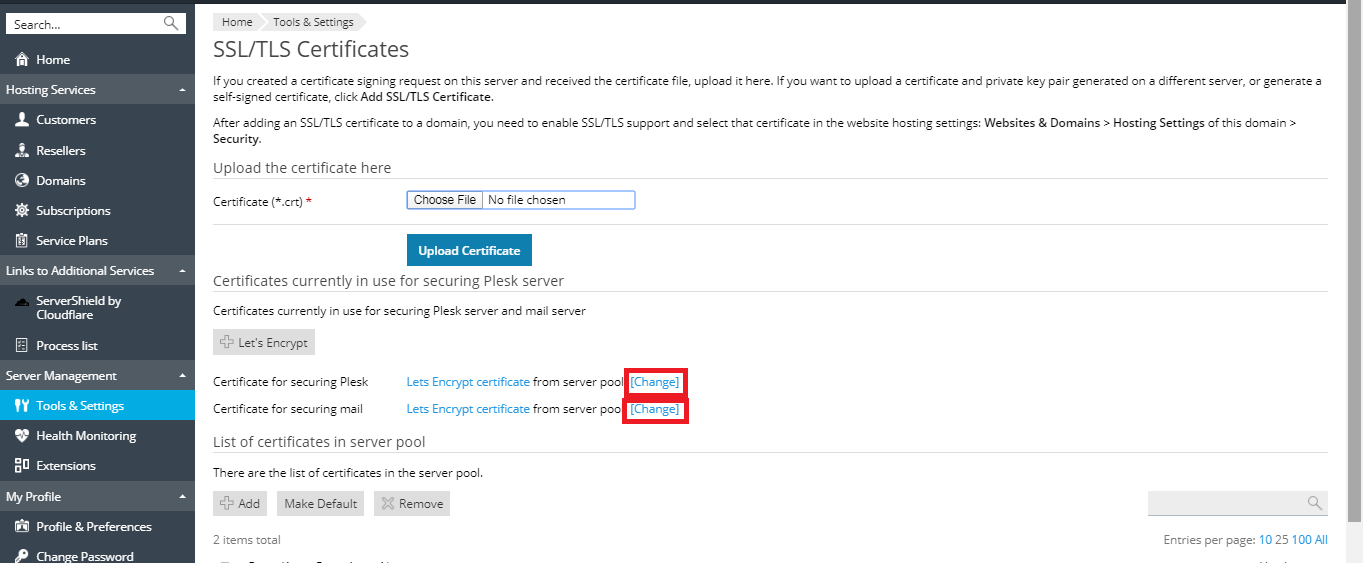
Step 2: In the SSL & TLS certificate option, you can see the button called change. When clicking it, you will be getting a drop-down menu such as a select certificate *.
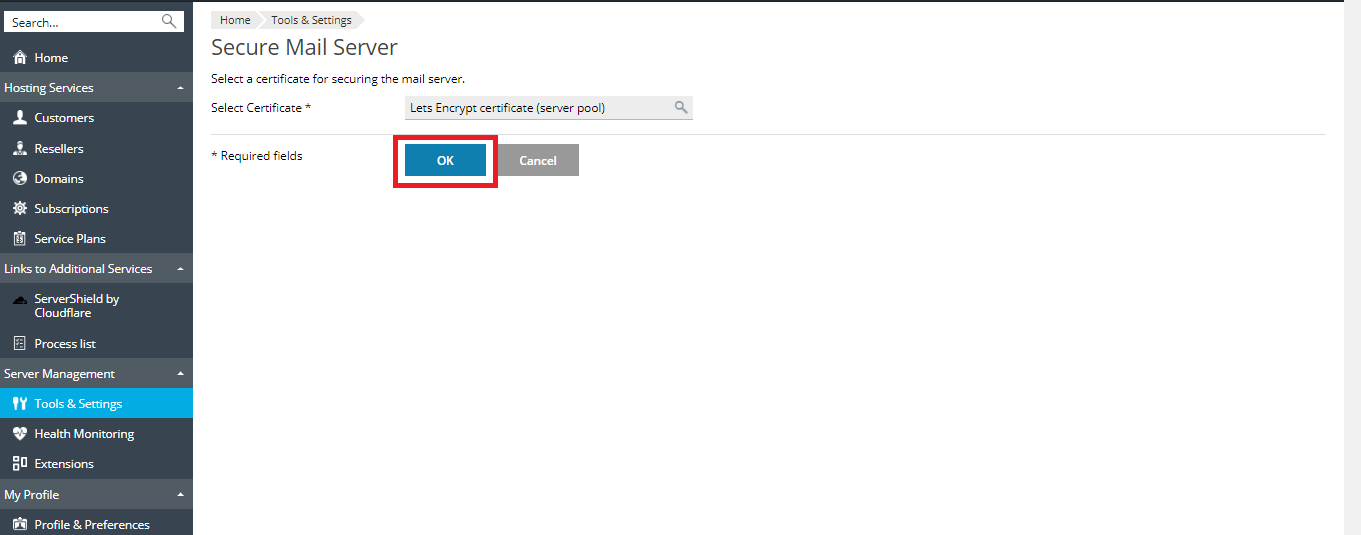
Step 3: In the drop-down menu, a certificate for your domain is listed. Choose the one which you want and then tap on the OK button.
Method 2:
Step 1: Open your Gmail account and go to the settings option. You can see the choice accounts & import in the settings option. Click on it!
Step 2: Once if you click on accounts & import options, choose send mail as a menu. So, there you can see the edit button and next is the Next button.
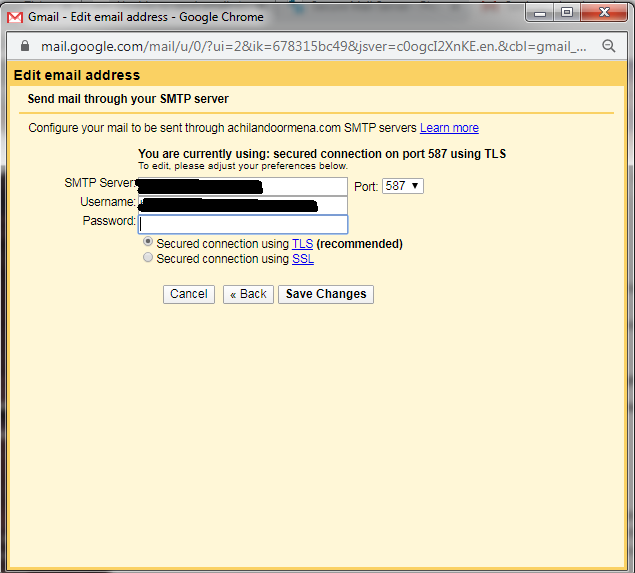
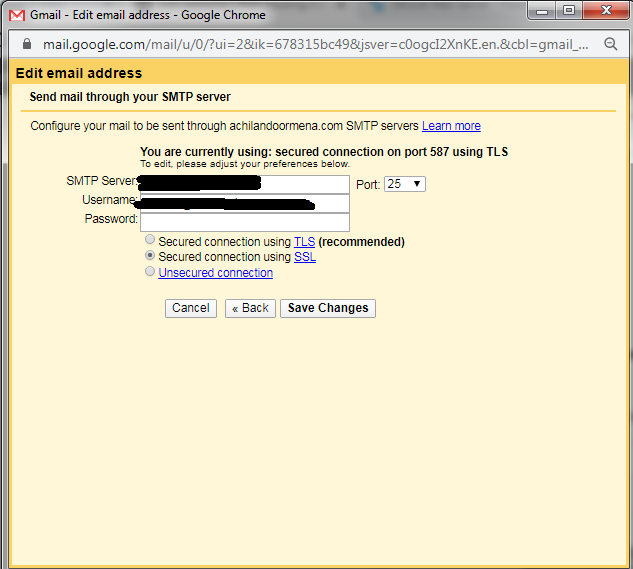
Step 3: Now, set your SMTP server with few information such as:
Method 3:
Step 1: In your Gmail account, go to settings and then click on the accounts and import option. As usual tap on send mail as.
Step 2: Click on the edit button and then go to button next step.
Step 3: Here, this step is important. You will get a drop-down menu and so, select port option. Choose 25 and save all your changes.
All over! Only three methods dude! You will get a solution in any of method surely.
One of the best applications to send emails through Gmail! Yes, either to reach out to other specification Gmail has an extreme user-friendly approach. In that case, if you get an error by saying TLS Negotiation failed, the certificate doesn’t match the host then what’s your next move? Yes, in this article we are going to learn how to overcome the situation if you couldn’t able to send an email via Gmail.
Why are getting this error?
Gmail has the functionality to check whether the server name and SSL certificate common name is the same or different. You would know that the SSL certificate is assigned with a common name. So, CN hasn’t differed with the name of the mail server. If it gets differ then you cannot send the email through the Gmail application.
Go to Gmail and search for a setting option. From there, click on accounts and imports to choose to send mail as an option.
By doing this, if you get an error by saying:
TLS Negotiation failed, the certificate doesn’t match the host
Let’s see how to solve this problem: Making out three solutions will fit our problem existence.
Method 1:
Step 1: Just do Plesk login. You need to go for a certificate for mail protection by clicking on SSL & TLS certificates option. To go for SSL & TLS certificates click on Tools & Settings.
Step 2: In the SSL & TLS certificate option, you can see the button called change. When clicking it, you will be getting a drop-down menu such as a select certificate *.
Step 3: In the drop-down menu, a certificate for your domain is listed. Choose the one which you want and then tap on the OK button.
Method 2:
Step 1: Open your Gmail account and go to the settings option. You can see the choice accounts & import in the settings option. Click on it!
Step 2: Once if you click on accounts & import options, choose send mail as a menu. So, there you can see the edit button and next is the Next button.
Step 3: Now, set your SMTP server with few information such as:
- Username
- Password
- SMTP Server
Method 3:
Step 1: In your Gmail account, go to settings and then click on the accounts and import option. As usual tap on send mail as.
Step 2: Click on the edit button and then go to button next step.
Step 3: Here, this step is important. You will get a drop-down menu and so, select port option. Choose 25 and save all your changes.
All over! Only three methods dude! You will get a solution in any of method surely.