How to Migrate WordPress Website to a New Domain And Retain SEO Score?
Many website owners at one point in time need to migrate their WordPress website to a new domain. While the process is easy and straightforward, the main complication arises with SEO or Search Engine Optimizations. If you’ve spent money on your SEO efforts and are enjoying higher rankings, then those could get wiped off within minutes of changing your domain. But there is a way with which you can retain those hard-earned SEO metrics for your new domain.
Preparations before WordPress Website Migration
Before you initiate the migration process, there are few things you need to keep in mind. First is that you cannot eliminate temporary effects. Your search rankings will be affected for some period of time because search engines need to adjust to the rankings. Thus, do not get scared if you see slump in your SERP rankings or traffic. But over time, you’ll see improvements.
Also before you migrate, it’s recommended that you take a backup of your existing site. This is to ensure you can always recover your website if anything goes awry.
You can either use FTP or a plugin software to take this backup and download in ZIP archive.
Migrating WordPress Website to a New Domain (Without losing SEO scores)
After the backup is out of the way, you can start with migrating your WP website to your new domain in a way that it doesn’t affect your current SEO scores.
You can create the database from your account cPanel dashboard.

Start uploading the ZIP package and installer files onto the root directory. Now it’s time to extract the files. Visit mynewdomain.com/installer.php and replace mynewdomain with your domain name.
Just follow the steps and you’ll successfully unzip the package.
To set up the 301 redirect, you need to edit your .htaccess file.
Connect to your old side using FTP and open the .htaccess file that is present in the root directory, just below the core folders. Paste the following line of code at the beginning:
Save the changes and exit. To check the implementation was successful, head over to your old domain from your browser. If it automatically redirects you to the new domain, then you’ve set it up correctly. If not, you might have to recheck for typos or something.
Now you’ve successfully migrated your WP website to a new domain. The 301 redirect will ensure your SEO scores recovers faster than usual.
Log into the GSC and put in your new domain name. Now switch over to the older version of GSC because we want to make some changes to the old domain.
Many website owners at one point in time need to migrate their WordPress website to a new domain. While the process is easy and straightforward, the main complication arises with SEO or Search Engine Optimizations. If you’ve spent money on your SEO efforts and are enjoying higher rankings, then those could get wiped off within minutes of changing your domain. But there is a way with which you can retain those hard-earned SEO metrics for your new domain.
Preparations before WordPress Website Migration
Before you initiate the migration process, there are few things you need to keep in mind. First is that you cannot eliminate temporary effects. Your search rankings will be affected for some period of time because search engines need to adjust to the rankings. Thus, do not get scared if you see slump in your SERP rankings or traffic. But over time, you’ll see improvements.
Also before you migrate, it’s recommended that you take a backup of your existing site. This is to ensure you can always recover your website if anything goes awry.
You can either use FTP or a plugin software to take this backup and download in ZIP archive.
Migrating WordPress Website to a New Domain (Without losing SEO scores)
After the backup is out of the way, you can start with migrating your WP website to your new domain in a way that it doesn’t affect your current SEO scores.
- Create Database for your new domain
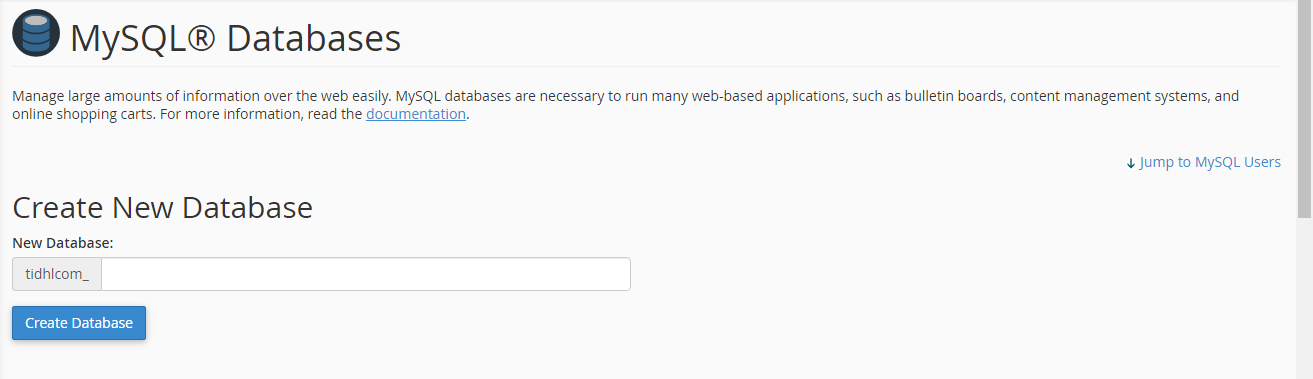
You can create the database from your account cPanel dashboard.
- Log in with the credentials and visit the “Databases” menu.
- From the option, select “MySQL Databases” since WP uses MySQL as database.
- Create the database and give it a name.
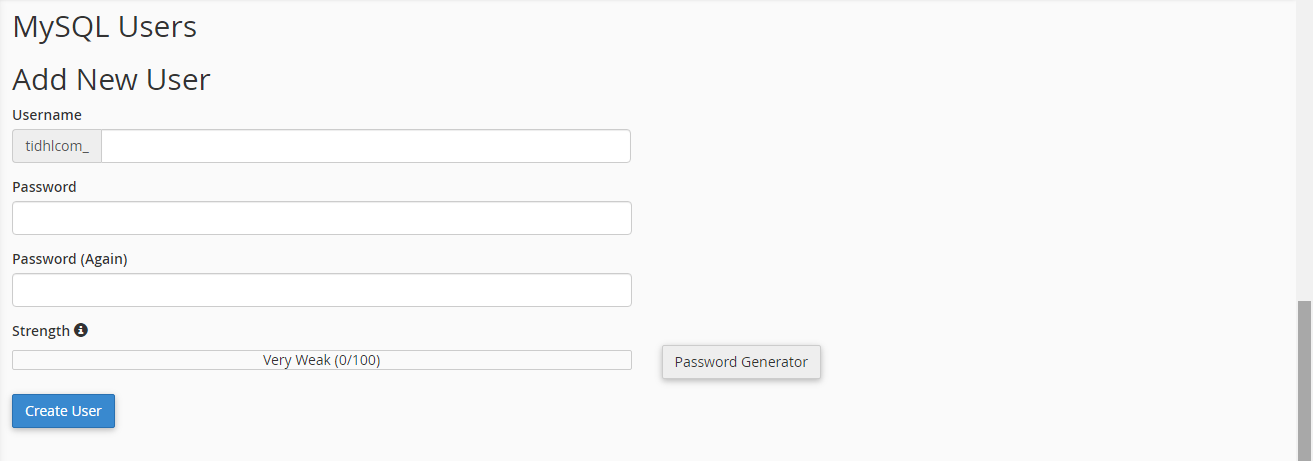
- Next, create an user or users that can access the newly-created database by clicking on “Create a user” button.
- Now complete the “Add a User to a Database” section which will give the users access to the database
- Upload and Unpack your ZIP file
Start uploading the ZIP package and installer files onto the root directory. Now it’s time to extract the files. Visit mynewdomain.com/installer.php and replace mynewdomain with your domain name.
Just follow the steps and you’ll successfully unzip the package.
- Set up 301 Redirects
To set up the 301 redirect, you need to edit your .htaccess file.
Connect to your old side using FTP and open the .htaccess file that is present in the root directory, just below the core folders. Paste the following line of code at the beginning:
Code:
#Options +FollowSymLinks
RewriteEngine on
RewriteRule ^(.*)$ http://www.newwebsite.com/$1
[R=301,L]Now you’ve successfully migrated your WP website to a new domain. The 301 redirect will ensure your SEO scores recovers faster than usual.
- Update on your Google Search Console
Log into the GSC and put in your new domain name. Now switch over to the older version of GSC because we want to make some changes to the old domain.
- From the gear icon, select “Change of Address”
- The console will ask you the newer domain from the drop down menu
- Now to test 301 redirect, click on check button
- Hit the submit button to confirm the change of address request