What is WebDav?
WebDav is abbreviated as web distributed authoring and versioning. To get access the remote web content for the client it acts as extension with HTTP. This is defined by a group who are working as Internet engineering task force in form of RFC 4918.
Recently, Microsoft has released a new version of WebDav with the rewritten authority by Windows server @ 2008 for IIS 7.0. This brings new content features with high mode security base even than before. This version has a new feature to get custom properties for all contents.
Let us learn how to enable custom properties using IIS Manager:
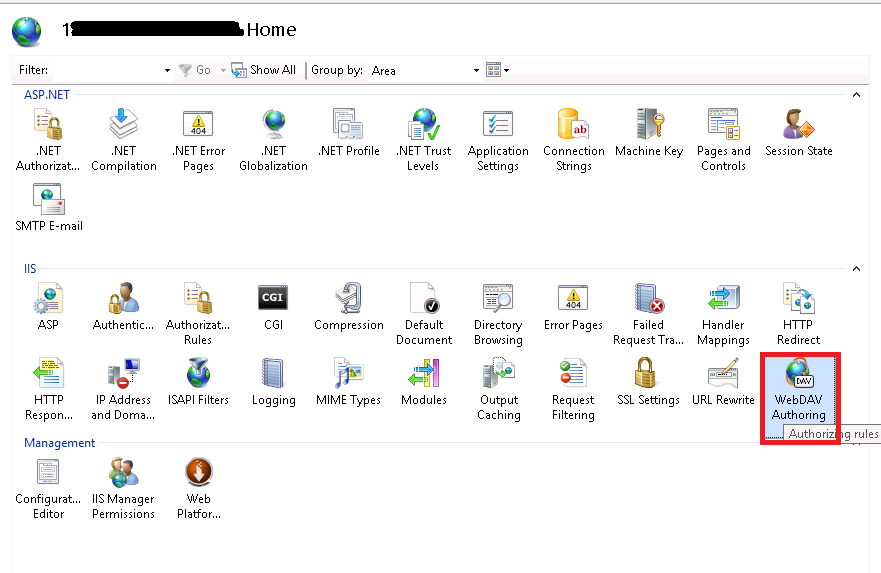
Step 1: Open the IIS Manager, there you have connection panel. Click on the site node and choose default web site.
Step 2: In the screen, search for WebDav authoring rule icon and double click on it.
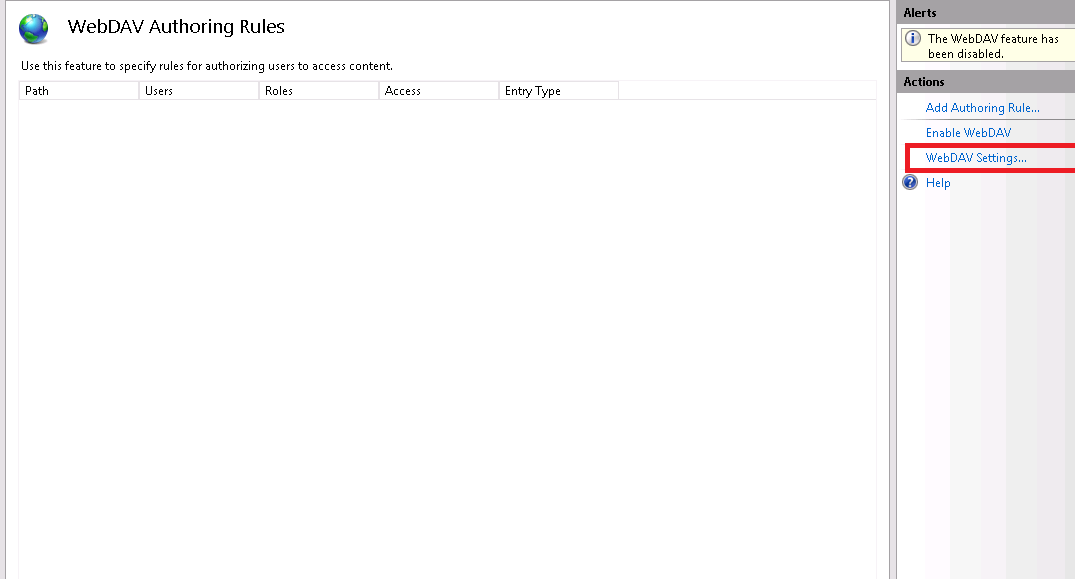
Step 3: After double clicking it, you will get the screen to be displayed and at the right side you have the action panel.
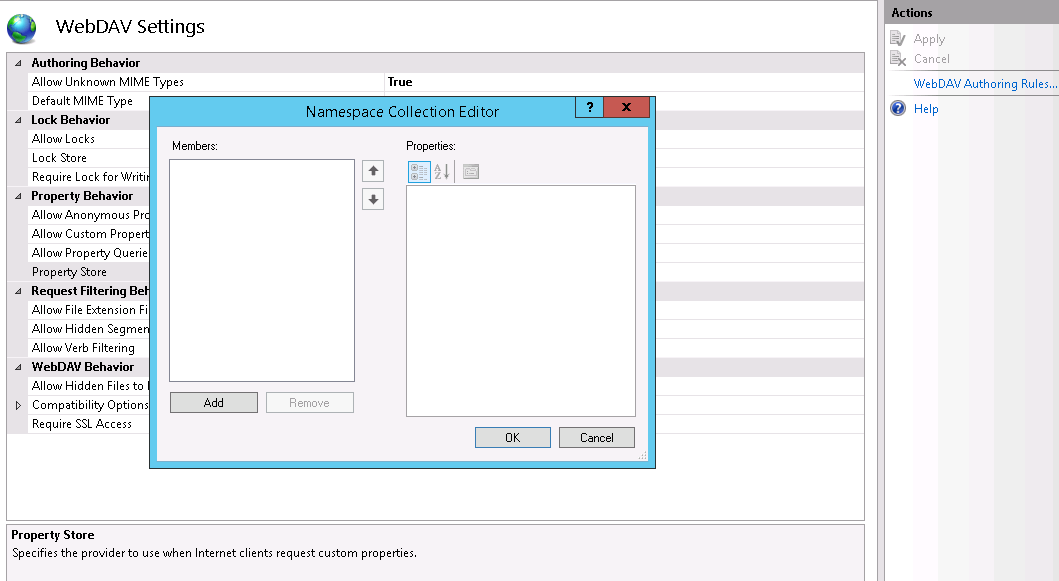
Step 4: In that action panel, click on the WebDav settings and it shows the settings as
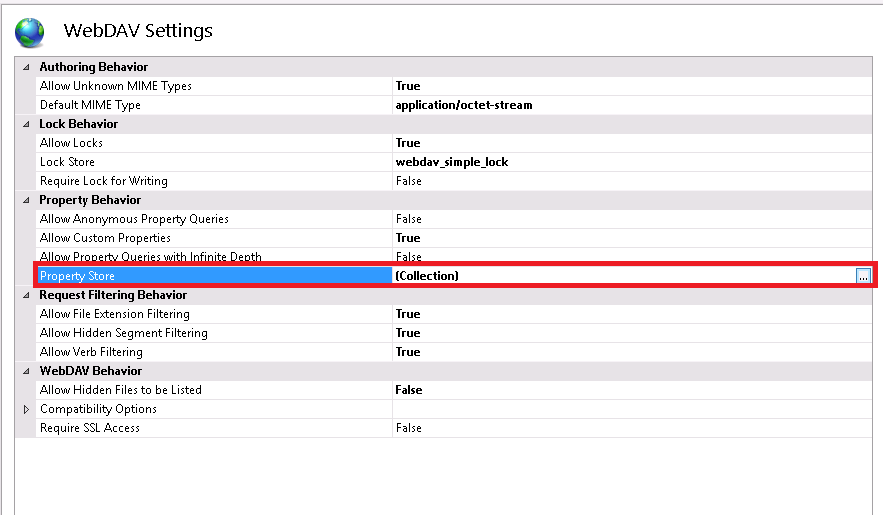
Step 5: Search for the icon (…) click on it and it helps get editor of namespace collection.
Step 6: Now, tap on the add button. The dropdown list will be displayed and then select “webdav_simple_prop”
Step 7: Here, you need to highlight the symbol * to XmlNameSpace
Step 8: Finally click on the OK button.
Step 9: Check whether all the process has been completed correctly and so click on the apply button. The apply button is present in the action panel.
Finally, we have enabled custom properties with WebDav easily. The process may takes a long bit but once if you completed and so, it will bring an new effect in WebDav versions.
WebDav is abbreviated as web distributed authoring and versioning. To get access the remote web content for the client it acts as extension with HTTP. This is defined by a group who are working as Internet engineering task force in form of RFC 4918.
Recently, Microsoft has released a new version of WebDav with the rewritten authority by Windows server @ 2008 for IIS 7.0. This brings new content features with high mode security base even than before. This version has a new feature to get custom properties for all contents.
Let us learn how to enable custom properties using IIS Manager:
Step 1: Open the IIS Manager, there you have connection panel. Click on the site node and choose default web site.
Step 2: In the screen, search for WebDav authoring rule icon and double click on it.
Step 3: After double clicking it, you will get the screen to be displayed and at the right side you have the action panel.
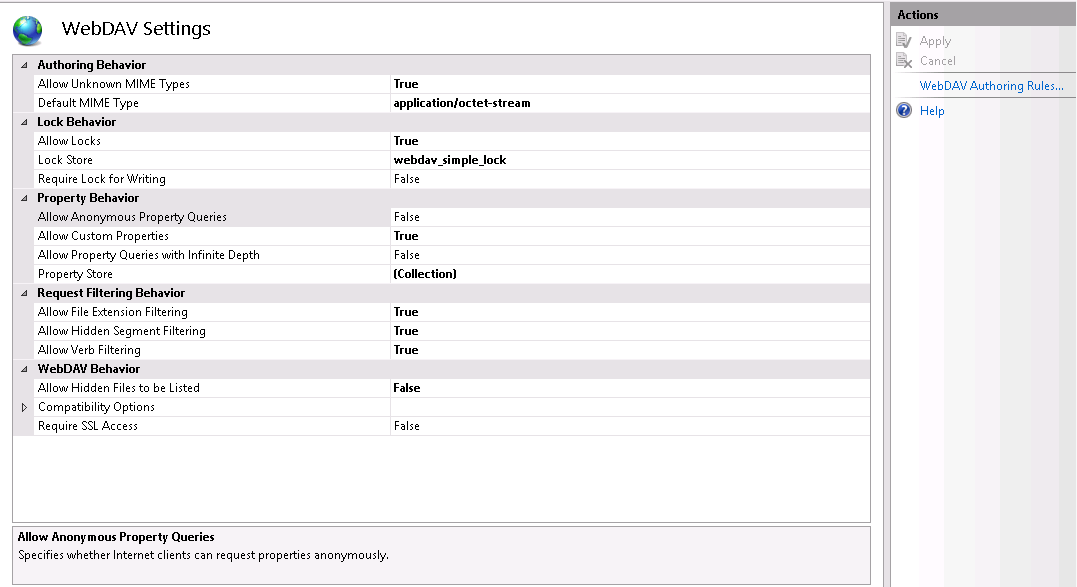
Step 4: In that action panel, click on the WebDav settings and it shows the settings as
- Set allow property queries with infinite depth to False
- Set allow custom properties to true
- Set allow anonymous property queries to False
Step 5: Search for the icon (…) click on it and it helps get editor of namespace collection.
Step 6: Now, tap on the add button. The dropdown list will be displayed and then select “webdav_simple_prop”
Step 7: Here, you need to highlight the symbol * to XmlNameSpace
Step 8: Finally click on the OK button.
Step 9: Check whether all the process has been completed correctly and so click on the apply button. The apply button is present in the action panel.
Finally, we have enabled custom properties with WebDav easily. The process may takes a long bit but once if you completed and so, it will bring an new effect in WebDav versions.