If you want to increase the speed of your website or web app, then you need to use DSO. DSO stands for Dynamic Shared Object. It is one of the many modules available in Apache to handle the PHP scripts. It is also one of few modules available for handling PHP. Since Apache does not natively support PHP scripts, you need such programs, which are known as PHP Handlers.
In this article, you’ll learn how to install DSO using EasyApache 4 with the mod_ruid2.
Install DSO with mod_ruid2
Here are the steps involved for this procedure:
Confirming that DSO is Available
As the next step, you need to ensure that DSO is available in your system for use. You can do this in two steps. Those are:
It would confirm that you have DSO available for use.
Setting DSO as PHP Handler
To start using DSO, you need to set it as PHP Handler. You can do this either via the CLI or from your WHM.
From CLI
Here are the steps involved to set DSO as PHP handler from the command line interface:
Connect to your back-end server using the SSH
Then, run this command
Replace the ## with the PHP version you want to set
From WHM
Using Web Host Manager is much easier. Here are the steps involved:

In this article, you’ll learn how to install DSO using EasyApache 4 with the mod_ruid2.
Install DSO with mod_ruid2
Here are the steps involved for this procedure:
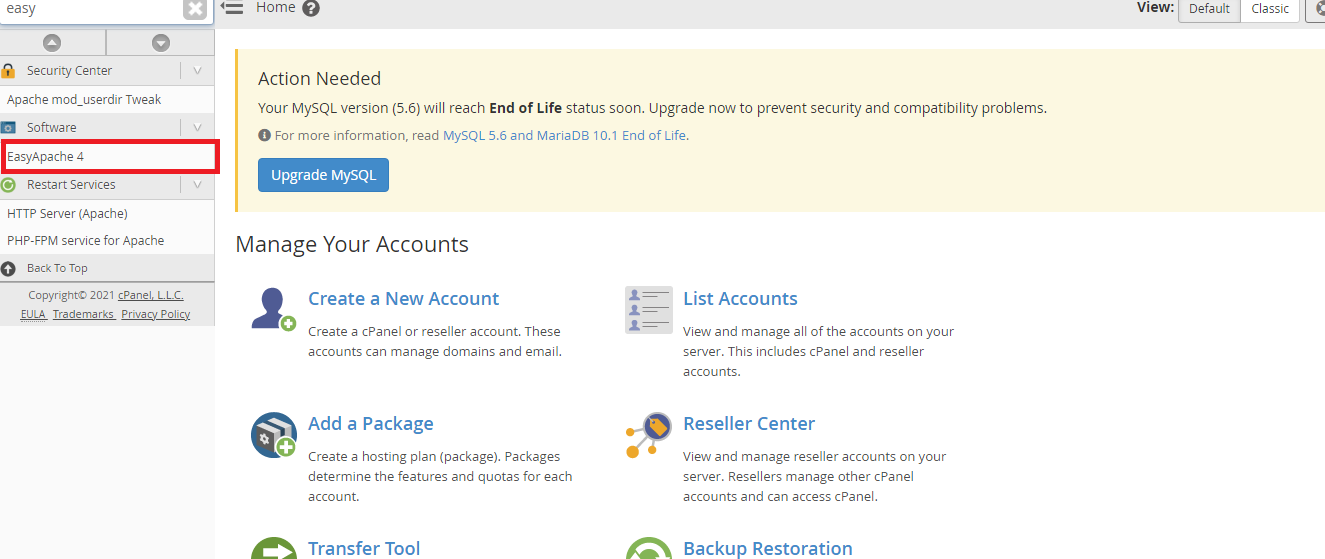
- Log into your WHM/cPanel with root privileges
- Search for “EasyApache” in the search box
- Under the Software category, you’ll see the EasyApache 4 listed. Click on it
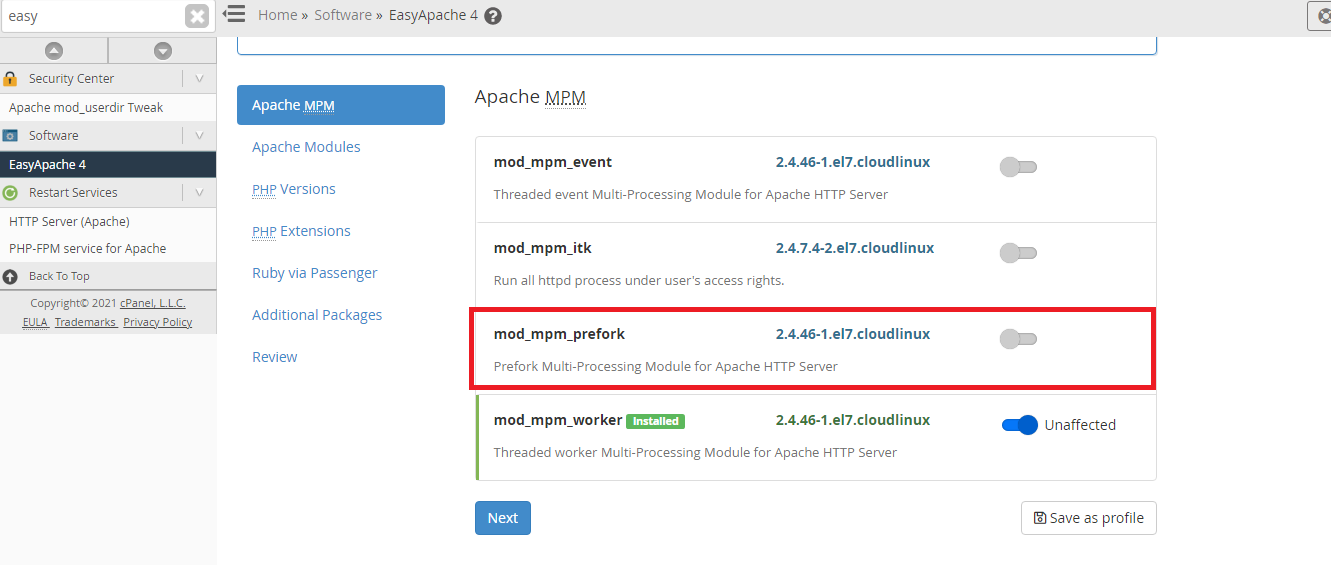
- For the “Currently Installed Packages” section, select the “Customize” option button
- Enable the Toggle button next to mod_mpm_prefork. This would enable the Apache MPM
- When prompted, click on Yes button followed by the Next button
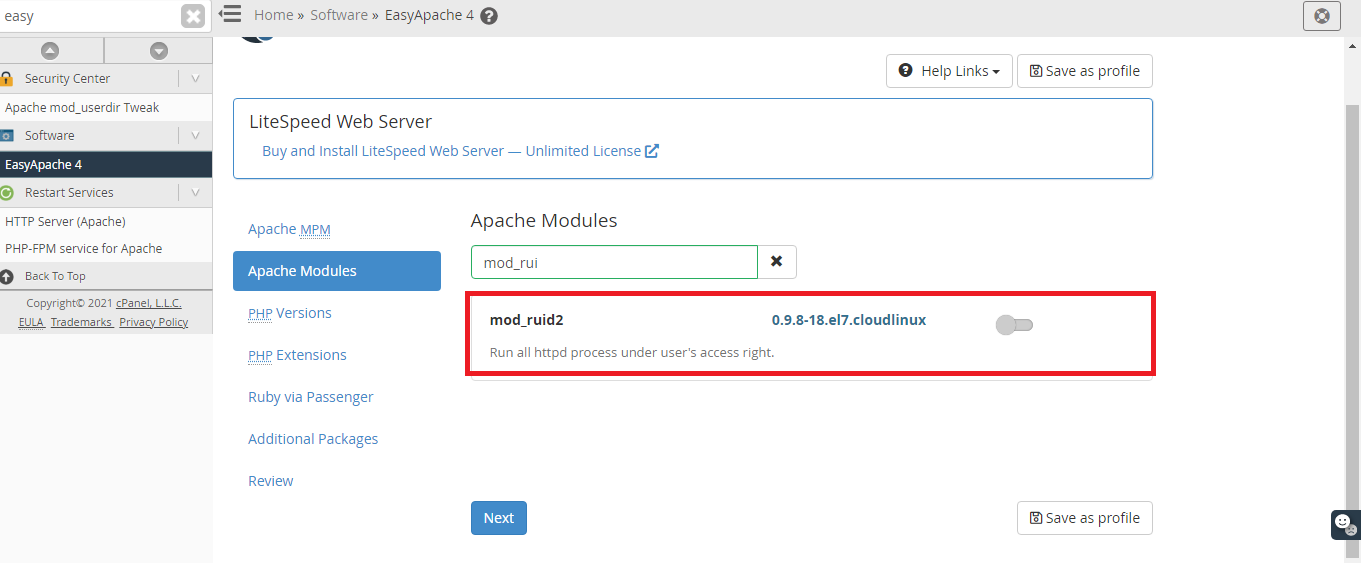
- Inside the Apache Modules section, search for the mod_ruid2 module and install it using the toggle button. Then click on Next to proceed further.
- Again use the search bar to find the “php802-php” module, where 802 is the version number. You should use the version you want to use, but make sure to not use dots in between
- When prompted, click on Yes button followed by the Next button to proceed further
- Review the changes you’ve made in the system and confirm by clicking on the Provision button. This will initiate the DSO installation and configuration process
Confirming that DSO is Available
As the next step, you need to ensure that DSO is available in your system for use. You can do this in two steps. Those are:
- Log in to your server using SSH
- Run this command -
Code:
/usr/local/cpanel/bin/rebuild_phpconf –available- You should see this line
Code:
- ea-php56: cgi dso noneSetting DSO as PHP Handler
To start using DSO, you need to set it as PHP Handler. You can do this either via the CLI or from your WHM.
From CLI
Here are the steps involved to set DSO as PHP handler from the command line interface:
Connect to your back-end server using the SSH
Then, run this command
Code:
- /usr/local/cpanel/bin/rebuild_phpconf –ea-php##=dsoFrom WHM
Using Web Host Manager is much easier. Here are the steps involved:
- Log into your WHM account with root privileges
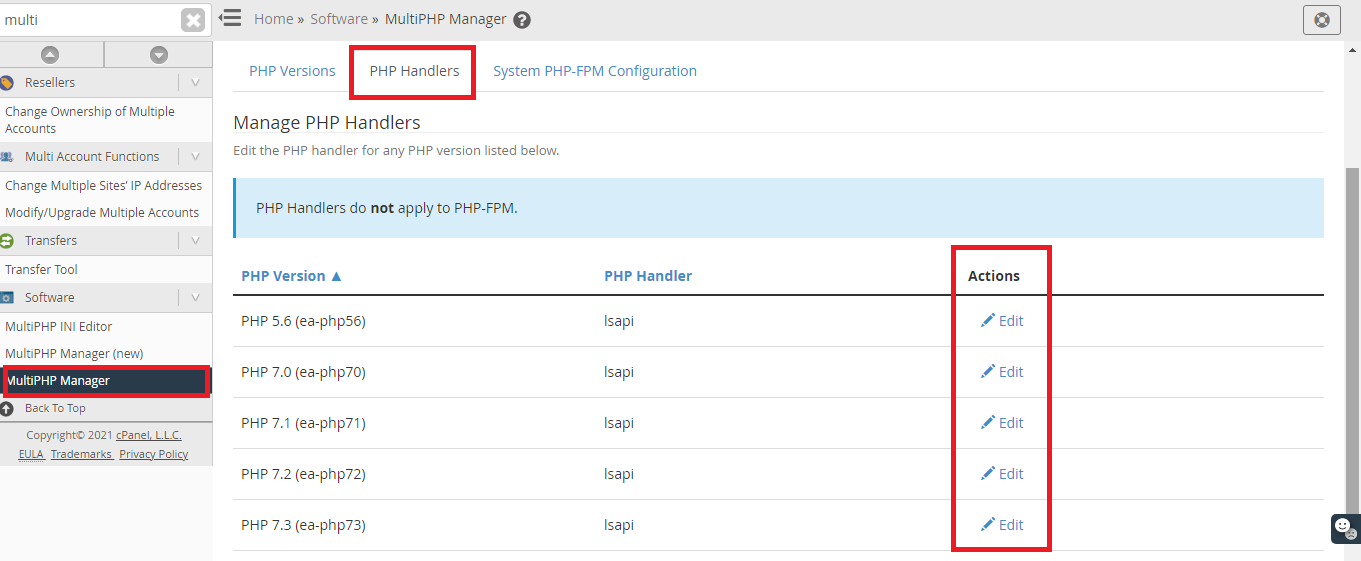
- Search for “Multiphp” in the search box
- Click on the “MultiPHP Manager” from the results
- Find and open the “PHP Handlers” tab
- Find the relevant PHP version you want the DSO for. Corresponding to the row, click on the “Edit” option
- From the drop down menu select “DSO” under the PHP Handler column
- Finally, hit the “Apply” button to apply the changes made