Site migration cannot be started: Failed to connect to target Plesk server by Plesk API: Plesk error [1006]: Access to API is disabled for 207.132.132.2
You would have got an error message like below mentioned:
This type of error occurs when you cannot log in even if you have the privilege as an administrator. Your IP address got restricted by the destination server. For example, it is easy to start the migration by selecting the option Tools & Settings and then choose Migration & transfer manager.
The IP address situated at the next step to start the migration. In the case of IP address restriction, migration doesn’t start the process instead it throws the error as mentioned above. Not only for migration setup has it showed the error even if you import the site. So, let us try by requesting API in the below format:
After execution, go to Tools & settings again but now you cannot see the option Migration & transfer manager. It shows the option as restrict administrative access page. From this, you can conclude that migration is not set for your IP address.
You may ask how the restricted administrative access page option works. Most probably, the options called “access to Plesk with administrative privileges” have changed its access type as “denied from the networks that are not listed” option. So, IP address won’t be visible like before now since it has been denied from the network.
No worries dude! We have resolutions for all types of migration and site import errors. Follow the below steps as recommended for perfect resolution:
Step 1: From your destination server, just log in to Plesk.
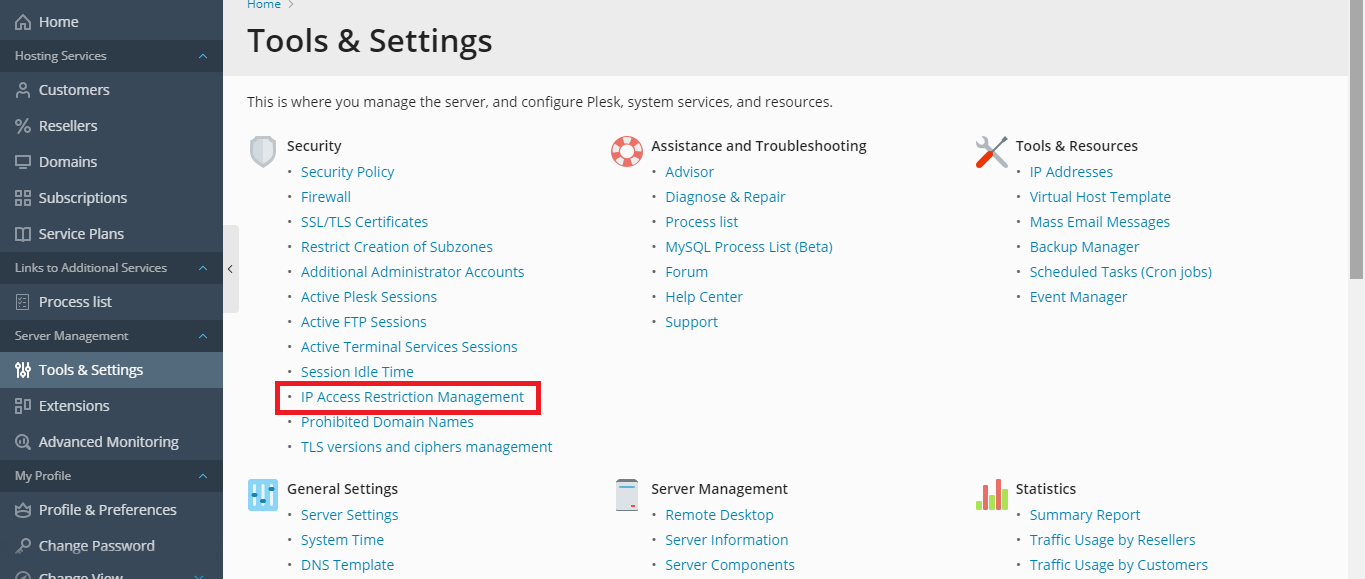
Step 2: After login, go to the option “Tools & Settings” and then choose “IP Access Restriction Management”.
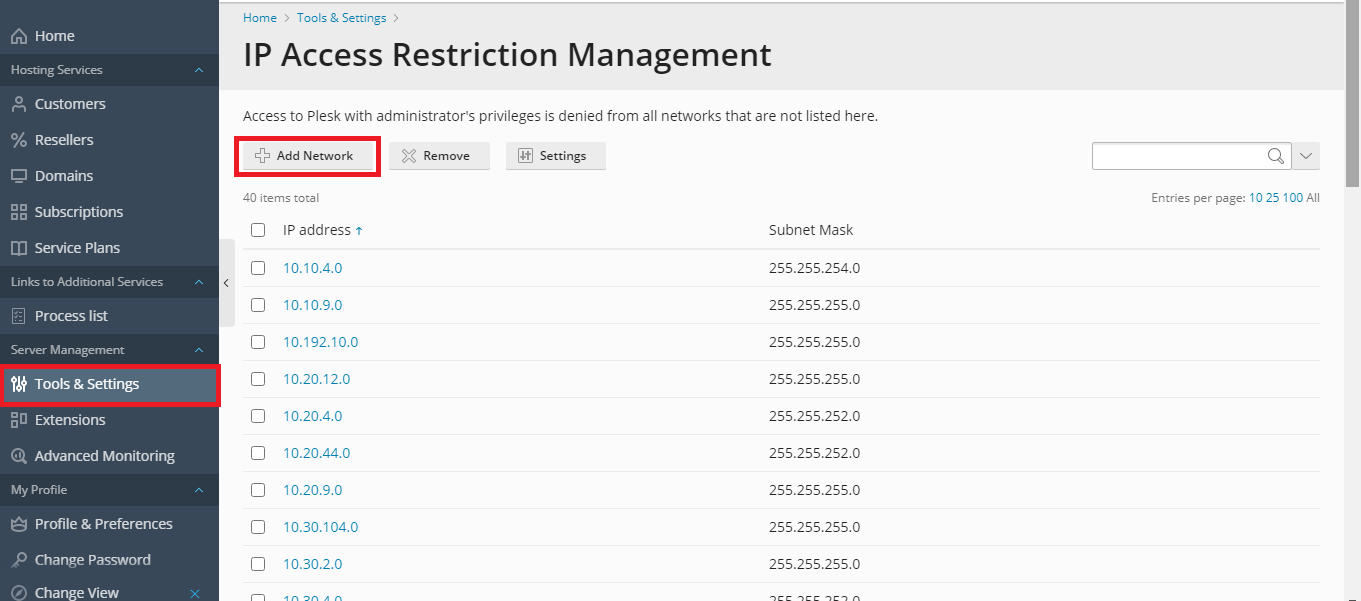
Step 3: Search the option “Add network” and so, you can enter the IP address that has been restricted from the network.
Step 4: Tap on the button OK.
That’s it! These four steps will give you a perfect resolution to get start migration again. Now, you can view the option “Migration & Transfer Managers” in your Tools & settings option. Restricted IP address works again without interruption. You can start the migration now easily!
You would have got an error message like below mentioned:
Code:
Failed to connect to target Plesk server by Plesk API: Plesk error [1006]: Access to API is disabled for 207.132.132.2The IP address situated at the next step to start the migration. In the case of IP address restriction, migration doesn’t start the process instead it throws the error as mentioned above. Not only for migration setup has it showed the error even if you import the site. So, let us try by requesting API in the below format:
Code:
/usr/local/psa/admin/conf/panel.ini (Linux) or %plesk_dir%admin/conf/panel.ini (Windows) file:
[api]
enabled = onYou may ask how the restricted administrative access page option works. Most probably, the options called “access to Plesk with administrative privileges” have changed its access type as “denied from the networks that are not listed” option. So, IP address won’t be visible like before now since it has been denied from the network.
No worries dude! We have resolutions for all types of migration and site import errors. Follow the below steps as recommended for perfect resolution:
Step 1: From your destination server, just log in to Plesk.
Step 2: After login, go to the option “Tools & Settings” and then choose “IP Access Restriction Management”.
Step 3: Search the option “Add network” and so, you can enter the IP address that has been restricted from the network.
Step 4: Tap on the button OK.
That’s it! These four steps will give you a perfect resolution to get start migration again. Now, you can view the option “Migration & Transfer Managers” in your Tools & settings option. Restricted IP address works again without interruption. You can start the migration now easily!