When your website is undergoing maintenance work on the backend, it’s necessary to put it in maintenance mode. This way, the users will see a sign which confirms that the website is currently down and undergoing changes. It will be back shortly. Without this message, they’ll simply see a broken website.
In this article, we explain how to put a WordPress website in Maintenance Mode.
Use SeedProd to Set up Maintenance Mode
In this section, learn about the step‐by‐step process for setting up a maintenance mode page in WordPress using SeedProd. To get started, you need to install a plugin called SeedProd. It’s a free plugin that allows you to build ‘Coming Soon’ pages in a drag‐and‐drop interface. Therefore, go to the plugins directory and install the SeedProd plugin.
The follow the following steps:
SeedProd also allows you to put some pages in Maintenance Mode while not restricting others. This is a great way if you have to work on specific pages and not on entire website. You can do this by going into Page Settings and look for Include/Exclude URLs. Now click on Exclude URLs radio button and provide the required URLs.
Use WP Maintenance Mode Plugin
If for some reasons you decide against using SeedProd, you can make use of the WP Maintenance Mode plugin. Working with this plugin is similar to SeedProd. To begin with, you need to install and activate the plugin. The follow these steps:
So that’s how you set up Maintenance Mode for WordPress website. Once the modifications are done, reverse the changes to bring the website back up.
In this article, we explain how to put a WordPress website in Maintenance Mode.
Use SeedProd to Set up Maintenance Mode
In this section, learn about the step‐by‐step process for setting up a maintenance mode page in WordPress using SeedProd. To get started, you need to install a plugin called SeedProd. It’s a free plugin that allows you to build ‘Coming Soon’ pages in a drag‐and‐drop interface. Therefore, go to the plugins directory and install the SeedProd plugin.
The follow the following steps:
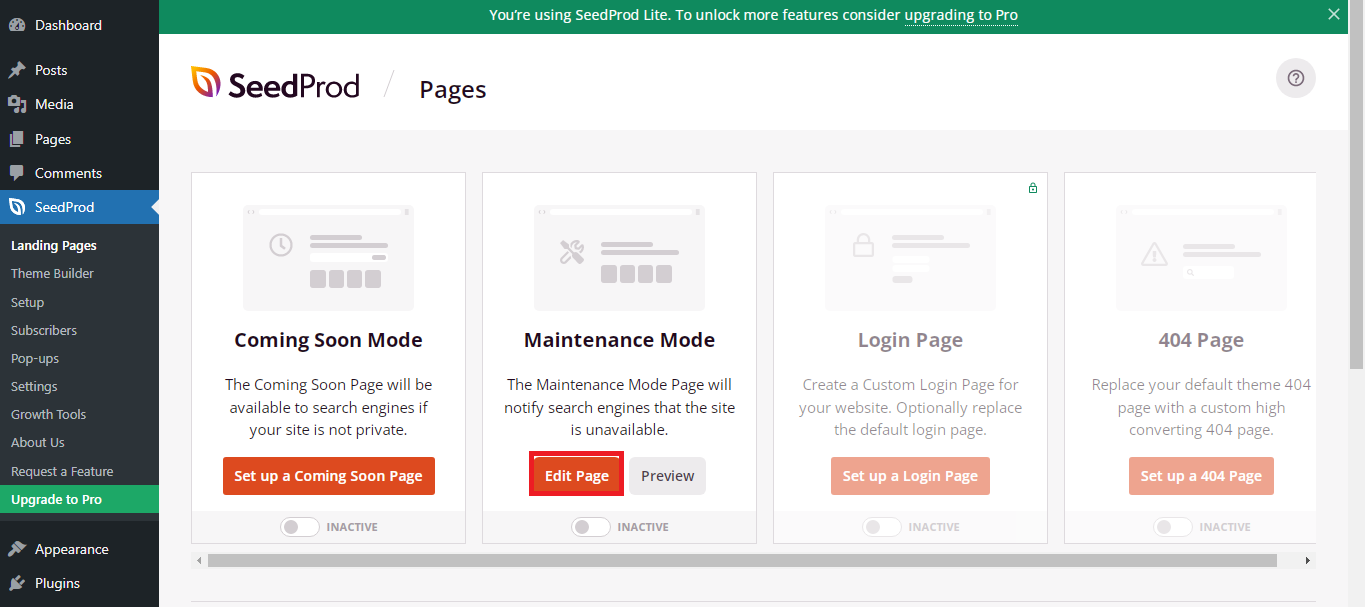
- Go to WordPress dashboard
- Navigate into SeedProd > Pages.
- Locate Maintenance Mode and click on Edit Page option
- Inside it, click on Page Settings which can you find at the top of the page
- Then go to Access Control tab. Here you need to select the users who can by pass the maintenance mode and visit the page. You can use cookies, IP address, or user roles, or a secret bypass URL
- Enter the users and click on Save
SeedProd also allows you to put some pages in Maintenance Mode while not restricting others. This is a great way if you have to work on specific pages and not on entire website. You can do this by going into Page Settings and look for Include/Exclude URLs. Now click on Exclude URLs radio button and provide the required URLs.
Use WP Maintenance Mode Plugin
If for some reasons you decide against using SeedProd, you can make use of the WP Maintenance Mode plugin. Working with this plugin is similar to SeedProd. To begin with, you need to install and activate the plugin. The follow these steps:
- Go to WordPress dashboard
- Navigate into Settings > WP Maintenance Mode. This will take you to General options tab
- Change the Status from deactivated (which is the default option) to activated
- Similarly, change the settings for other criteria like Bypass for Search Bots, Backend role, Frontend role, and Robots Meta Tag as per your preference
- Save the changes and exit
So that’s how you set up Maintenance Mode for WordPress website. Once the modifications are done, reverse the changes to bring the website back up.