Steps to migrate WordPress from a Shared Hosting to VPS
WordPress powers over 1.3 billion websites. The flexibility of hosting WordPress on multiple places is one of the reasons. Many businesses and individual bloggers start off with their WordPress website on a shared hosting, but eventually feel the need to move into a Virtual Private Server or VPS. In this article, you’ll learn how to migrate your WordPress website from a shared to private virtual server.
Shared Hosting vs Private Hosting
So now that you want to move into a private hosting, you should know all of its benefits (and drawbacks).
Virtual servers are two types, namely, shared and private. In a shared hosting environment, your website and applications are stored along with tens of others on a single server. Thus, it is named “Shared”. But in case of private, your website is the only one that lives on that server. Therefore, it is called “Private”, separate from other servers.
The major benefit with VPS is you get complete control over your server technology. By migrating to a private server, you ensure safety and guaranteed resource like CPU cores, memory, and disk space. These provide the best, high-class performance.
When deciding between shared or private, you should consider website traffic. If your website receives low traffic, then shared hosting is the better option. But when traffic goes up, then you should migrate to a virtual private server.
Process to Migration WordPress to a VPS
In this section, we’ll explain the process for migrating your WordPress website to a VPS.
1. Sign up and create a Free Cloudways Account
First of all you need a VPS account. If you haven’t selected one already, you can consider Cloudways VPS. Create a free account to get started.
2. Create a Site Backup
Before modifying or working on any aspect of your website, it’s highly recommended to create a backup. This ensures you have a copy to restore your website in case something goes wrong. You can do this on your shared hosting provider with below steps:
WordPress uses SQL as its database and your Wordpress website has a SQL database as well. You need to export it from your current hosting provider.
4. Import the SQL Database into VPS
In this step, you’d do the reverse – import the downloaded files to the new virtual private server. To do this, follow the steps:
5. Download a SFTP software (skip this if you already have one)
Now, you need to upload the WP-Content file that you downloaded previously. For this you need a SFTP software. If you don’t have one, we recommend WinSCP. Install it and go the next step.
6. Upload the WordPress content
Open the “Application Management” tab like you did previously. Get the SFTP details like Public IP, Username, and Password. Provide the details in the SFTP application and create a connection.
To upload the WP-Content file, drag the file that’s stored in your desktop to “public_html” directory.
Now you need to log in to the WordPress admin dashboard. For this you’d need the login username and password. In the Application Management section, you’ll find Admin Area Access. This would list the username and password. You can either change or keep it as it is.
Now log in to your WordPress admin section and reactive the themes and plugins you had on your website previously.
7. Point Domain Name to VPS
In the last step, you need to point the domain to the VPS server.
WordPress powers over 1.3 billion websites. The flexibility of hosting WordPress on multiple places is one of the reasons. Many businesses and individual bloggers start off with their WordPress website on a shared hosting, but eventually feel the need to move into a Virtual Private Server or VPS. In this article, you’ll learn how to migrate your WordPress website from a shared to private virtual server.
Shared Hosting vs Private Hosting
So now that you want to move into a private hosting, you should know all of its benefits (and drawbacks).
Virtual servers are two types, namely, shared and private. In a shared hosting environment, your website and applications are stored along with tens of others on a single server. Thus, it is named “Shared”. But in case of private, your website is the only one that lives on that server. Therefore, it is called “Private”, separate from other servers.
The major benefit with VPS is you get complete control over your server technology. By migrating to a private server, you ensure safety and guaranteed resource like CPU cores, memory, and disk space. These provide the best, high-class performance.
When deciding between shared or private, you should consider website traffic. If your website receives low traffic, then shared hosting is the better option. But when traffic goes up, then you should migrate to a virtual private server.
Process to Migration WordPress to a VPS
In this section, we’ll explain the process for migrating your WordPress website to a VPS.
1. Sign up and create a Free Cloudways Account
First of all you need a VPS account. If you haven’t selected one already, you can consider Cloudways VPS. Create a free account to get started.
2. Create a Site Backup
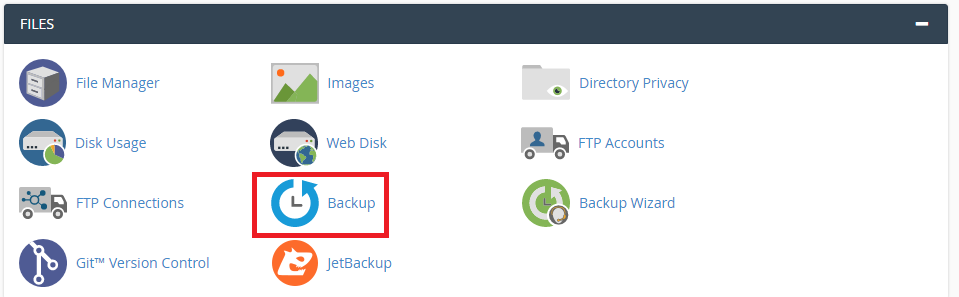
Before modifying or working on any aspect of your website, it’s highly recommended to create a backup. This ensures you have a copy to restore your website in case something goes wrong. You can do this on your shared hosting provider with below steps:
- Login to c-Panel,
- then to Files >> Backup.
- Create a backup.
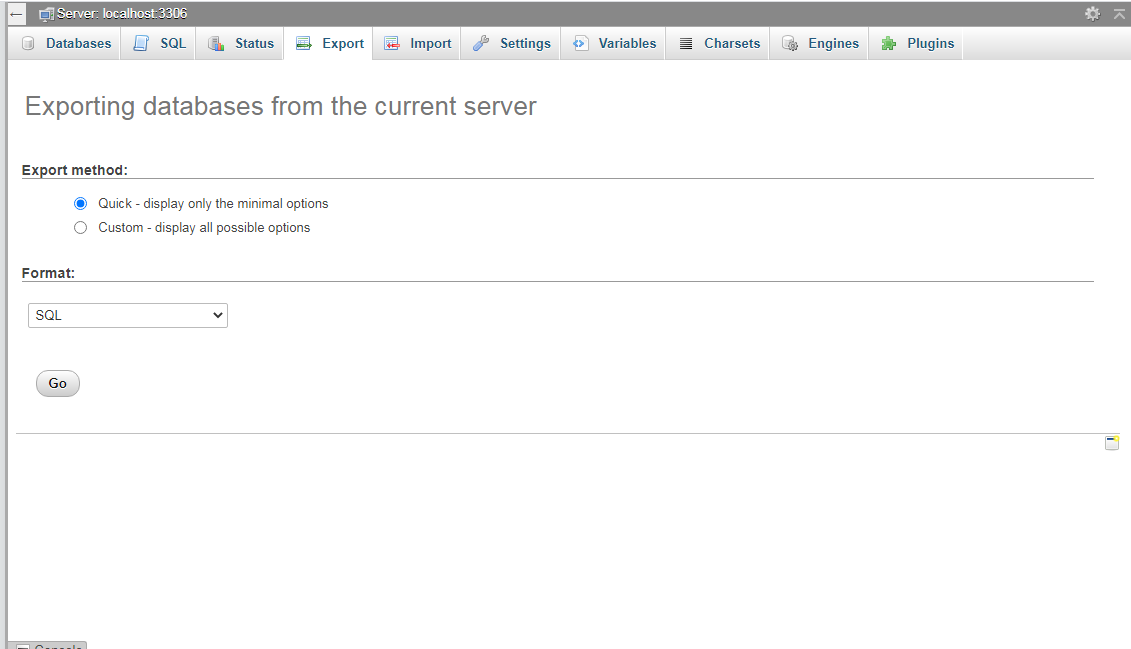
WordPress uses SQL as its database and your Wordpress website has a SQL database as well. You need to export it from your current hosting provider.
- Log into c-Panel
- choose phpMyAdmin.
- On the top menu bar, you’ll see an “Export” option.
- Click on it and the files will be downloaded in .sql format.
- Save on to your local computer.
4. Import the SQL Database into VPS
In this step, you’d do the reverse – import the downloaded files to the new virtual private server. To do this, follow the steps:
- Login to VPS and click on “Manage Server”.
- From the “Application Management” tab, click on “Launch Click & Go MySQL Manager” button.
- You’ll receive an untrusted connection warning, but you can ignore this and click on “I understand the risk” button.
- From the Import menu, browse the SQL database stored locally and select “Execute”.
5. Download a SFTP software (skip this if you already have one)
Now, you need to upload the WP-Content file that you downloaded previously. For this you need a SFTP software. If you don’t have one, we recommend WinSCP. Install it and go the next step.
6. Upload the WordPress content
Open the “Application Management” tab like you did previously. Get the SFTP details like Public IP, Username, and Password. Provide the details in the SFTP application and create a connection.
To upload the WP-Content file, drag the file that’s stored in your desktop to “public_html” directory.
Now you need to log in to the WordPress admin dashboard. For this you’d need the login username and password. In the Application Management section, you’ll find Admin Area Access. This would list the username and password. You can either change or keep it as it is.
Now log in to your WordPress admin section and reactive the themes and plugins you had on your website previously.
7. Point Domain Name to VPS
In the last step, you need to point the domain to the VPS server.
- Go to “Domain Management” section under “Application Management”.
- Click on “Add Primary Domain”.
- Enter the domain name without “http://”. Just “www.yoursitename.com”
- Click on “save”
- Navigate to “A (Host)” and locate “@” symbol and then click on “Edit” picture
- This will open CName tab.
- Find the “www” row.
- From the Domain Management section under the Application Management tab, copy the address and paste it in the “Point to” option in the “www” row. This address should look like wordpress-7877-12832-76374.cloudwaysapps.com if you’re using Cloudways Managed Hosting.