How to decrease the size of SQL server database size?
Database shrinkage is usual happenings for all the server usage. In this article, we are going to see how to shrink or reduce the size of the SQL database. It’s true that database has a huge space to store all type of data’s and coding’s to execute certain specifications. If it reaches out the limit then we have to reduce the space or to shrink the size of the database.
What is meant by shrinkage of database?
The data’s are stored in form of files and folders. So, you have to move the data page present at the file end space to empty space located to file front end space. The space in end of the file will be free now and so, the space can be allocated or you can go to previous file system terms.
When you are shrinking the database, there are a limitations and guidelines while performing the database shrinkage. At starting, when you created the database the size of the database is fixed and allotted properly. So, you cannot change the size of the database either by extending or cutting off the size. When you are backing up the data, kindly don’t do the shrinkage process it might result error in backup.
There is a common process to shrink the database by using DBCC SHRINKFILE. If it gets failed, when columnstore index optimization encountered xVelocity so it’s necessary for you to disable columnstore index and start using DBCC SHRINKFILE.
Let us go to topic directly. Now you have two choices to shrink the database one is SQL server management studio and Transact SQL command.
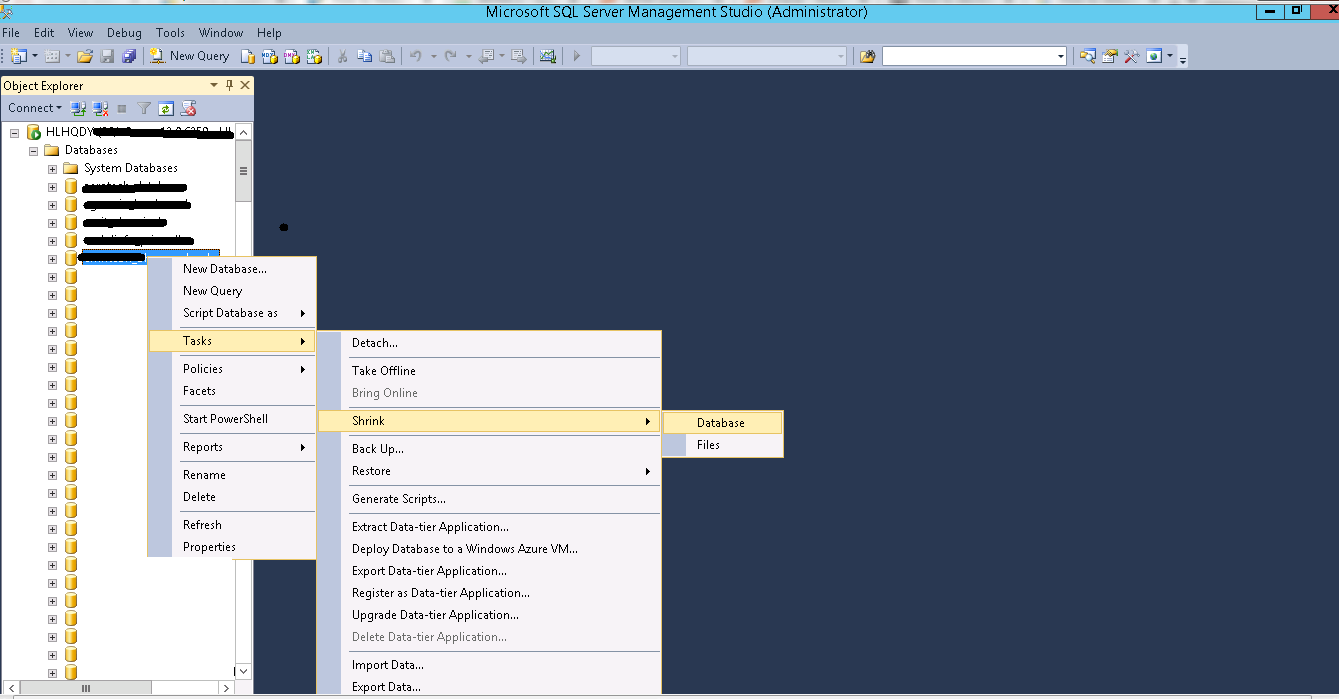
Step 2: Right click on the database folder and select the task option. From that, choose shrink option and it shows two choices such as database and files. Click on the database option.
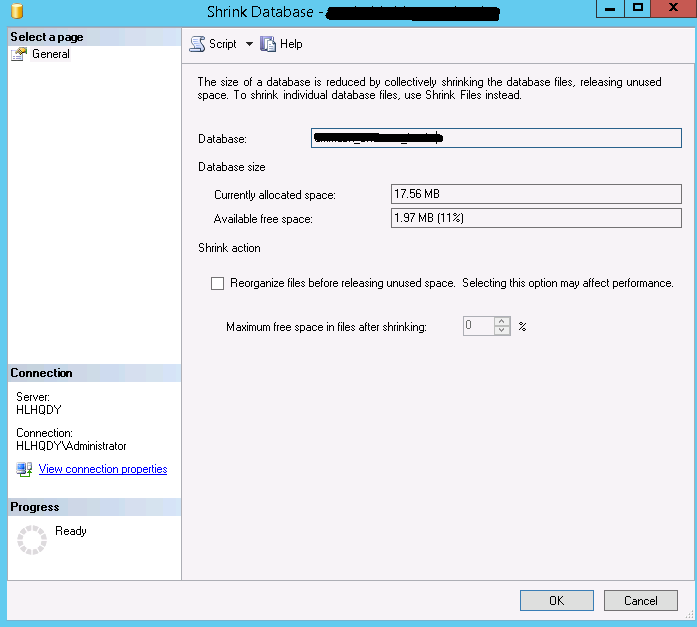
Step 3: It opens with a screen at last there is a button called ok. Click on the OK button.
That’s it for SQL server management studio shrinkage process.
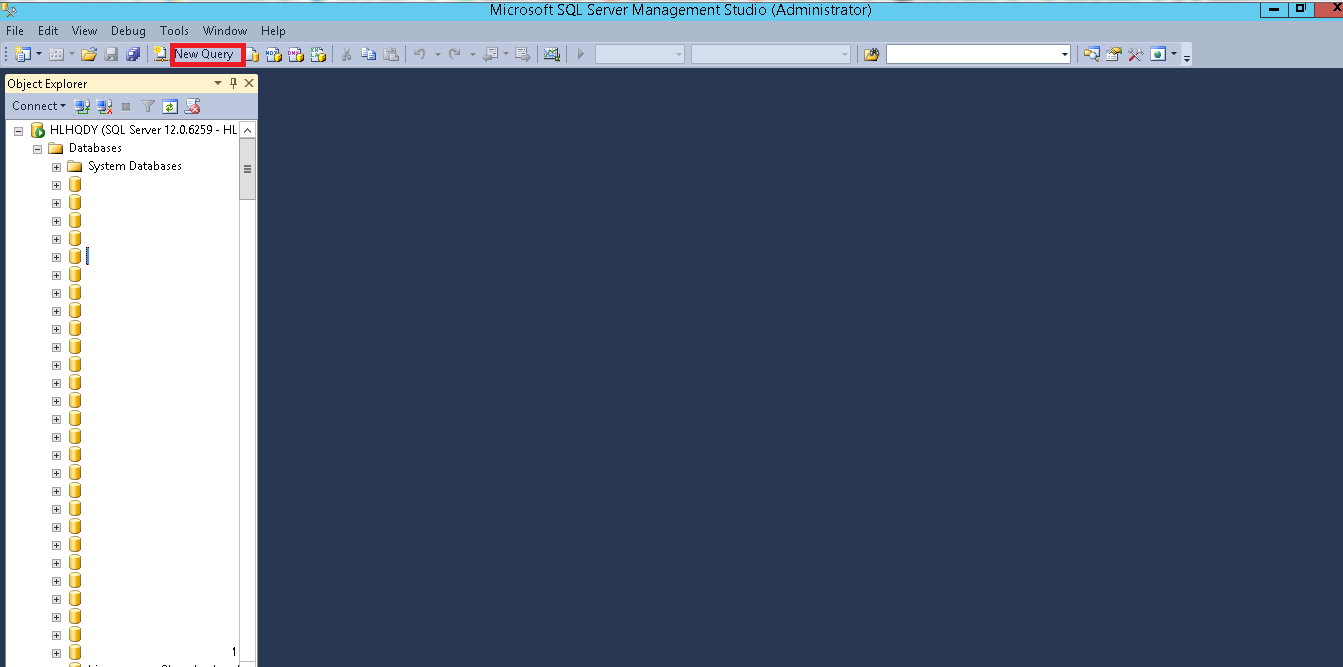
Step 1: Login to SQL server management studio and search for database engine connection. Once if you find it then connect database engine.
Step 2: On the top of the page, there is an option called new query in standard bar. Click on new query button and enter the command & execute it.
This command is used only to test the database shrinkage.
GO
So, you have successfully done the shrinking process.
Database shrinkage is usual happenings for all the server usage. In this article, we are going to see how to shrink or reduce the size of the SQL database. It’s true that database has a huge space to store all type of data’s and coding’s to execute certain specifications. If it reaches out the limit then we have to reduce the space or to shrink the size of the database.
What is meant by shrinkage of database?
The data’s are stored in form of files and folders. So, you have to move the data page present at the file end space to empty space located to file front end space. The space in end of the file will be free now and so, the space can be allocated or you can go to previous file system terms.
When you are shrinking the database, there are a limitations and guidelines while performing the database shrinkage. At starting, when you created the database the size of the database is fixed and allotted properly. So, you cannot change the size of the database either by extending or cutting off the size. When you are backing up the data, kindly don’t do the shrinkage process it might result error in backup.
There is a common process to shrink the database by using DBCC SHRINKFILE. If it gets failed, when columnstore index optimization encountered xVelocity so it’s necessary for you to disable columnstore index and start using DBCC SHRINKFILE.
Let us go to topic directly. Now you have two choices to shrink the database one is SQL server management studio and Transact SQL command.
- SQL server management studio:
Step 2: Right click on the database folder and select the task option. From that, choose shrink option and it shows two choices such as database and files. Click on the database option.
Step 3: It opens with a screen at last there is a button called ok. Click on the OK button.
That’s it for SQL server management studio shrinkage process.
- Transact SQL command:
Step 1: Login to SQL server management studio and search for database engine connection. Once if you find it then connect database engine.
Step 2: On the top of the page, there is an option called new query in standard bar. Click on new query button and enter the command & execute it.
Code:
DBCC SHRINKDATABASE (DatabaseName, ‘ targetpercent’ )
Code:
DBCC SHRINKDATABASE (test, 18);So, you have successfully done the shrinking process.