Tens of thousands of users use WordPress to manage their website, blog, or e-commerce store (via WooCommerce plugin). While managing and updating the website is important, what’s equally important -- yet neglected -- is taking proper backups. In case of disaster, you can easily restore your WordPress website using this backup file. In absence of it, you lose your website and the related files forever. In this article, learn how to create backup of your WordPress website manually.
Preparing for the Backup
Taking backup of WordPress website and files is a critical process. Therefore, you need to prepare before working on the backup.
A WordPress website has two components, namely, the Database and the Files. To backup your website, you need to create backup for both database and files. The files are located in the server of your hosting provider. To access them, you’d need either cPanel or FTP access. Database can only be accessed via phpMyAdmin.
Ensure that you have access to all of these things before moving ahead. If not, get the credentials.
Creating Backups Manually
Now let’s get started with creating backups of the WordPress site.
If you’re going to use the cPanel, then here are the steps to follow:

Downloading Database using phpMyAdmin
As already mentioned, you’d need to download the database too. This is done via phpMyAdmin. Here are the steps you need to follow:

That’s it. You have successfully downloaded both files and databases.
After that, there are a few things you can do. First is encrypt the backup files so that it stays secure. Even if hackers get hold of the files, they won’t be able to decrypt them easily. You can also test restore. Checking that the backup files are correctly restoring your WordPress website gives you a peace of mind. If not, you may want to download the files and database again. Third thing you can do is make multiple copies of the backup file and store them at a remote server or another hard drive. This will provide you with additional options in case something goes wrong on your local drive.
Preparing for the Backup
Taking backup of WordPress website and files is a critical process. Therefore, you need to prepare before working on the backup.
A WordPress website has two components, namely, the Database and the Files. To backup your website, you need to create backup for both database and files. The files are located in the server of your hosting provider. To access them, you’d need either cPanel or FTP access. Database can only be accessed via phpMyAdmin.
Ensure that you have access to all of these things before moving ahead. If not, get the credentials.
Creating Backups Manually
Now let’s get started with creating backups of the WordPress site.
If you’re going to use the cPanel, then here are the steps to follow:
- Log in to your cPanel host account
- Open the product for which you want to create a backup
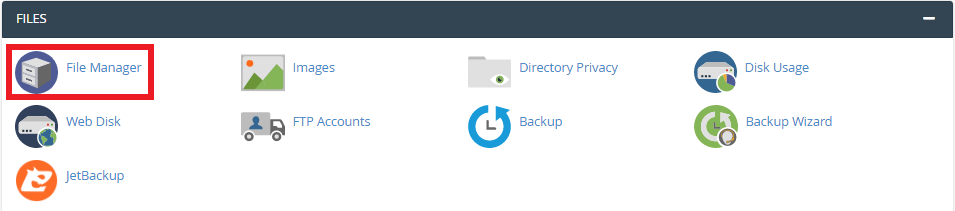
- Then locate and click on ‘File Manager’ under the Files section
- Inside File Manager, you’ll see a list of folders that are in hierarchy. Locate the folder ‘public_html’ and expand it by clicking on the ‘+’ symbol. In case you’re hosting multiple websites, you need to first open the domain folder for which you want to create a backup
- Within this folder, there should be three sub-folders named wp-admin, wp-content, and wp-includes along with other documents
- On the right-hand side panel, click on all the files including the sub-folders. But instead of direct download, it’s recommended that you compress the files into one ZIP file and then start the download process. So right-click on the public_html folder and click on ‘Compress’
- Download the compressed file once its ready
- Open the FTP client
- On the left-hand side panel, you’ll see an option called ‘local site’ and the right-hand side panel is the remote server
- At the top, you need to provide credentials like Host, Username, Password and connect to the server
- Once connection is established, the right-hand panel should load
- You need to find the public_html folder. Right-click on the folder and start downloading. You can also drag the folder to the left-hand side for automatic download
Downloading Database using phpMyAdmin
As already mentioned, you’d need to download the database too. This is done via phpMyAdmin. Here are the steps you need to follow:
- Log in to your hosting account
- Open your product, eg. thisdomain.com
- Then, open the cPanel Admin
- Scroll to the Databases section and click on phpMyAdmin.
- Inside phpMyAdmin, click on the Databases option from the top
- On the left-hand side panel, you’ll see a list of databases created for your website. Click on any database and its content will be displayed on the right-hand side. In case you don’t know which database is for your website, then look up for it in the wp_config.php file. It contains information about your website’s database
- Open the right database and select all the tables in it. If there’s no Select All option available, then select the top row and scroll all the way to the bottom. Click on Shift and the last row at the same time. It will select all the tables for you.
- Export all the tables
- For the format, it’s recommended to stay with SQL
That’s it. You have successfully downloaded both files and databases.
After that, there are a few things you can do. First is encrypt the backup files so that it stays secure. Even if hackers get hold of the files, they won’t be able to decrypt them easily. You can also test restore. Checking that the backup files are correctly restoring your WordPress website gives you a peace of mind. If not, you may want to download the files and database again. Third thing you can do is make multiple copies of the backup file and store them at a remote server or another hard drive. This will provide you with additional options in case something goes wrong on your local drive.