Plesk is one of the best hosting control panels you can use as your Web Host Manager. It has a friendly user-interface and comes with a wide set of features which makes the life easier of admins. And the best part is you can use it for both Windows and Unix-based servers. In this article, we guide you step-by-step on how you can upgrade Plesk on a Windows server.
Upgrading Plesk
There are two ways you can upgrade Plesk. One is by using the command line interface and the other is by using the Plesk interface.
It’s worth noting that when you’re upgrading Plesk, the Plesk itself will stay unavailable but the website will.
Upgrading Plesk via Plesk Interface
The easiest way to upgrade your Plesk is by using the Plesk Interface. Here are the steps involved in the upgrading process:
You can upgrade your Plesk via the Command Line Interface. Here are the steps involved in the process:
This would upgrade the Plesk to the latest available option. To upgrade to any other version, you should follow the steps mentioned below:
Now upgrade to the latest version of Plesk using this command -
There are a few errors you may run into when upgrading Plesk to Obsidian. Some of them are:
The reason for these errors is that Plesk Obsidian RTM is serviceable for the early adopter version. You can fix this error either via the CLI or Plesk Interface by upgrading to Obsidian.
Using Command-line Interface
To upgrade to Obsidian using the CLI tool, you need to use the following method:
If you see this error, then stop the installation process -
You can also use the Task Manager to terminate the installer process. Using the following steps for this purpose:
You also are required to terminate the Plesk Installer process for Plesk Obsidian. Follow the steps below:
Connect to the server using RDP
Use this command to stop the Plesk Installer Process -
Using the Interface
You can upgrade to Obsidian using the Plesk Interface. Use the following steps for this purpose:
Upgrading Plesk
There are two ways you can upgrade Plesk. One is by using the command line interface and the other is by using the Plesk interface.
It’s worth noting that when you’re upgrading Plesk, the Plesk itself will stay unavailable but the website will.
Upgrading Plesk via Plesk Interface
The easiest way to upgrade your Plesk is by using the Plesk Interface. Here are the steps involved in the upgrading process:
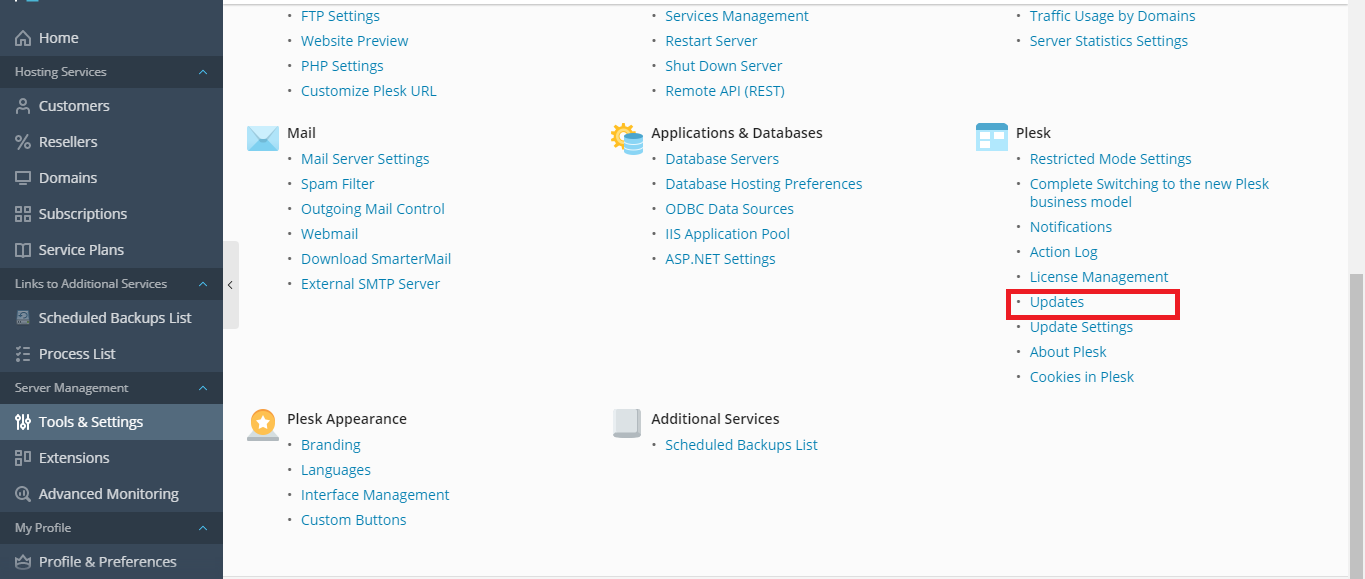
- Open the Plesk Interface and go to Tools & Settings >> Updates & Upgrades
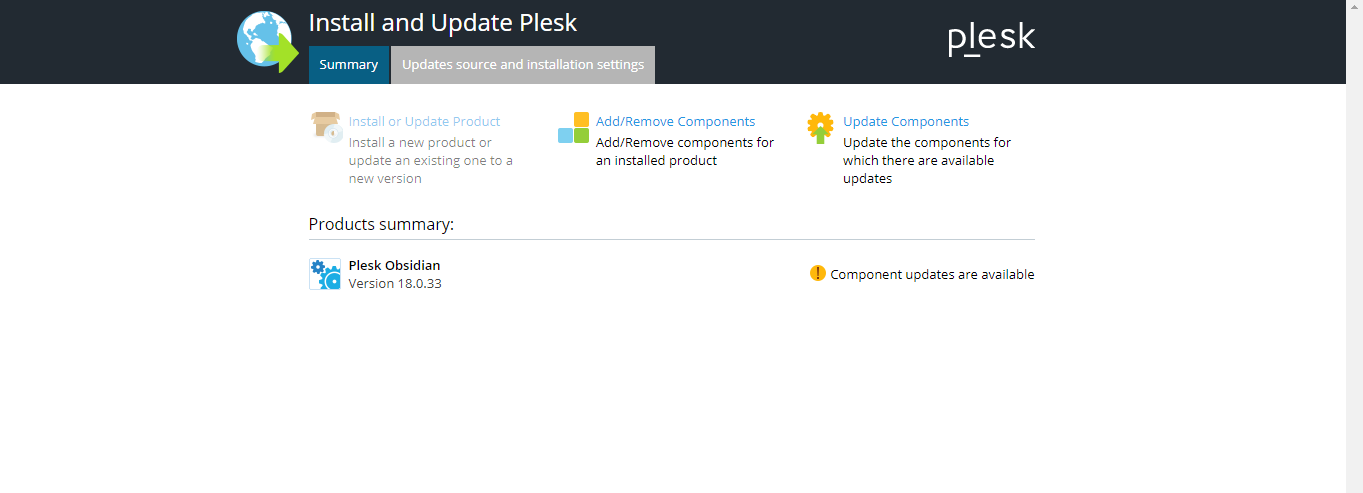
- Select the “Install or Upgrade Option” from the menu
- You’ll find a list of Plesk version available for install from the drop down menu. Click on “Continue” button
- Log in to the Plesk Administrator GUI
- Navigate to Tools & Settings >> Updates and Upgrade Settings
- Find the “Plesk Release Tiers” option
- From the available option, click on the “Early Adopter Release”
You can upgrade your Plesk via the Command Line Interface. Here are the steps involved in the process:
- Connect to your server via RDP
- Run this command to start the Plesk installer on your Windows server -
Code:
>"%plesk_bin%"\ai.exe --console- Log in to the Plesk remote server using RDP
- Using this link to download Plesk installer-
Code:
https://installer-win.plesk.com/plesk-installer.exe- Using the command prompt, change the directory to the directory in which the installer binary got saved
- Use this command to launch Plesk console -
Code:
> plesk-installer.exe --console
Code:
> plesk-installer.exe --console --tier testing- You should take the time to read the text below the “IMPORTANT” heading
- Once you’re done, press N and then the “Enter” key
- Set the additional settings and then press N followed by Enter key
- In the next step, you’d be asked to select the version you want to upgrade to. Type N to confirm and Enter to proceed
- Confirm by typing “Y” and press Enter
- To start the process, type “F” and press the Enter key
There are a few errors you may run into when upgrading Plesk to Obsidian. Some of them are:
- In the “Update and Upgrades” step, you may notice the Plesk Obsidian RTM not available for upgrade
- The release version is already selected. To confirm this, you can run this command -
Code:
# plesk bin server_pref -s | grep -i release-tierUsing Command-line Interface
To upgrade to Obsidian using the CLI tool, you need to use the following method:
- Connect to your remote server using RDP
- Use this command to start Plesk installer -
Code:
> plesk installer
Code:
BUSY: Another update process locked update operation- In the Plesk Installer, initiate the upgrade process by selecting Plesk Obsidian 18.0.20
- Connect to the server using RDP
- Using this command to find the PID of the Plesk installation process:
Code:
> wmic process where “caption like ‘%installer%’” get processId,caption
Caption ProcessId
parallels_installer_Microsoft_10.0_x86_64_3.23.12.exe 6434
Caption ProcessId
ai.exe 6434- Kill the process using this command -
Code:
> taskkill /PID 6434 /F- You’d also need to kill the ai.exe using this command -
Code:
> taskkill /FI “IMAGENAME eq ai.exe” /F- Open Task Manager
- Find the Plesk Installer Process which can have a variety of names like ai.exe, parallels-installer.exe, plesk-installer.exe, among others
- Right-click on it and select “End Task”
You also are required to terminate the Plesk Installer process for Plesk Obsidian. Follow the steps below:
Connect to the server using RDP
Use this command to stop the Plesk Installer Process -
Code:
> plesk installer stopYou can upgrade to Obsidian using the Plesk Interface. Use the following steps for this purpose:
- Log in to your Plesk Interface
- Navigate to Tools & Settings >> Update and Upgrade Settings
- Select the “Early adopter release” option
- Now, connect to the server using RDP
- Use this command to run Plesk Daily task -
Code:
> plesk daily- Stop the existing installer process if you encounter this error -
Code:
ERROR: Update operation was locked by another update process (Plesk installer or pum)- Now, log in to the interface as an admin
- Navigate to “Tools & Settings” page
- Select the “Update and Upgrades” option and then the “Install or Upgrade Product”
- From the available option, select Plesk Obsidian 18.0.20 and hit “Continue”