Many developers opt to develop a WordPress website locally on a PC or Mac to speed up the development process. Once the changes are made, you must move it to the live site. That’s when some developers, especially those new to website development, look for help. In this article, learn the steps involved in moving a WP website from local web server to a live site.
Before you begin, make sure you have the following:
Fully accessible website developed in WordPress on your local server
Web hosting storage and a domain name
FTP software to upload all the files to the live site
Step-by-Step Process
Here are the steps you need to take for moving the website to a live site:
Export local WordPress database
The first thing to do is export the local WP database. For this purpose, you can use phpMyAdmin.
From your computer browser, visit ‘http://localhost/phpmyadmin/’. Then, look for the options regarding WordPress database. At the top of the menu bar, you’d have an ‘Export’ button. Click on it.
Clicking on Export button will present you with two options: Quick and Custom. The former is fast and simple, while the latter option requires customization (you’ll have to manually set some parameters). For now, it’s recommended that you go with Quick export. Select Quick and then Go.
Upload WordPress to Live Site
The next step is to start uploading the files. For this, you’d need an FTP software. Open the software and connect to your web hosting account. Once you’re connected to the live site, start uploading the files and folders. Make sure to upload them to the right directory.
Create MySQL database of the live site
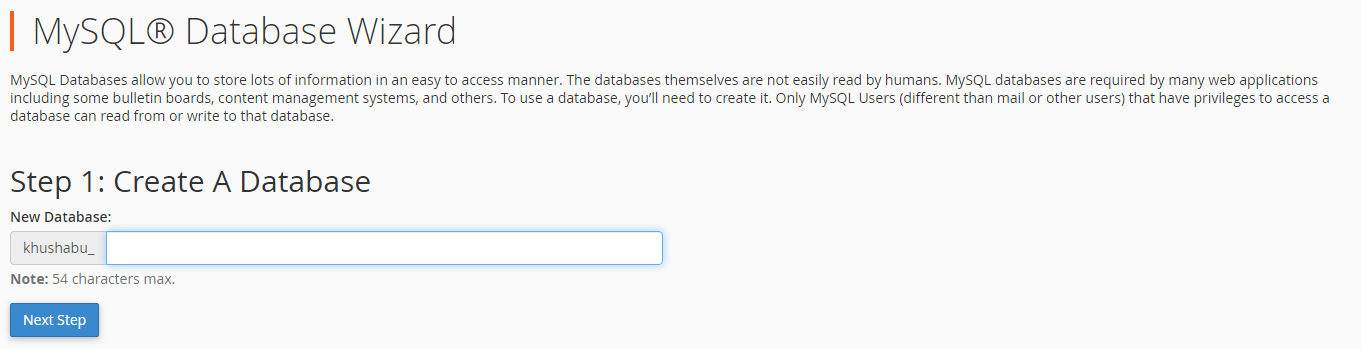
While the uploading process takes place in the background, you can begin the process of creating the database of the live site. cPanel is all you need to create. So log in to your cPanel dashboard and then navigate into MySQL Database Wizard, which is found under the database section. This will open up a new screen where you’d have to input the database name and add database users. When adding users, provide the password for those users. Click on ‘Create User’ to add that user to the database. In the next page, set MySQL privileges for those users and click on the button that says ‘Make Changes’.
Import WordPress database on your live site
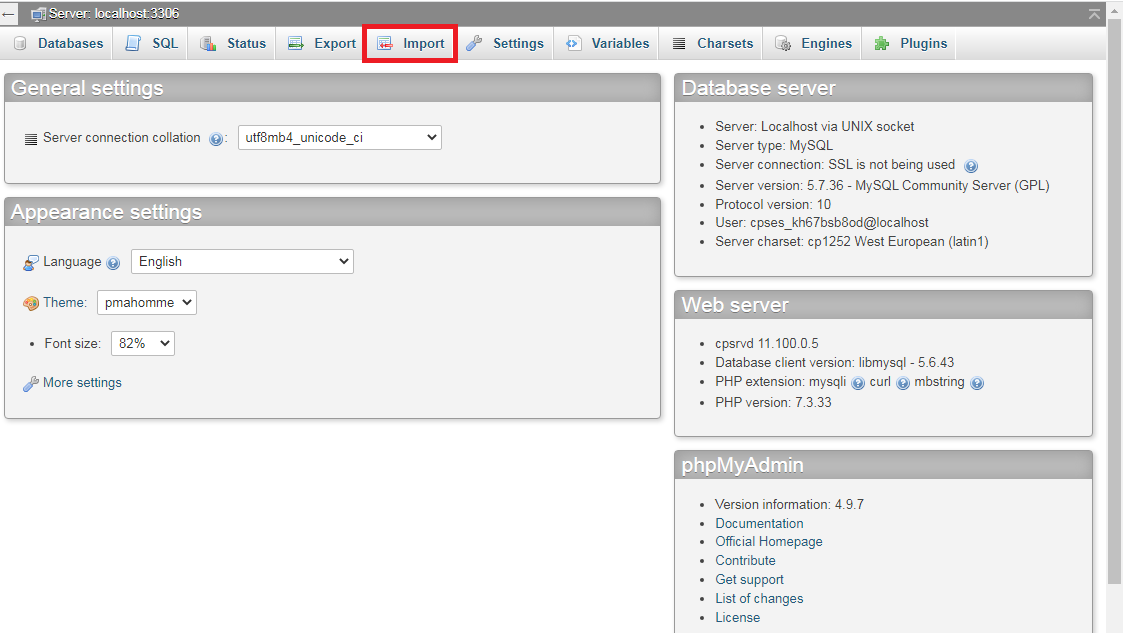
Now, navigate back to the cPanel dashboard and click on phpMyAdmin from the database section. Open the database that you just created. Here, you’d have to import the file that you exported in the first step. So click on the ‘Import’ button and then on ‘Choose File’. Then select that file and click on ‘Go’ to upload.
Change URL of your Website
Next step is to change the site URL of your database. That’s needed if you want to connect to your live site. In the previous step where you created database tables by importing the file, the table that was created was wp_options. Find this table in phpMyAdmin. If you’ve changed the prefix of your database, then instead of wp_options, you will find [prefix]_options.
Now, you need to click either on the link on the sidebar or browser button that’s beside the table.
Now, under the options_name field, find the site URL. Now, click on the ‘Edit’ option and then look for ‘option_value’ column. This will display the URL of your local install. Replace this URL with the new URL and click on Go.
Next, repeat the steps for option_name:home. At times, the wp_options page is unusually long. In such cases, find the home tab. To navigate between the pages, use pagination arrows.
Setting up live site
If you visit your website, you’ll see the ‘Error Establishing Database Connection’ error. To fix this, you need to set up the live website. You have to use FTP for this and edit the wp-config.php file. Open the file and provide the name, username, and password that you created in the third step. Once you upload this file back, your website will be live.
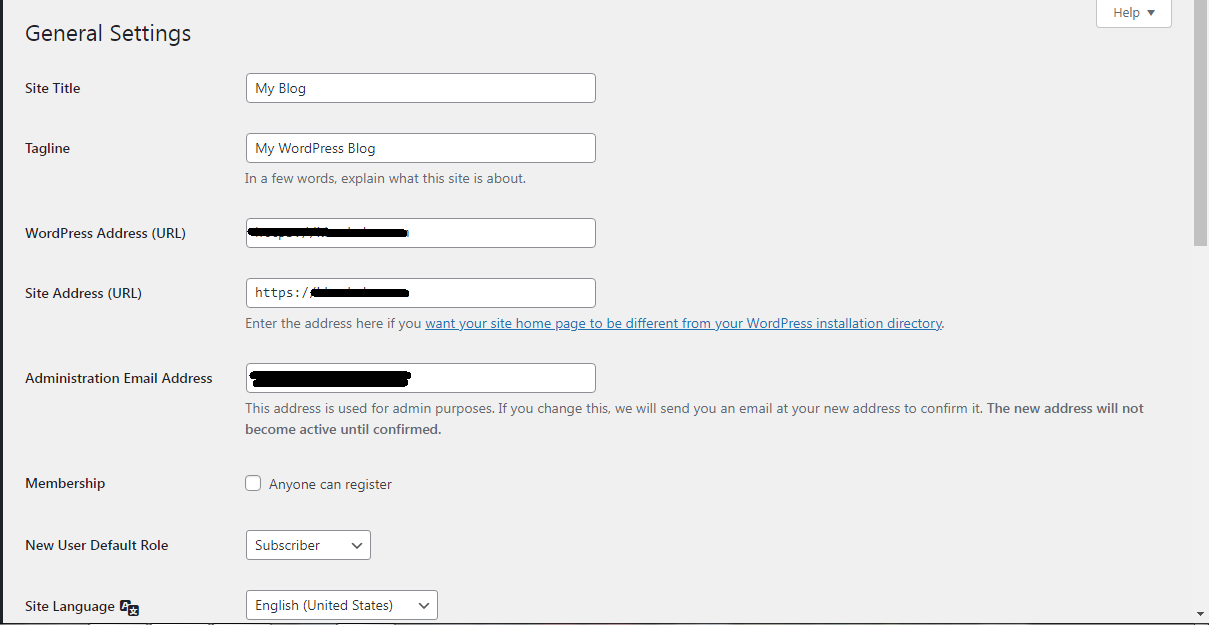
Once you have made your site live, you should check that your site URL is correct everywhere. So log in to your WordPress admin panel and navigate to Settings >>General. Check that the site URL is what it should be and click on ‘Save Changes’.
You should also fix the images and broken links. You can use SQL query to fix these issues. Here’s the SQL query you need to use -
Next, go to phpMyAdmin and click on database and then on SQL (it should be at the top menu). If required, you need to change URL of local site and live site by writing the above query there.
Other way to fixing broken links and images is to use a plugin like Velvet Blues WordPress plug. Follow the instructions to fix the error.
So that’s how you move a WordPress site from local server to live site. For further assistance, get in touch with hosting provider.
Before you begin, make sure you have the following:
Fully accessible website developed in WordPress on your local server
Web hosting storage and a domain name
FTP software to upload all the files to the live site
Step-by-Step Process
Here are the steps you need to take for moving the website to a live site:
Export local WordPress database
The first thing to do is export the local WP database. For this purpose, you can use phpMyAdmin.
From your computer browser, visit ‘http://localhost/phpmyadmin/’. Then, look for the options regarding WordPress database. At the top of the menu bar, you’d have an ‘Export’ button. Click on it.
Clicking on Export button will present you with two options: Quick and Custom. The former is fast and simple, while the latter option requires customization (you’ll have to manually set some parameters). For now, it’s recommended that you go with Quick export. Select Quick and then Go.
Upload WordPress to Live Site
The next step is to start uploading the files. For this, you’d need an FTP software. Open the software and connect to your web hosting account. Once you’re connected to the live site, start uploading the files and folders. Make sure to upload them to the right directory.
Create MySQL database of the live site
While the uploading process takes place in the background, you can begin the process of creating the database of the live site. cPanel is all you need to create. So log in to your cPanel dashboard and then navigate into MySQL Database Wizard, which is found under the database section. This will open up a new screen where you’d have to input the database name and add database users. When adding users, provide the password for those users. Click on ‘Create User’ to add that user to the database. In the next page, set MySQL privileges for those users and click on the button that says ‘Make Changes’.
Import WordPress database on your live site
Now, navigate back to the cPanel dashboard and click on phpMyAdmin from the database section. Open the database that you just created. Here, you’d have to import the file that you exported in the first step. So click on the ‘Import’ button and then on ‘Choose File’. Then select that file and click on ‘Go’ to upload.
Change URL of your Website
Next step is to change the site URL of your database. That’s needed if you want to connect to your live site. In the previous step where you created database tables by importing the file, the table that was created was wp_options. Find this table in phpMyAdmin. If you’ve changed the prefix of your database, then instead of wp_options, you will find [prefix]_options.
Now, you need to click either on the link on the sidebar or browser button that’s beside the table.
Now, under the options_name field, find the site URL. Now, click on the ‘Edit’ option and then look for ‘option_value’ column. This will display the URL of your local install. Replace this URL with the new URL and click on Go.
Next, repeat the steps for option_name:home. At times, the wp_options page is unusually long. In such cases, find the home tab. To navigate between the pages, use pagination arrows.
Setting up live site
If you visit your website, you’ll see the ‘Error Establishing Database Connection’ error. To fix this, you need to set up the live website. You have to use FTP for this and edit the wp-config.php file. Open the file and provide the name, username, and password that you created in the third step. Once you upload this file back, your website will be live.
Once you have made your site live, you should check that your site URL is correct everywhere. So log in to your WordPress admin panel and navigate to Settings >>General. Check that the site URL is what it should be and click on ‘Save Changes’.
You should also fix the images and broken links. You can use SQL query to fix these issues. Here’s the SQL query you need to use -
Code:
UPDATE wp_posts SET post_content = REPLACE(post_content, 'localhost/test/','www.yourlivesitelink.com/');Other way to fixing broken links and images is to use a plugin like Velvet Blues WordPress plug. Follow the instructions to fix the error.
So that’s how you move a WordPress site from local server to live site. For further assistance, get in touch with hosting provider.